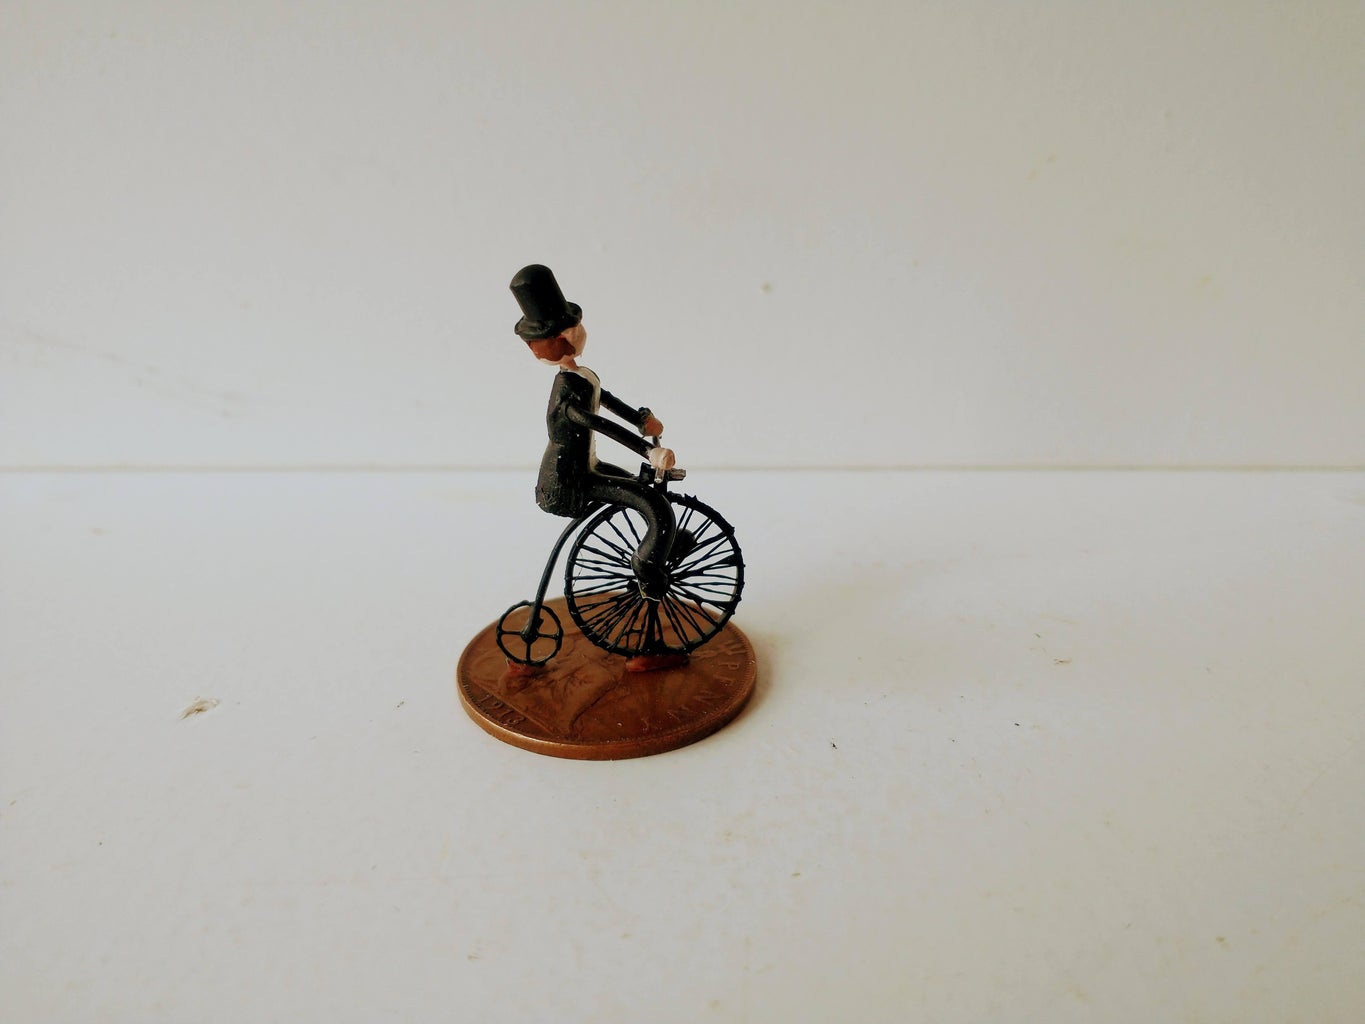
Introduction: Tiny Penny Farthing Bicycle Made From Pocket Watch Gears - Small Enough to Put on an Old Penny


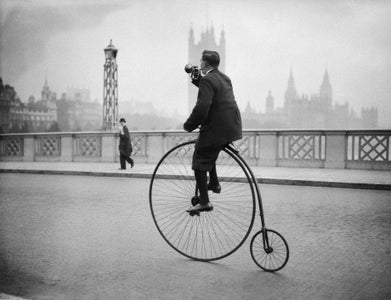


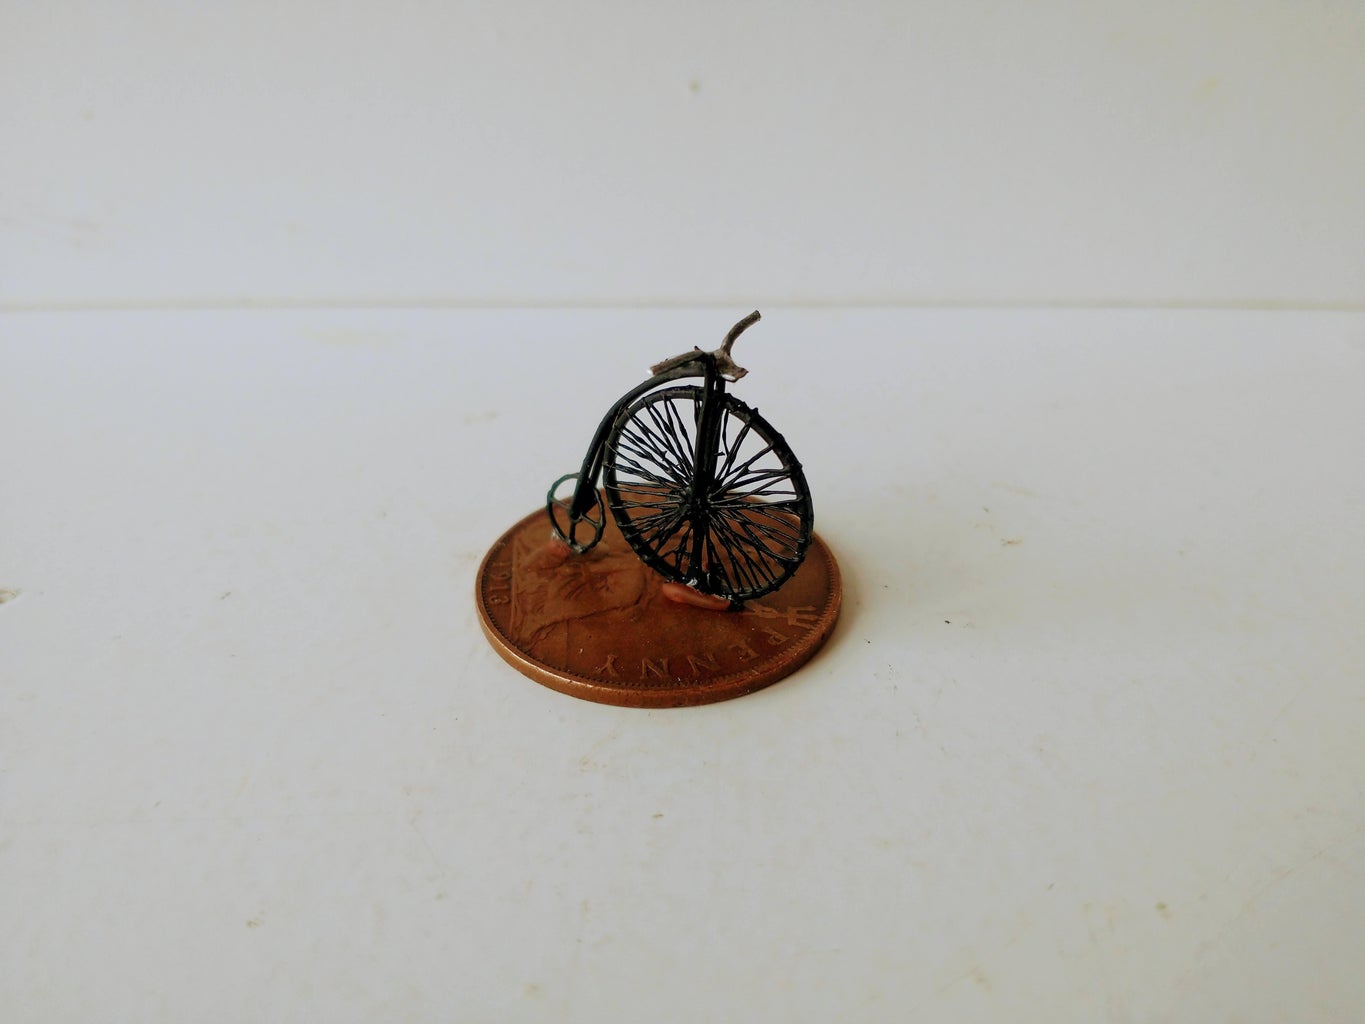
A Penny Farthing, also known as a high wheel, is an early type of bicycle that was popular in the 1870s and 1880s. It is known for its large front wheel providing high speeds and comfort.
Something so large I decided was a good candidate to scale down and sit on an Old English Penny.
No 3D printers involved here! Just good old fashioned fiddly work using tools that most users of Instructables will have and made from materials that are very easy to get hold of. Much more satisfying!
Supplies
For this project you will need
Materials
For The Penny Farthing
1 x Old Penny
1 x Pocket Watch Balance Wheel (approx 17.57 in diameter)
1 x Pocket Watch Ratchet Gear
1 x Reel Of Fine Metallic Polyester Thread
10cm length of 0.5mm thick Jewellers Wire
Spray Can of Etch Primer paint
Spray can of Matt Black paint
For The Gentlemen (Optional)
1 x Chopstick
20cm length of 2.5mm Electrical Wire (solid core - not stranded)
1 x 5mm Wooden Bead
Short Length Of Earthing Sleeve Insulation (2cm should be more than enough)
Modelling Acrylic Paint - I used Citadel paints
Tools
Dremel with flexishaft
1mm, 1.4mm drill bits
Wire Snips
Wire Striper (although you could use a Stanley knife instead)
Soldering Iron and Solder
Heatsinks for soldering
Miniature pair of snub nose pliers (2 would be preferable)
Superglue
Hot Glue Gun
Nail Fire
Jewellers Vice
Nail Scissors
Pin Hammer
Hand Held Guillotine or Gents Saw
Step 1: Gathering Materials


I unfortunately like to hoard a lot of pocket watch components. After digging around in stash I found the right pieces I needed for this project.
For this project you need a Balance Wheel which can be found in most pocket watches and a Ratchet Gear. If you don't have these to hand already you can find both of these in an old pocket watch. Broken ones are very easy to come by and cheap if not free in some cases. Also taking them apart is great fun!
The Balance wheel must have weights that can be unscrewed for this project otherwise you won't be able to create the spokes for the main wheel as effectively.
The diamter of the Balence Wheel I used was approx 17.57 in diameter and the Ratchet Gear was 6.9mm in diameter approximately
Step 2: Stripping the Balance Wheel for the Main Wheel
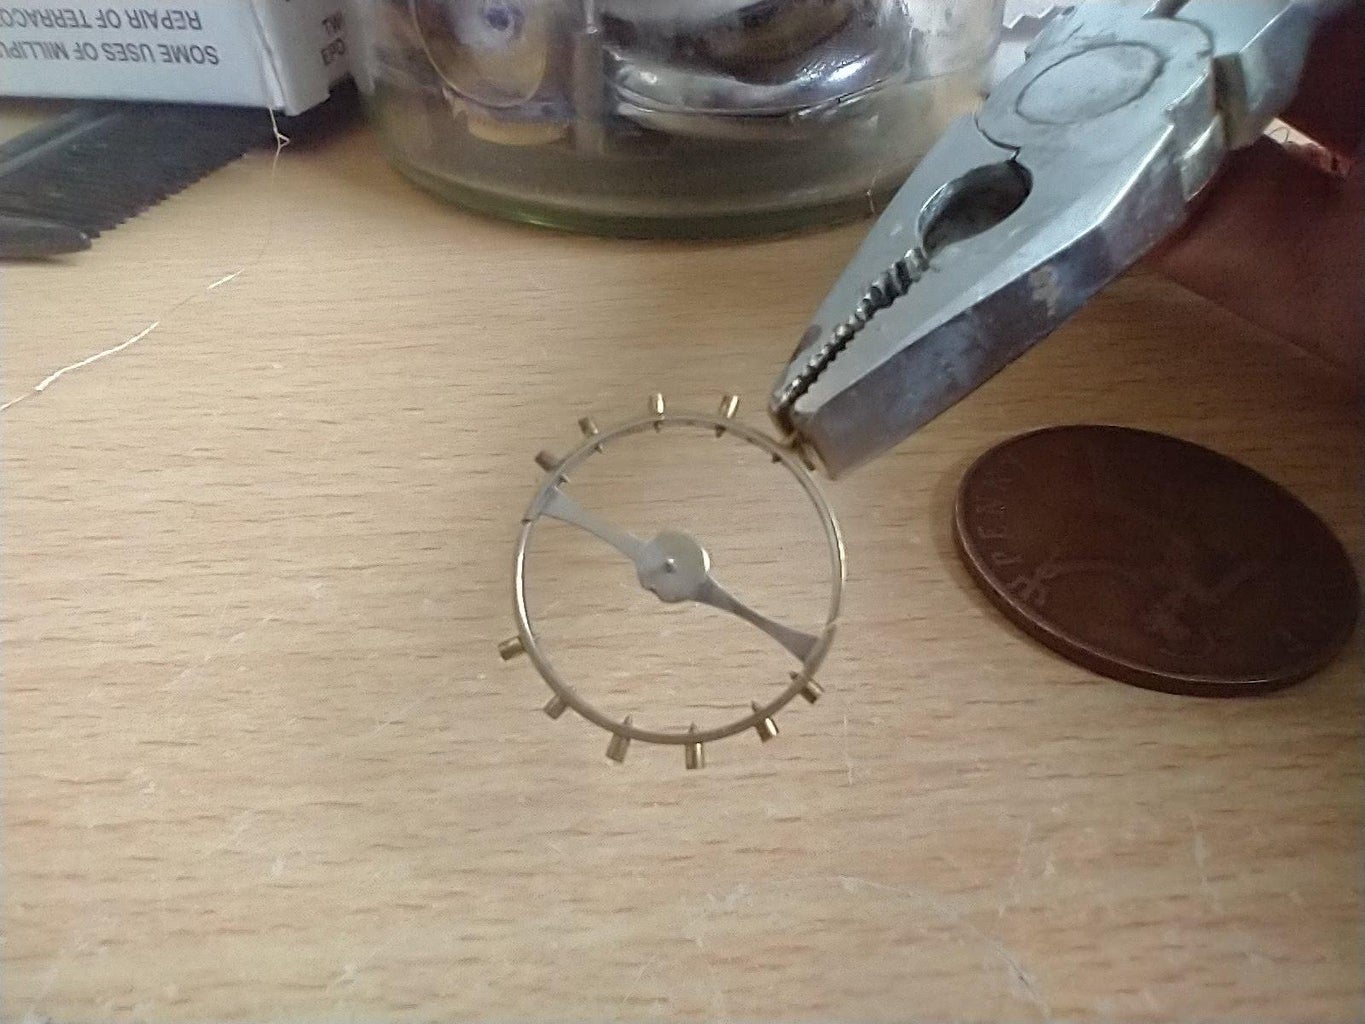


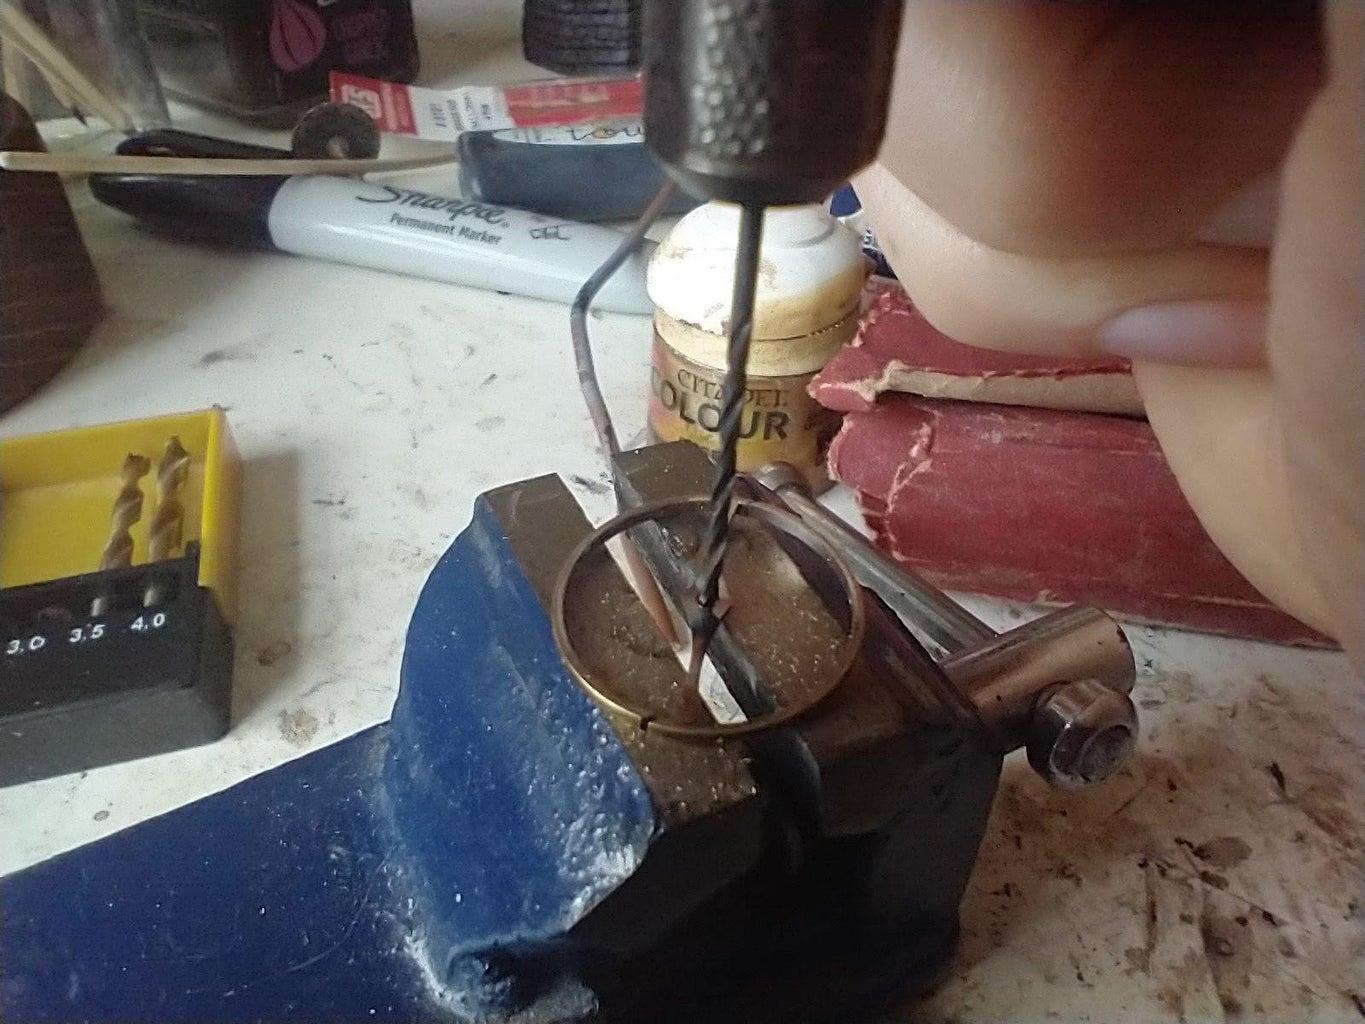
The main wheel is the most time delicate part of this project I found.
- Take your balance wheel and unscrew all of the weights which are screwed into it. You won't be needing the weights so these can either be discarded or kept in a very safe place (which is what I did).
- Now using your wire snips start to dissemble the axle at the centre of the wheel. Our aim is to reveal the through hole which the axle is mounted to. I used my wire snips to remove the over fixings and then a small pin hammer to knock through the main axle out of the hole. Position the axle over a void such as between slightly opened jaws of a jewellers vice, which is what I used.
- Now that the hole in the centre of the wheel is revealed you can now expand it slightly. Using a 1mm drill bit in your Dremel, expand the hole. I held the wheel in my jewellers vice again to save my fingers!
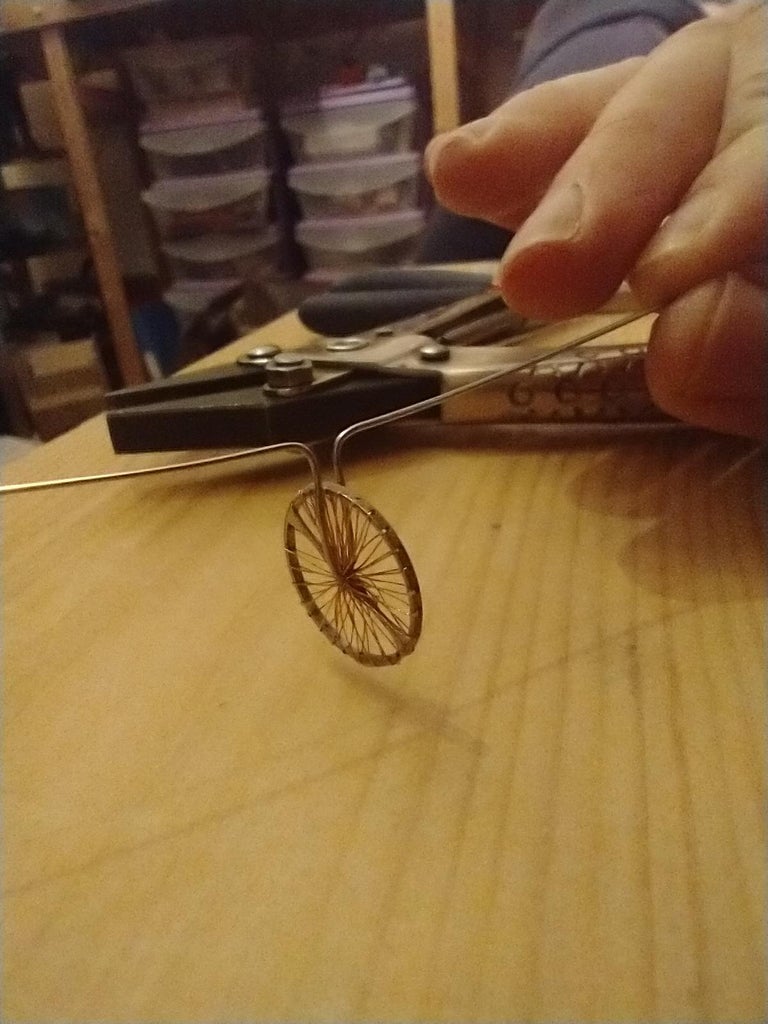
Step 3: Making the Spokes for the Main Wheel


Now the really fiddly part! You should be able to see on the outer rim of the balance wheel a series of holes where the balance weights were once screwed into. I found working with shorter length of thread better to reduce risk of knotting, but in return you will have a few knots on show
- Take your fine metallic thread and thread into one of these holes (it doesn't really matter which one but I like to start from the edge). Now thread the hole into the 1mm hole at the centre of the balance wheel that we drilled out in the previous step.
- Tie the two together to join the thread and fix the thread in its final position. A tiny blob of superglue I found quite helpful on both the knot and the rim of the wheel
- Now thread the thread into the next hole next it and then back through the centre hole.
- Keep doing this until you have run out of holes in the rim on one side. At this point you will then need just wrap around the rim instead of going through a hole and glue each thread in place. The balance wheel I used only needed a couple of these, but yours may be different.
- If you have run out of thread by this point repeat steps 1 to 4 again until you have a completed wheel
- At the very end glue your thread to the rim of the wheel and leave to dry with the thread taught, I found it's own weight was enough to do this.
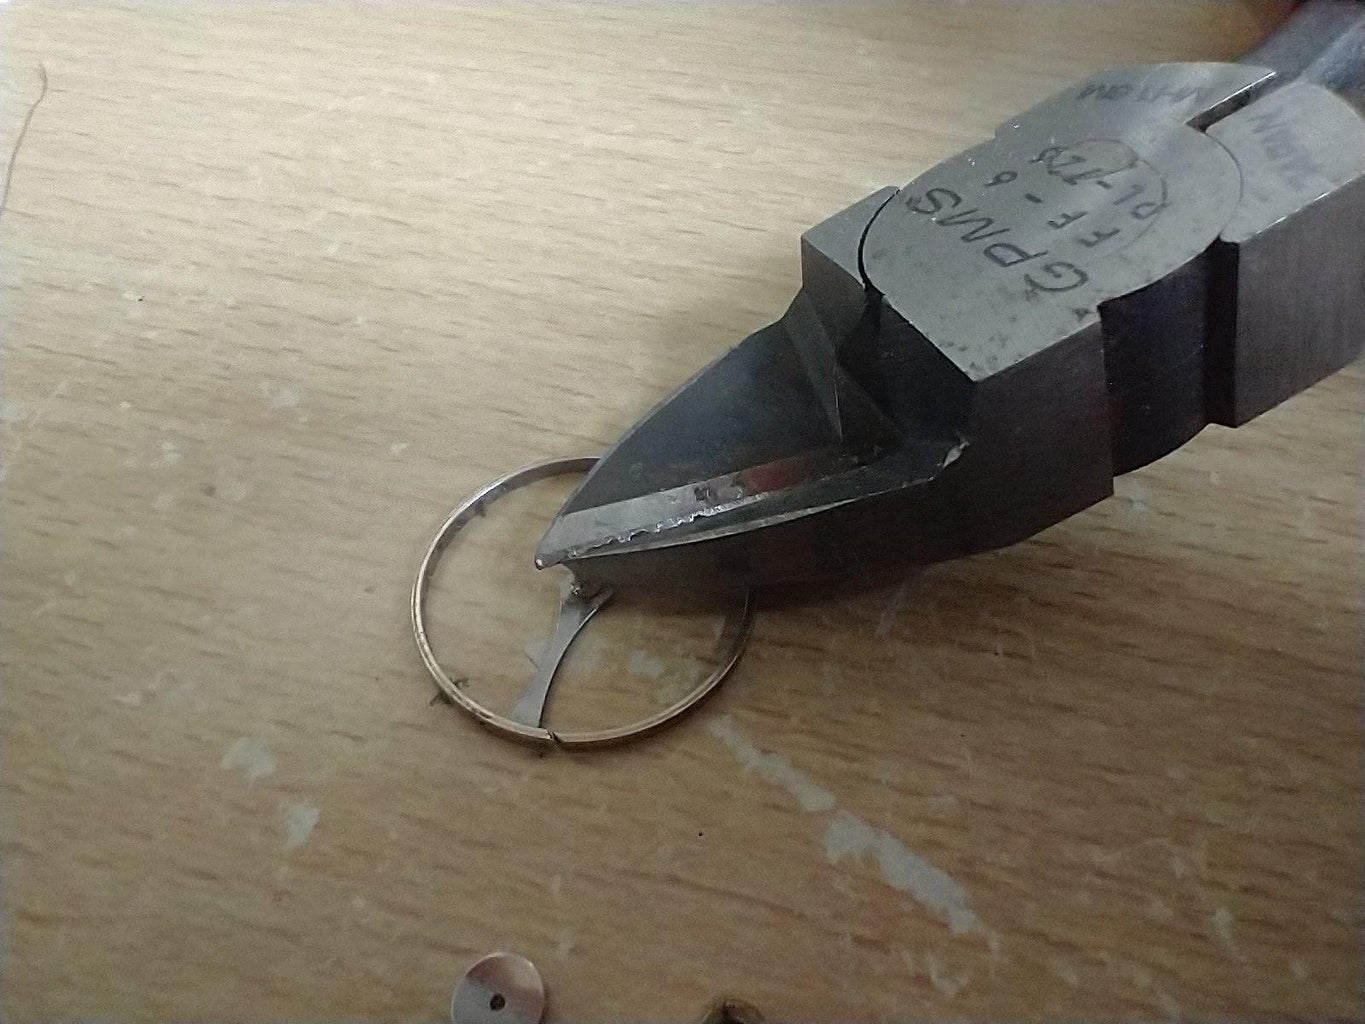
Step 4: Making the Back Wheel Out of the Ratchet Gear


Things should be a little less fiddly now I promise!
- Take your ratchet gear (mine was 6.9mm in diameter) and like the balance wheel, remove the axle and fixings in the centre using wire snips and a pin hammer.
- Now drill a 1mm hole into the exposed centre hole to expand it slightly. Again I held the gear in my vice to protect my fingers
- Now remove the teeth from the gear itself. I used wire snips to begin with to take the edges off and then used a nail file to remove the rest of the bumps
Step 5: Making the Bicycle Frame Part 1


The bike frame is made in two parts.
- Take your 7cm 1mm jewellery wire and thread through the main wheel. Now bend the wires together so the hug the wheel quite closely. The wire needs to be straight.
- At the top of the wheel bend the two wires away from each other at 90 degrees. This will become the handle bars. Trim the two wires to make slightly but not by much at this point.
- Repeat for the back wheel but using a 10cm length of the same wire
- Now bend the wire of the back wheel into an arc using something that closely matches the diameter of the main wheel but not exactly the same, it must be very slightly larger. Or you could just use your hands and wing it as the wire is very soft.
Step 6: Making the Bicycle Frame Part 2

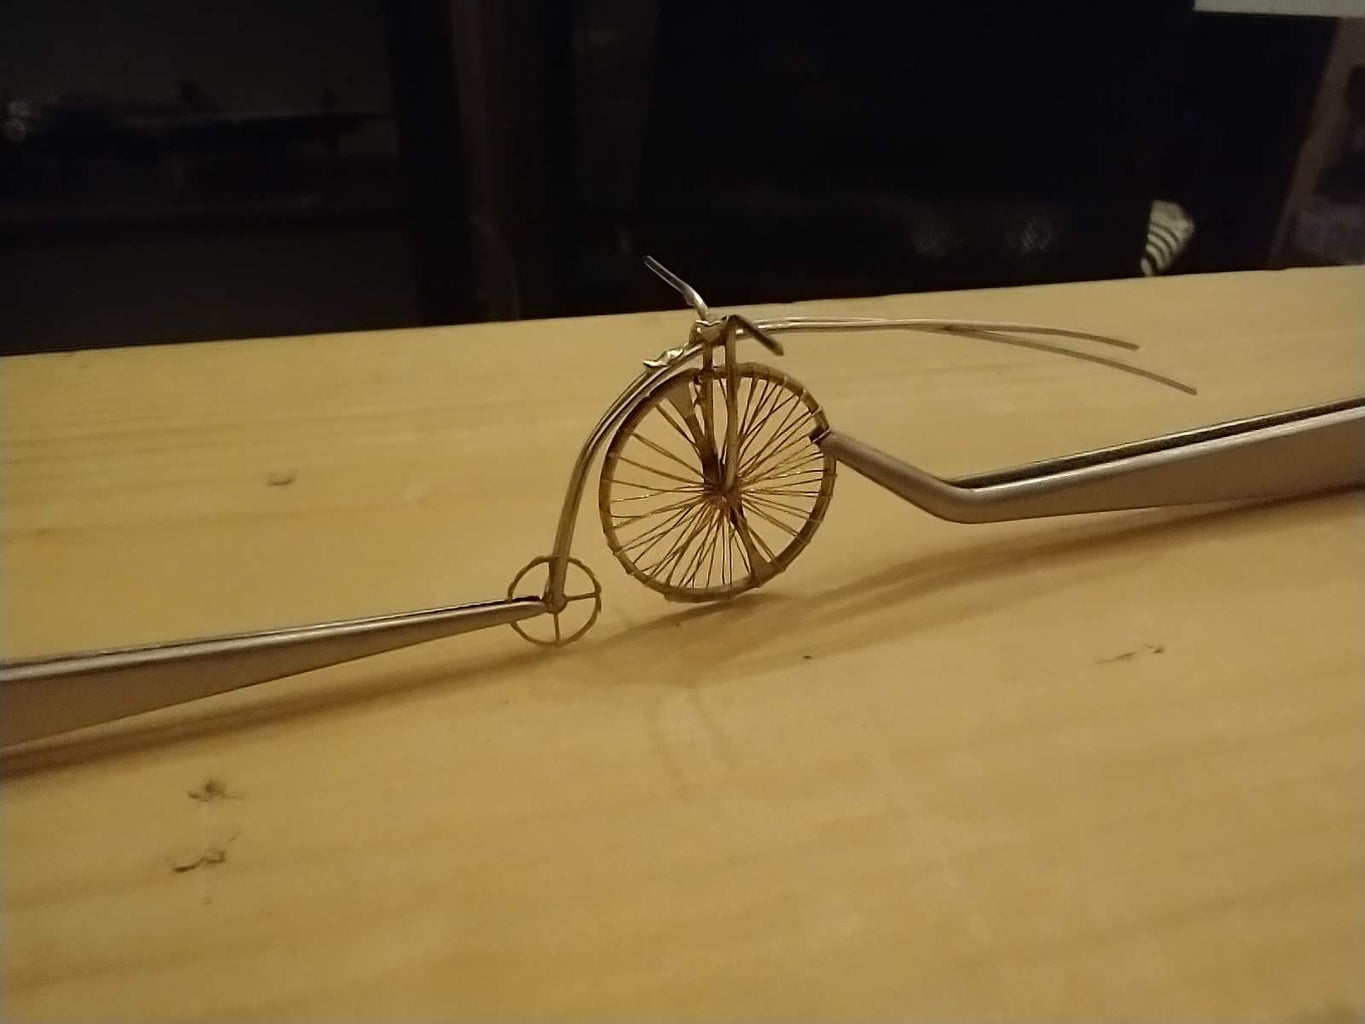

Now to join the two wheels together in holy matrimony
- Using heat sinks or a soldering helping hand, position the frame of the back wheel between the handle bars at the top of the main wheel. Leave lots of overhang for now!
- Now solder the wires together
- Once cooled the excess wire between the handlebars can be trimmed to length.
The handlebars could also be trimmed to length at this point but if you wish to make the rider further down this page then I would recommend leaving this step out for now.
Step 7: Paint

Now using Etch Primer, spray the bicycle and leave to dry. Then spray using a Matt Black paint making sure you reach into all the spokes we made with the thread.
At this point I mounted my Penny Farthing to it's base using a blob of hot glue and then a a coat of superglue after this had cooled. Once dried, I then painted the glue with a matching brown paint to conceal it as best as I could.
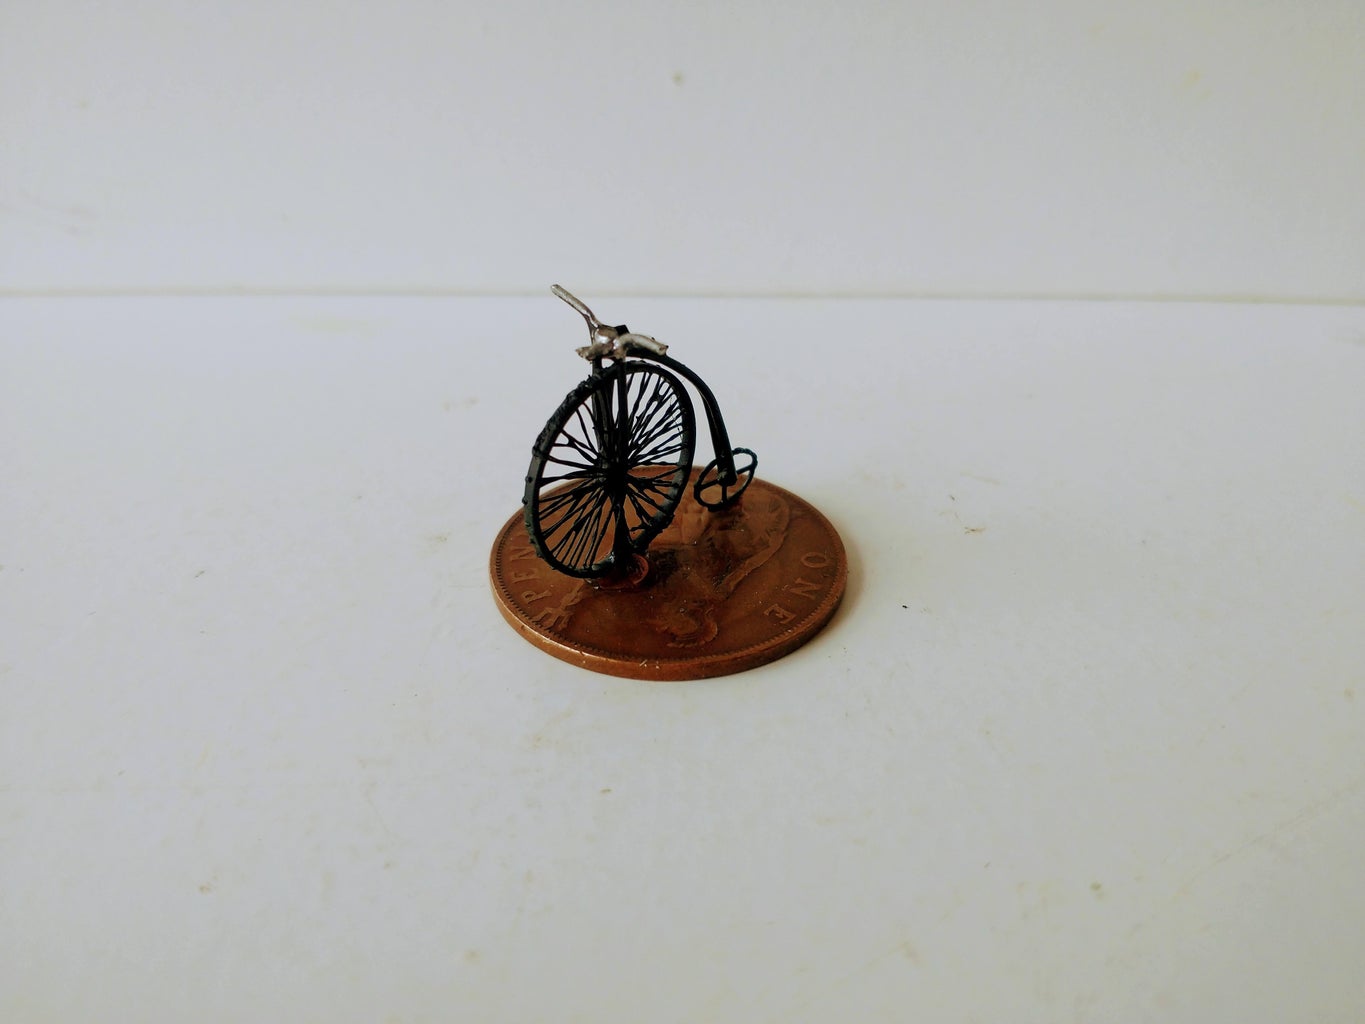
You have now made your own tiny Penny Farthing!
If however you would like to make the rider then please read on....
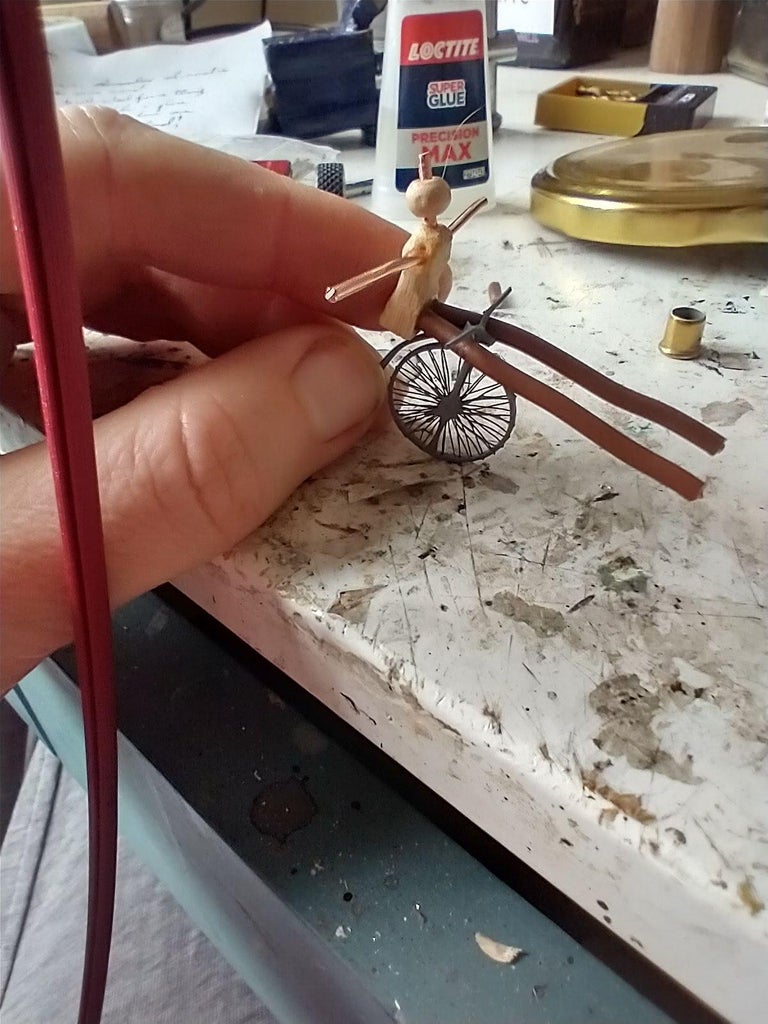
Step 8: Making the Rider Part 1 - the Torso


Now we need to figure out the size of the rider and his positioning on the bike. I found the best way to figure all this out was to lay the bike flat and then draw a rough outline of the Penny Farthing side on.
- Draw out a figure and the stance you want your figure to have.
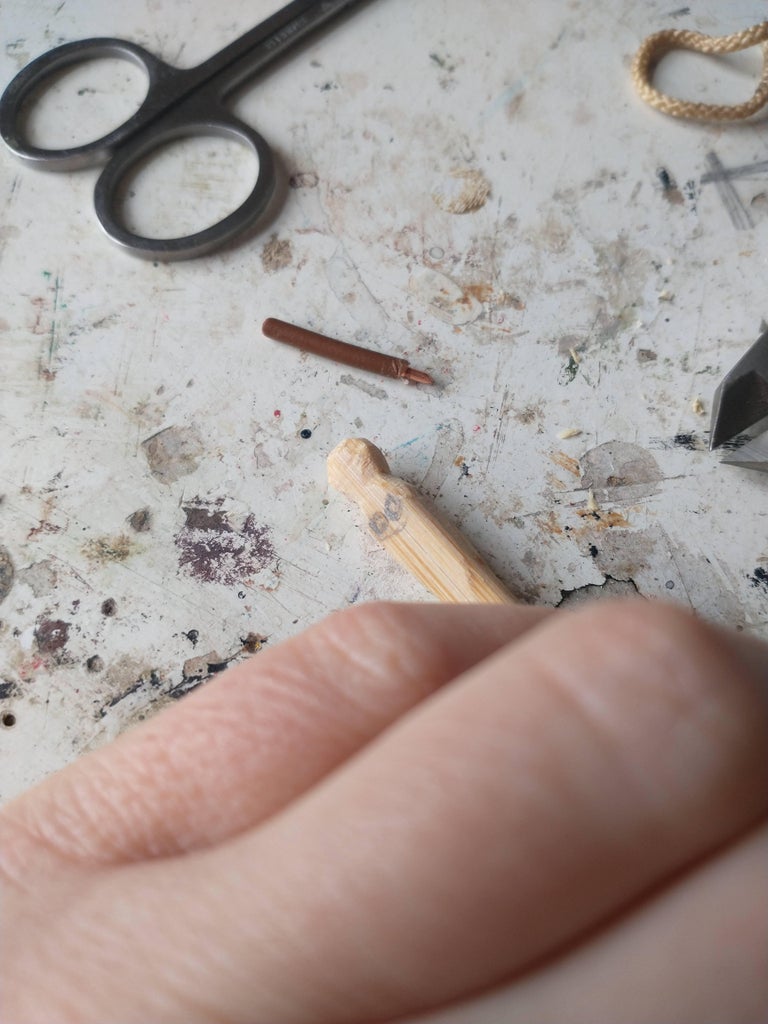
- Next take your chopstick and using the flat end (not the end you eat with) mark the length of the torso onto the wood.
- Mark 5 holes, 2 for the legs, 2 for the arms and one for the neck/head. I found with the stance I wanted of my figure riding the bicycle, it was best to have his legs protruding from the front of his body (see photo) I also drilled the neck hole at a slight angle so his neck would be upright while the rest of his body would be at an angle.
- Using a Stanley Knife, carve a rough hourglass shape and slope the shoulders down slightly. Make sure you leave space around each hole we have marked or these will blow out when we come to drill them out.
- Next use your nail file to round over the corners slightly of the torso, particularly around the shoulder, waist and rear areas. Don't go too mad though at this stage as we can always come back and refine the torso at a later stage.
- Now using a 1.4mm drill bit we can drill out the holes we marked in Step 3, don't go too deeply though. Just a 2-3mm would be ideal. You may find your neck and arm holes may meet, but this is OK as long as you have enough wood around them so they don't blow out.
- Now using a Hand Held Guillotine or a Gents Saw, cut the torso to length. Remember again to leave space between the leg holes and where you cut, otherwise the holes you have just drilled will blow out.
Step 9: Making the Rider Part 2 - the Limbs


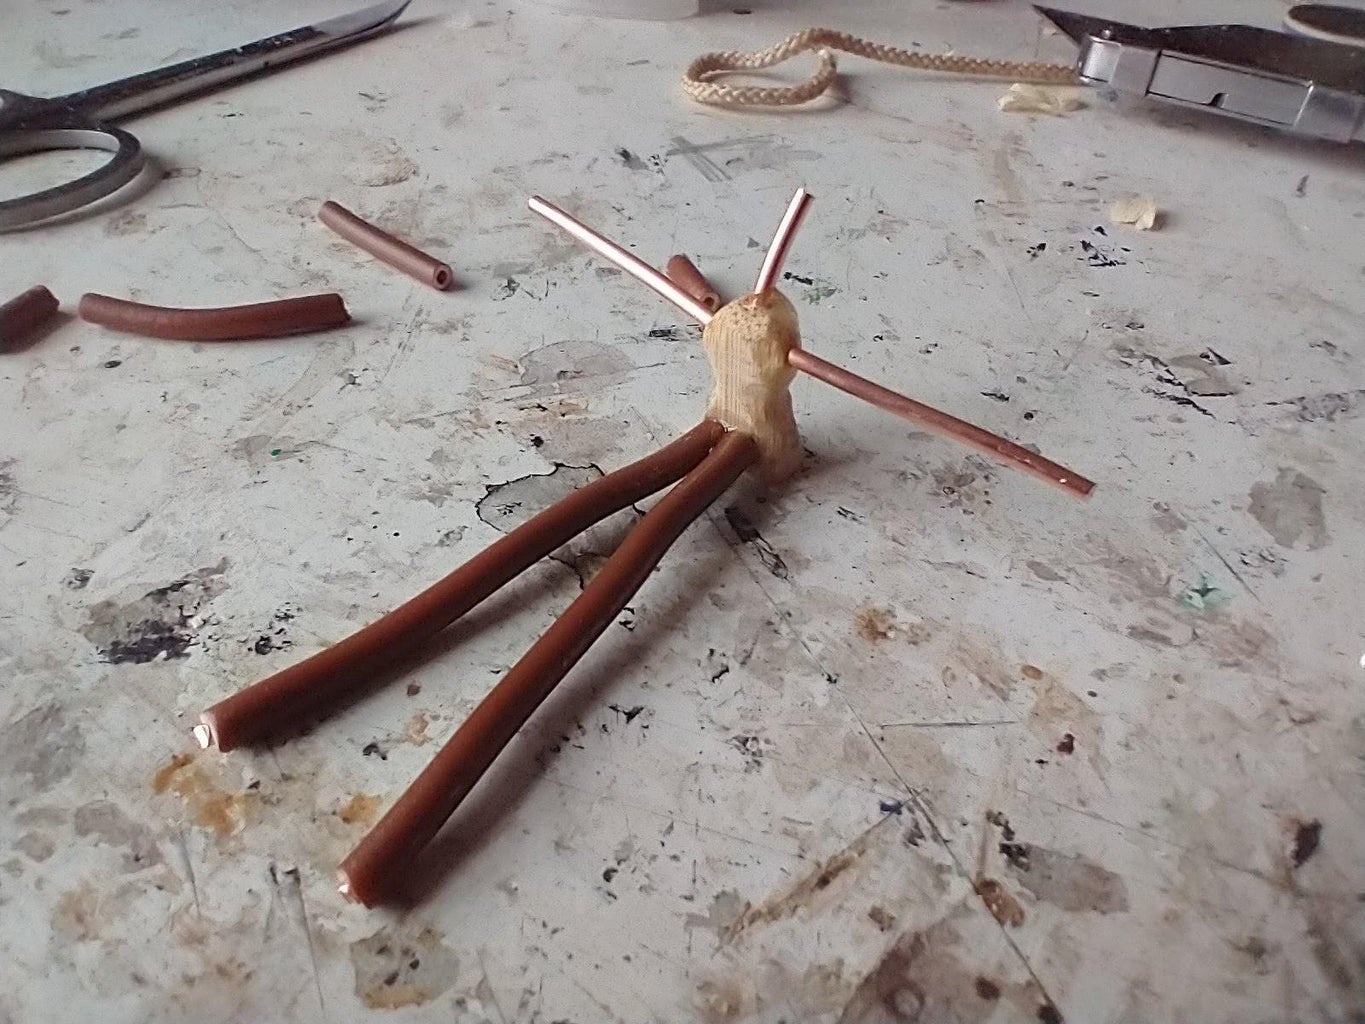
Now, believe it or not, the limbs are actually made out of one length of wire. I used a 20cm length 2.6mm insulated piece of electrical wire, but you could possibly get away with something a little bigger or smaller but regaurdless of the size it must be solid core and have it's plastic insulation still in place.
- First take a 10cm length wire and stripper the ends off, using either a knife or a wire stripper. We want to remove only 5mm either end.
- Now cut this wire in half
- Now insert the stripped ends of the wire into the two leg holes we drilled out. You may need to trim the stripped ends down slightly so the wire sits snugly in the hole, but what we are aiming for is to have the bare wire completely hidden in the hole and the insulation meeting the wood. A bit like a mortise and tenon joint.
- Once these fit nicely, remove the two pieces of wire and apply a blob of glue to the two holes and then reinsert the two pieces of wire. Leave to dry.
- While the legs are drying, we can get on with the arms and neck. For this we need to completely strip the rest of the wire we haven't used on the legs.
- Now cut this into 3 equal 4cm lengths (the ones in the photo I believe are 3-4cm in length but yours will probably be longer).
- Apply a blob of superglue to each arm hole and then insert a piece of wire into either side.
- Repeat again for the neck hole and allow to dry.
Step 10: Making the Rider Part 3 - the Head


Once all the joints are dry (which should only be a few minutes) we can fit the head. I used a 5mm wooden bead and slipped this onto the neck, leaving a slight gap (maybe 1-2mm) from the figure's shoulders. I then applied another blob of superglue and left this to dry for a little longer than the joints, 15-30 minutes is ideal.
Step 11: Making the Rider Part 4 - Positioning the Limbs
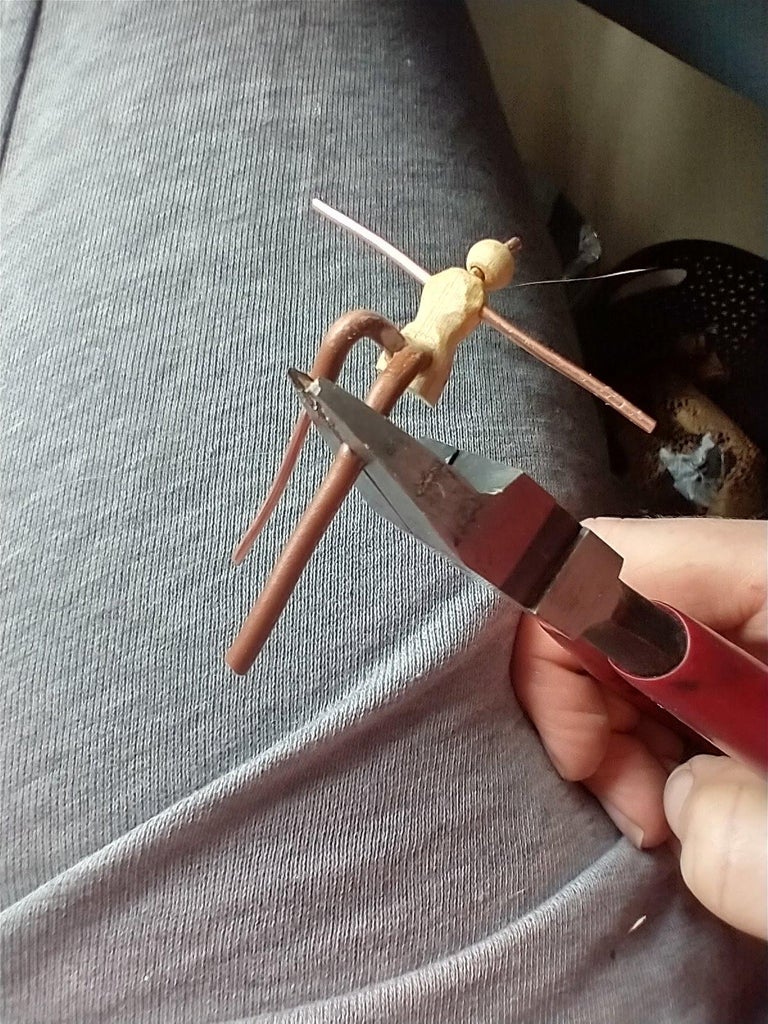


Now comes the tricky part, we now needs to bend each leg to give the appearance that our little figure is peddling his Penny Farthing. It is important to use the bicycle as a reference while you position your rider, do this between every step below.
- We need to part his legs first to allow for the bicycle between them. So gentle push the two lengths of wire away from each other. I found at this point I needed to use the Stanley Knife to strip back the insulation between his legs for a better fit on the frame of the bike.
- Using two pairs of miniature pliers, hold one leg near to the torso and then using the other pair of pliers (or your fingers) bend the first leg at approximately 90 degrees.
- Repeat again for the second leg but at a lesser angle
- Trim the lower legs to length now, using the bicycle as your reference. (In the photos above you can see I added another bend on each wire for feet but this it turned out wasn't needed)
- Now for the arms. Using your pliers bend each arm forward and also downwards so they meet the handle bars. You may need to rotate the arms slightly in their sockets in order to achieve this but its only slight.
- Trim the arms to length using wire snips.
Step 12: Making the Rider Part 5 - Adding the Detail

Now we have your rider in his position we can now add the detail.
For his hands and feet you need to only add a small blob of hot glue to the end of each wire, using a larger blob for his feet of course.
I wanted my rider to have a top hat, so I cut a 5mm length of earth sleeving and then glued this to his head using the hot glue gun. The squeeze out of the hot glue also makes the brim of the hat, but if this doesn't happen then you can use a very fine bead of glue to expand the brim a little. I then filled the rest of the insulation with hot glue to make the top of his hat.
Step 13: Making the Rider Part 6 - Priming and Painting


Like the Penny Farthing itself, the figure also needs to be Etch Primed as we have used a collection of materials. Leave this to dry overnight and then we can paint him however we see fit.
Step 14: Completion


One last step now. Mounting our rider to the Bicycle. For this we need a small blob of superglue between his legs (sounds painful I know...) and also onto the handlebars where his hands meet them. Once this is dry the handlebars can finally be trimmed to length using wire snips.
In hindsight the rider is a little too big compared to the proporitons of the real thing but I think that's my only issue with the project. Maybe someone else who attempts this may have better luck.

Finalist in the
Big and Small Contest


4 Comments
15 days ago
This is absolutely adorable. I can't see well enough to make it myself but I'm going to hang onto these instructions to pass on down the line. Super nice work. Thank you for sharing with easy to understand insrtructions.
15 days ago
Rediculously cute!
15 days ago
Wow, what a beautiful project this is......i will try to make it and i am going to search an old watch....
Great project !!!!
15 days ago
Awesome scratch!!