
Introduction: Crayon Dyed Miniature Dormice and Beds


Do you remember the Dormouse from "Alice in Wonderland"? Dormice are extremely sleepy rodents, similar to squirrels but as small as mice. The smallest are 2" -- 4" long, not including the tail. Unlike squirrels or mice, dormice are nocturnal and they hibernate for much of the winter. They sometimes remain dormant for 9 months of the year, just waking up to snack on stored food.
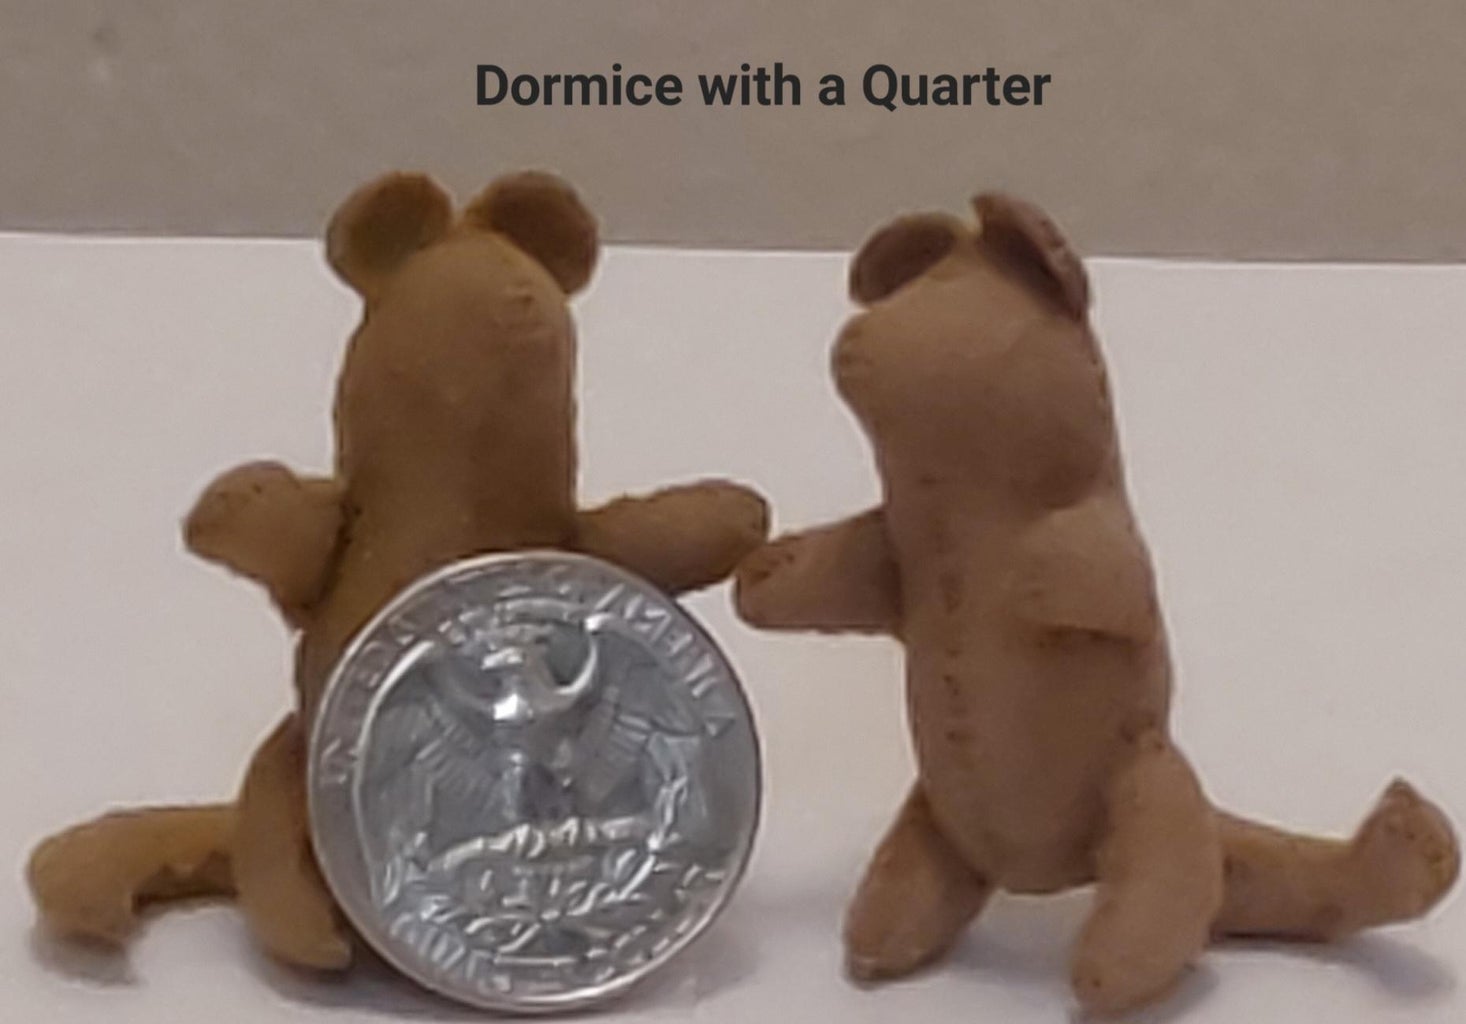
Their life style sounds wonderful to me! My stuffed dormice are much smaller than life-size; they are approximately 1 1/2" tall. Each one is uniquely crayon dyed, they are all different colors. I have also included patterns for beds but they're optional -- dormice will easily fall asleep anywhere!
Supplies
For the Dormouse and fabric Sleeping Bags:
Fabric that doesn't fray (e.g., knit suede, knit velour, felt), a 6" by 6" piece
Polyester fiberfill stuffing (or pull cotton balls apart and shred them)
Thread in matching colors
Basic sewing supplies (needles, pins, fabric scissors)
Glue Stick
Crayons for dyeing knit suede (optional)
White Vinegar (if dyeing fabric)
Iron (if dyeing fabric)
Pink colored pencil (optional)
For the Paper Beds, Bunk Beds, and Cribs:
Construction Paper or Cardstock
Glue Stick
School Glue (PVA, White Glue)
Scoring tool (a ballpoint pen that has run out of ink)
Paper scissors
Step 1: Download the Dormouse Pattern

Download the Dormouse pattern.
Attachments

Step 2: Crayon Dye the Fabric (optional)

Knit suede takes very well to crayon dyeing. Each of my knit suede dormice are different unique colors. I used Crayola crayons to dye 12 fabric swatches, leaving one original undyed gray. Color the fabric thoroughly, then iron it to draw out the wax (protect the iron with a paper towel over the fabric). Repeat with the same color crayon or with a combination of colors and iron again. Repeat until you have the color you want and wax and color no longer iron out. Set the color by briefly soaking the fabric swatches in a warm 50-50 water/vinegar solution and ironing them one more time.
Notes:
Felt fabric cannot be crayon dyed but felt has no wrong side and it's easier to sew. Because there is no grain line you can arrange the pieces very closely when cutting them out.
Knit suede is much thinner than real suede. Because the pattern pieces are so small, you can ignore the grain lines and treat it like felt. Unlike felt, it has a wrong side.
Dormice made from knit suede or knit velour will be thinner and smaller than Dormice made from felt. My three larger dormice are made of felt.
Step 3: Cut Out the Dormouse Parts

Cut out the pattern pieces.
You will need fabric that measures approximately 6" by 6." You need to cut two Body Fronts, 2 Body Backs, 2 Tails, and 4 Arms, 4 Legs, and 4 Ears.
To achieve this: Arrange the pattern pieces on a single layer of fabric. Pin or hand baste them to the fabric and cut out the dormouse parts. Arrange the pattern pieces on the fabric again, turning the patterns over to reverse them if your fabric has a right and wrong side. (It's not necessary to reverse the pattern if you are using felt or a fabric that is the same on both sides.) Cut out the Dormouse parts again. Repeat for another set of Arms, Legs, and Ears.
Step 4: Make the Ears

Use a Glue Stick to glue each Ear together, wrong sides facing. Use a colored pencil to tint the inside of the Ears pink if desired.
Step 5: Make Each Dormouse Part


Place matching parts together (i.e., Body Fronts, Body Backs, Arms, Legs, Tail), right sides facing.
Use a knotted double length of thread to whipstitch the center seam of the Body Front from point to point (as indicated in the picture), right sides facing. Repeat for the center seam of the Body Back. Turn the body pieces right side out and match them together, now wrong sides facing. Starting at the center of the head, whipstitch the body pieces together, stuffing as you go.
For the arms and legs: Partially whipstitch together (right sides facing) from point to point (as indicated in the picture). Turn right side out and continue to whipstitch all around, stuffing as you go.
For the tail: The same as above, but leave the base of the tail open.
Step 6: Assemble the Dormouse

Attach the Ears to the Head seam or further back, which ever looks best.
Attach the Legs to the Body, at the side seams. You may place the legs so the Body touches the ground or it is slightly elevated. Take care that both Legs are attached at the same level so the Dormouse isn't lopsided.
Attach the Tail, facing right or left, sewing around its circular base.
Attach the Arms to the side seams so they point upwards.
Notes:
Depending on leg placement, standing Dormice (elevated body) will be slightly taller than sitting Dormice (body on the ground).
I have not embroidered eyes on my Dormice since they're asleep most of the time, but feel free to add them if desired.
Step 7: Make a Sleeping Bag

Download the pattern.
Cut out one Cardboard base, two fabric Bottom pieces, and one fabric Top piece. Cut a long slit in one Bottom piece. Match the Bottom pieces together, right sides facing. Sew a running stitch all around, close to the edge. Turn it right side out through the slit. Insert the Cardboard base through the slit. (It will be a tight fit and the cardboard will bend slightly. Flatten it out when it's inside.) Whipstitch the slit closed (the side with the slit is the outside of the Sleeping Bag).
Use a length of knotted double thread to make a hem of running stitches all around the circular edge of the Top piece. Do not tie a knot at the end -- pull the thread to gather the edge to fit the Bottom of the Sleeping Bag, leaving an opening at the top for the Dormouse to get in and out.
Pin and whipstitch the Top and Bottom together.
Attachments
Step 8: Make a Bed or Bunk Bed


Download the patterns. The red lines are fold lines. Score them (with a ballpoint pen that no longer writes) before folding. The black lines are cut lines.
Cut out the pieces on the black lines.
For the Single Beds:
Cut out one Bed Box, one Bed Base, and one Headboard.
Fold and glue the Bed Box so the tabs are inside the shorter sides of the box.
Fold and glue the Bed Base so the legs are a double thickness.
Glue the open Bed Box on top of the Bed Base, aligning the corners and edges.
Glue the Headboard on one of the shorter sides.
For the Bunk Beds:
Cut out two Bed Boxes and one Bunk Bed Base.
Fold and glue each Bed Box so the tabs are inside the shorter sides of the box.
Fold and glue the Bunk Bed Base so the legs are a double thickness.
Glue an open Bed Box on top of the Bunk Bed Base, aligning the corners and edges.
Fit the second Bed Box between the four legs (it will be a tight fit) and slide it up, allowing enough room for a dormouse to comfortably get in and out of bed. Use school glue to glue the lower Bunk in place if necessary.
Step 9: Make a Crib

Download the patterns. The red lines are fold lines. Score them (with a ballpoint pen that no longer writes) before folding. The dashed line is a score line, but not a fold line. The bold black lines are cut lines. The narrower black lines are also cut lines, but do not cut them until you are directed to.
Cut out one Crib Base, one Crib Sides, one Crib Top Bar, and one Crib Cover.
Fold and glue the Crib Base so the legs are a double thickness.
Fold the Crib Sides and check that the Crib Base will fit into it, before gluing the Crib Sides together, with the Tab inside. Do not glue the Crib Sides to the Crib Base yet.
Cut on the narrow black lines to form the Crib Bars. Leave the four corner supports upright, but fold alternating strips down (towards the inside of the crib) on the dashed score line. Drizzle some glue over them and insert the Crib Cover. Press the Crib Cover down and gently press the Crib Sides inwards, to straighten the edges.
Fit the Crib Top Bar to the Crib Sides, folding and gluing it to the four corner bars. Trim off the excess length. Use small drops of glue to attach each Crib Bar to the Crib Top Bar.
When the glue is dry, slip the Crib Base into the Crib Sides.
Adjust the height of the Crib Sides by sliding them up or down. Use school glue to glue it in place if necessary.
Step 10: Let the Dormouse Sleep


Remember, dormice are nocturnal, so they sleep during the day. They appreciate sleeping in Sleeping Bags, Beds, or simply in a warm heap on top of each other.

This is an entry in the
Big and Small Contest


2 Comments
11 days ago
Craft dog, I think these are lovely (: thank you
Reply 10 days ago
Thanks!