Introduction: Friendship Heart Necklaces - 3D Printed and Magnetic


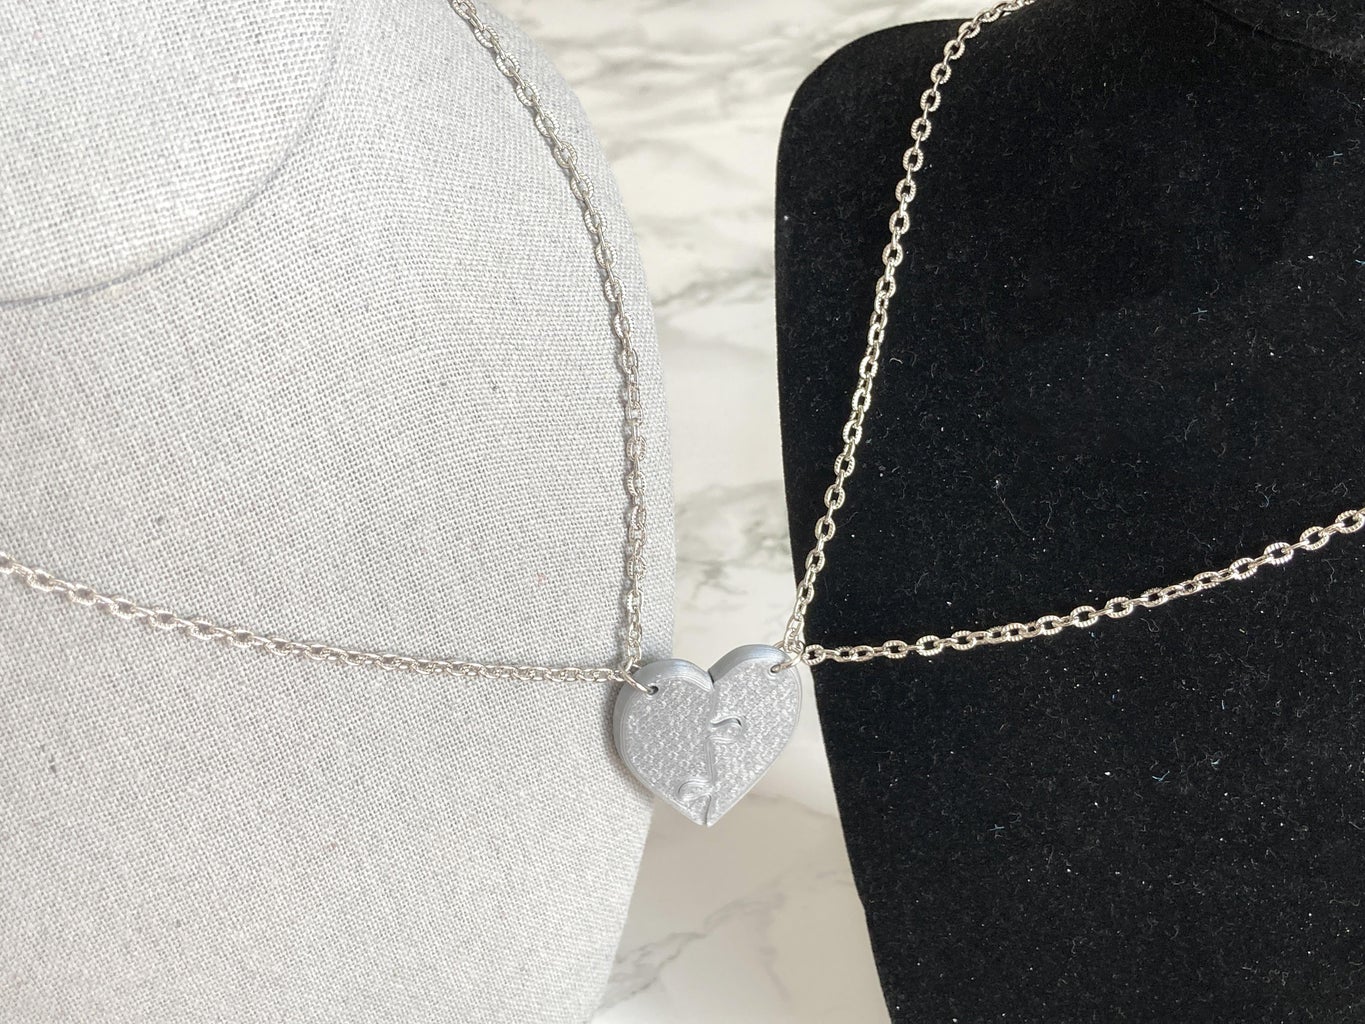
When I finished making my Connecting Magnetic Hearts Necklace, I thought it would be fun to make a broken heart friendship necklace that also uses magnets. I wasn't sure how to do it at the time, but after thinking about it, I decided that instead of a broken heart, I would use puzzle piece half hearts! So, combining a simple heart with puzzle piece cutouts and a slot for magnets, I came up with this puzzle piece heart that can either be used as separate friendship necklaces or as a single necklace that connects in the front with the pendant rather than a clasp in the back.
Instructable 374
Supplies
Supplies
- Tinkercad.com
- Fusion 360 - I used this to round out the heart
- 3D Printer - I use a Prusa MK3 and Bambu X1 Carbon
- Filament
- Small Magnets - I used 3mm by 3mm by 3mm cubes, unfortunately, I bought mine about 5 years ago and I can't find anything similar on Amazon at least, but you could likely find it elsewhere or adjust your print to fit the magnet you get, it will need to be small to fit in this small pendant.
- Chain - I prefer Stainless Steel
- Jump Rings - they need to be big enough to fit through the thickness of the heart, mine are Stainless Steel 7mm, 18 gauge
- Jewelry pliers
- Attached files


Step 1: Heart to Fusion - Video
I knew I wanted a heart, but I thought it would be nice if the edges were curved. While Tinkercad does have a Fillet shape in the Shape Generators section of the Shapes Panel, it doesn't work with curved shapes and odd angles like this heart has.
Luckily, it is really easy to send a shape directly to Fusion 360, apply a fillet, and export it so you can bring it back into Tinkercad to finish your design.
Watch the video here or check out the next step to see how I sent the heart to Fusion 360, added the fillet, then saved it so I could bring it back into Tinkercad.
You can also find some great introductory tutorials on how to work with Tinkercad and Fusion 360:
Step 2: Heart - Add Fillet With Fusion 360


How to send your heart to Fusion 360, add a fillet, and export it to bring it back into Tinkercad.
- Start by selecting your shape (it does need to be one of, or a combination of, the basic shapes to work with this function) and clicking Send.
- From there you have the Send to Fusion option. It can help to already have Fusion 360 open on your computer.
- Once in Fusion, select your whole shape (what you select could change based on your specific shape) and then click the Fillet option.
- You can type in the fillet radius in the box that comes up, or drag the arrow slider to make the fillet. Be aware that you will be limited by the shape and its size for how big the fillet can be. I was able to go up to about 2.5mm so that is what I went with.
- Save your design (you have to save it before you can export it).
- Export your design as an STL. You can then export this STL back into your Tinkercad design space and continue on with your project.
Step 3: Puzzle Cut


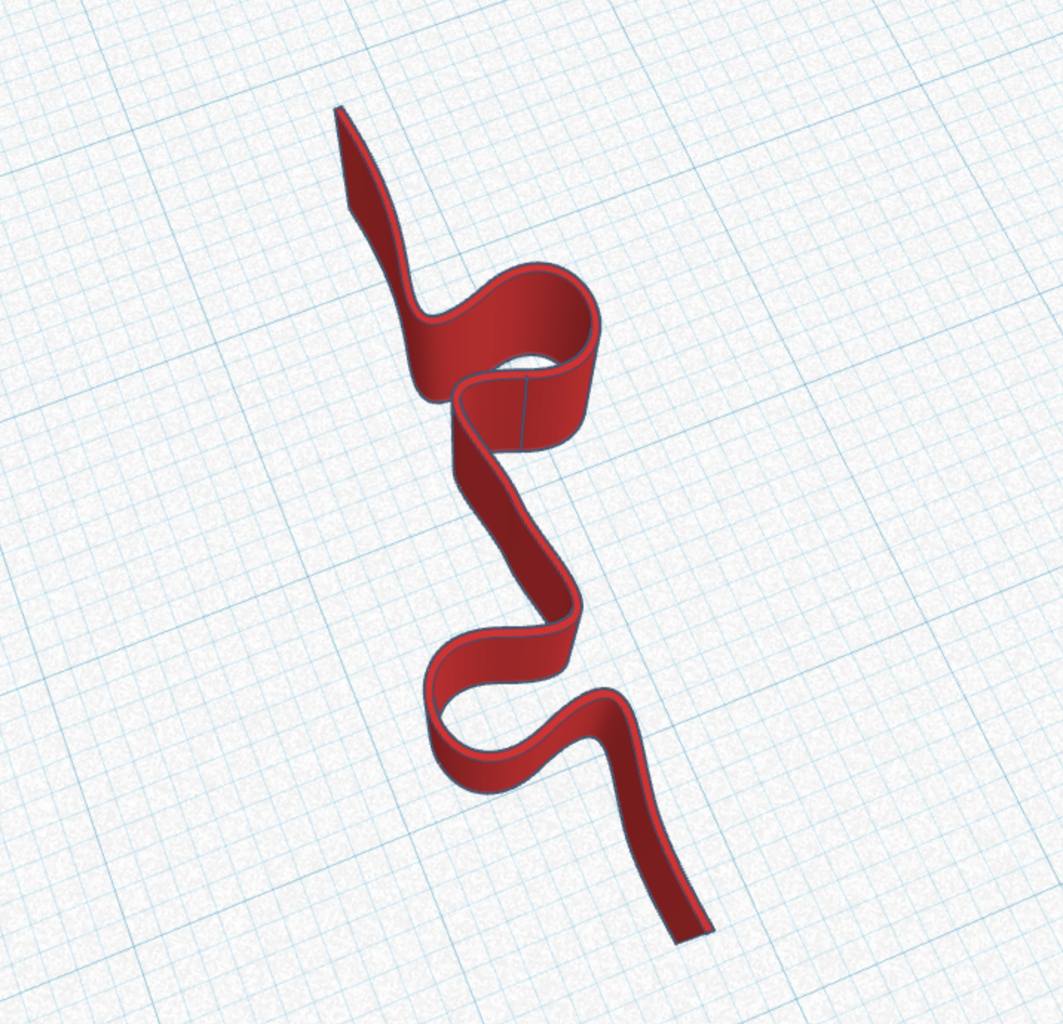
I used the same technique for getting the puzzle-shaped cut as I used in my 3D Printed Puzzles tutorial. I made the tabs as big as I could.
I opened it in Inkscape and removed the extra lines so I just had the two tabs (one on each side) and just the cut down the middle.
I edited the line to make it thicker because I didn't want to have to worry about the pieces fusing when printing. I also made the top and bottom line extend farther since I wasn't sure how long it would need to be.
Saving this as an SVG, I imported it into Tinkercad. Make sure it imports right without flaws. If it looks wrong, one thing you can do is enlarge it in Inkscape, upload it into Tinkercad, then resize it back done. Sometimes thinner shapes have trouble importing to Tinkercad correctly.
Step 4: Continue Design in Tinkercad


How that you have your heart and your puzzle cutout, you can combine these. I also had my magnet cutout leftover from my other connecting hearts necklace that I used here.
First, I needed to decide the thickness of the heart pendant (and size overall). This decision was made in part with how many layers I wanted over the top and below the magnet. I wanted to make sure it would be covered well.
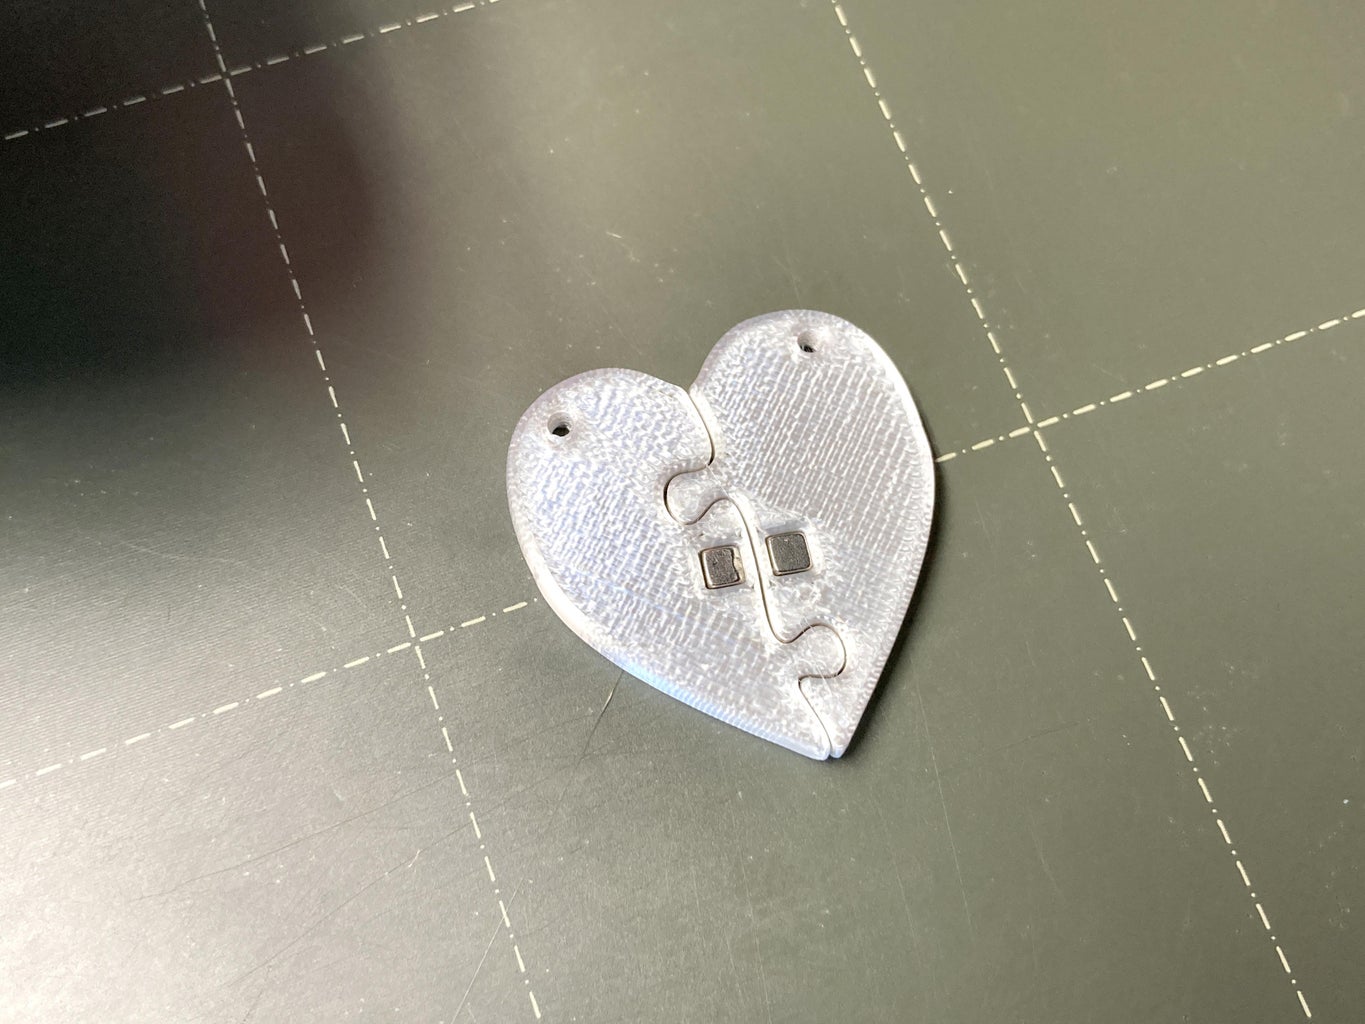
The magnet hole is 3.20mm thick. I ended up making the heart 4.40mm thick. I centered the magnets with the heart so I had 3 layers on top and bottom.
Line up the puzzle line down the middle. If it doesn't fit well, you may need to head back to your Inkscape or Illustrator program to fiddle with it.
Once I had that lined up, I added the magnet cube cutouts. I wanted to put them as close to the puzzle line without getting to close. I tested, exported, sliced, and re-edited until I was happy with the placement. I went until I had just two lines between the magnet hole and puzzle cut.
Lastly, I needed holes to attach jump rings to. Like with my other necklace, I went with a torus instead of a cylinder to cut it out since the heart is so thick. I find the thicker it is, the harder it is to put a jump ring in a cylinder.
Group everything together and you have your pendants!
Step 5: Slice - Add Pause


Time to add your pause in the slicer!
With most slicers, you need to right click on the layer that will print AFTER you want the pause and Add Pause.
Another thing you can do here, is have fun with the Top Layer Infill. The Herbert Curve gives a fun textured design on top of the pendant. You can also set that infill for the bottom layer too if you want.
Step 6: Add Magnet


If you are adding the magnet, you need to be ready for the pause.
Make sure when you place your magnets, they are in the right orientation or the magnets won't attract in the final necklace.
Restart the print after the pause and it should finish off the pendants and cover the magnets. If the magnet seems like it is sticking out of the holes you made, I recommend stopping, fixing the design to make more space for the magnet, and trying again. You don't want the nozzle dragging on the magnet.
This part can be finicky because the magnets are going to want to keep connecting even as you put them in. One way to try to avoid this is:
- Put the magnets on a piece of paper, make sure they are oriented right
- Attach a magnet below the paper and then keep these apart.
- Put a line on the paper to make sure the magnets are oriented right.
- Use this to carefully put the bottom magnet in the 3d printed piece.
- Hold the paper down and then take off the top magnet breaking the connection and leaving the bottom magnet in place.
- Carefully repeat with the other magnet.
Step 7: Seperate Pieces


After fighting with my magnets through a few prints and even getting the magnets in wrong, I decided to see if I could separate the hearts. I managed to do it using Fusion 360. This makes adding the magnets much easier. You still have to make sure they are oriented right, but they won't fight you as much.
Step 8: Make Into Necklace


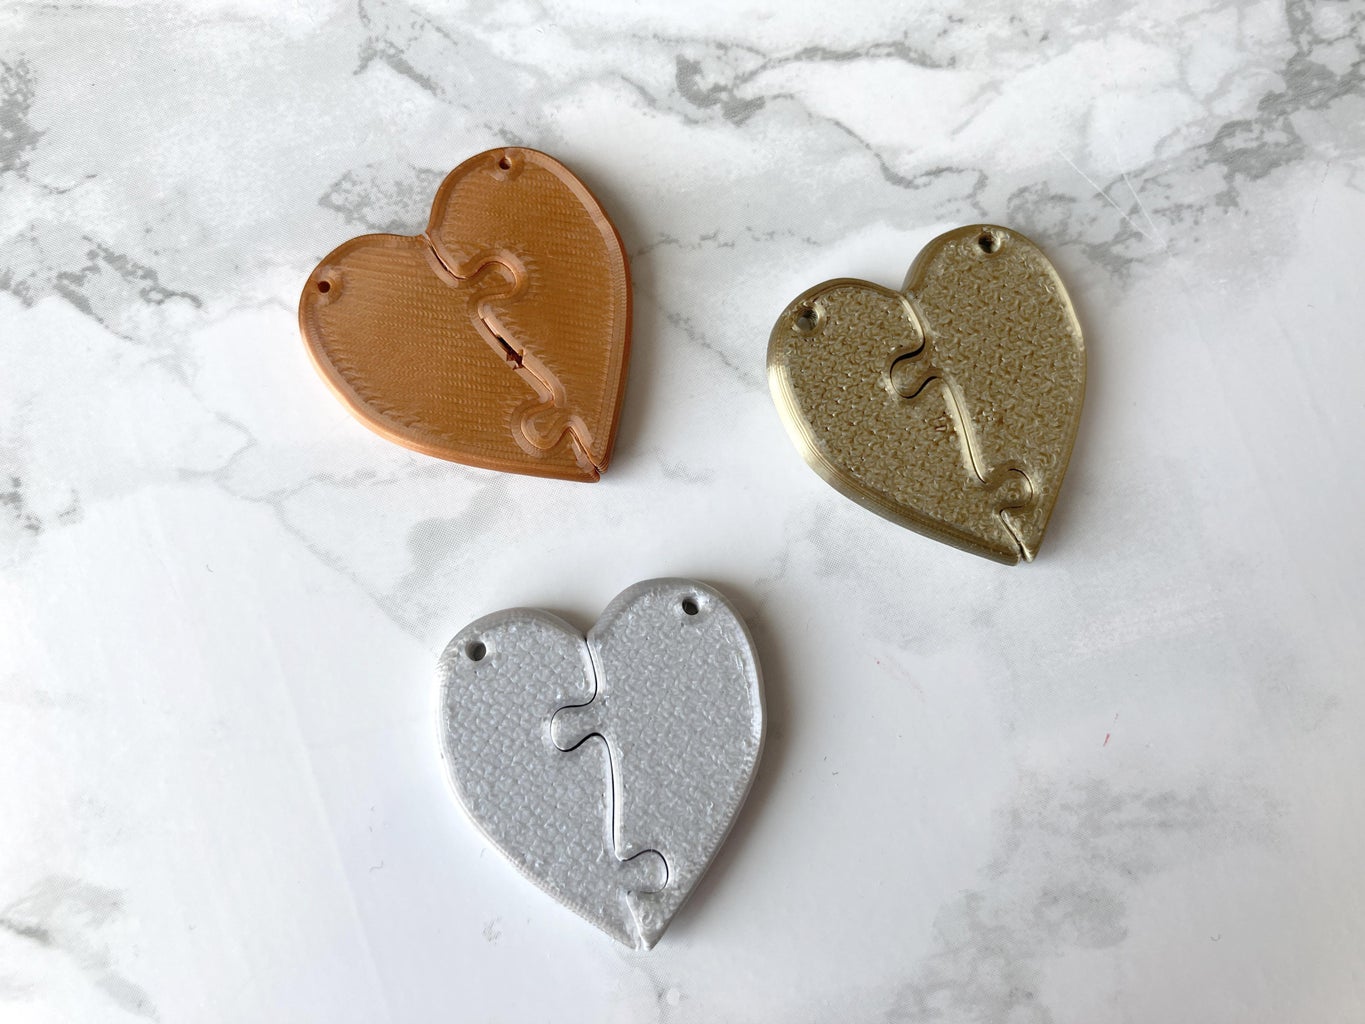
You can now take your heart pieces and either make them into 1 necklace that doesn't need a clasp, or make them into 2 seperate friendship necklaces!
Step 9: Finished Necklaces


Comments