Introduction: Build Temporary Architecture With Plastic Bottles


While plastic recycling has often been promoted so that large companies can pass their responsibility for the proper disposal of plastic packaging onto consumers— in spite of there being better, more reusable, as well as less environmentally detrimental options—the fact nevertheless remains that we live on a world of finite resources, where an abundant amount have already been extracted from the natural world. As such, recycling is imperative. However, the developed world also has a track record of pushing its waste and recyclables onto the developing world, which is obviously unfair. With these two considerations, we have to develop our own methods and processes in which to remove materials from the waste stream and give them new and longer lives.
Archipelago addresses these issues through a multi-step system empowering individuals to recycle at home using a few specialized, but easy to produce or acquire, tools in combination with modular design.
Supplies


To begin, we’ll need to gather some important tools. Many of the following are common to most households or are not entirely necessary, but there are three specialized tools that are absolutely necessary for this project. The bottle slicer is a really low-tech piece of equipment, but its efficacy is actually incredibly important for the further steps to work properly. Many other designs for PET filament extruders have bottle slicers built right into them but, with it being a separate tool, the sliced bottles will take up much less space than intact bottles. Thus when producing a lot of filament, it makes sense to prepare a lot of material all at once so it can be dried and extracted in a more efficient way. Also, while the Archipelago PET Filament Extruder may not be the smallest filament extruder out there, it is certainly very compact and efficient.
Once you have prepared all of the tools below, move on to the next step in the Archipelago process (or work on them both simultaneously):
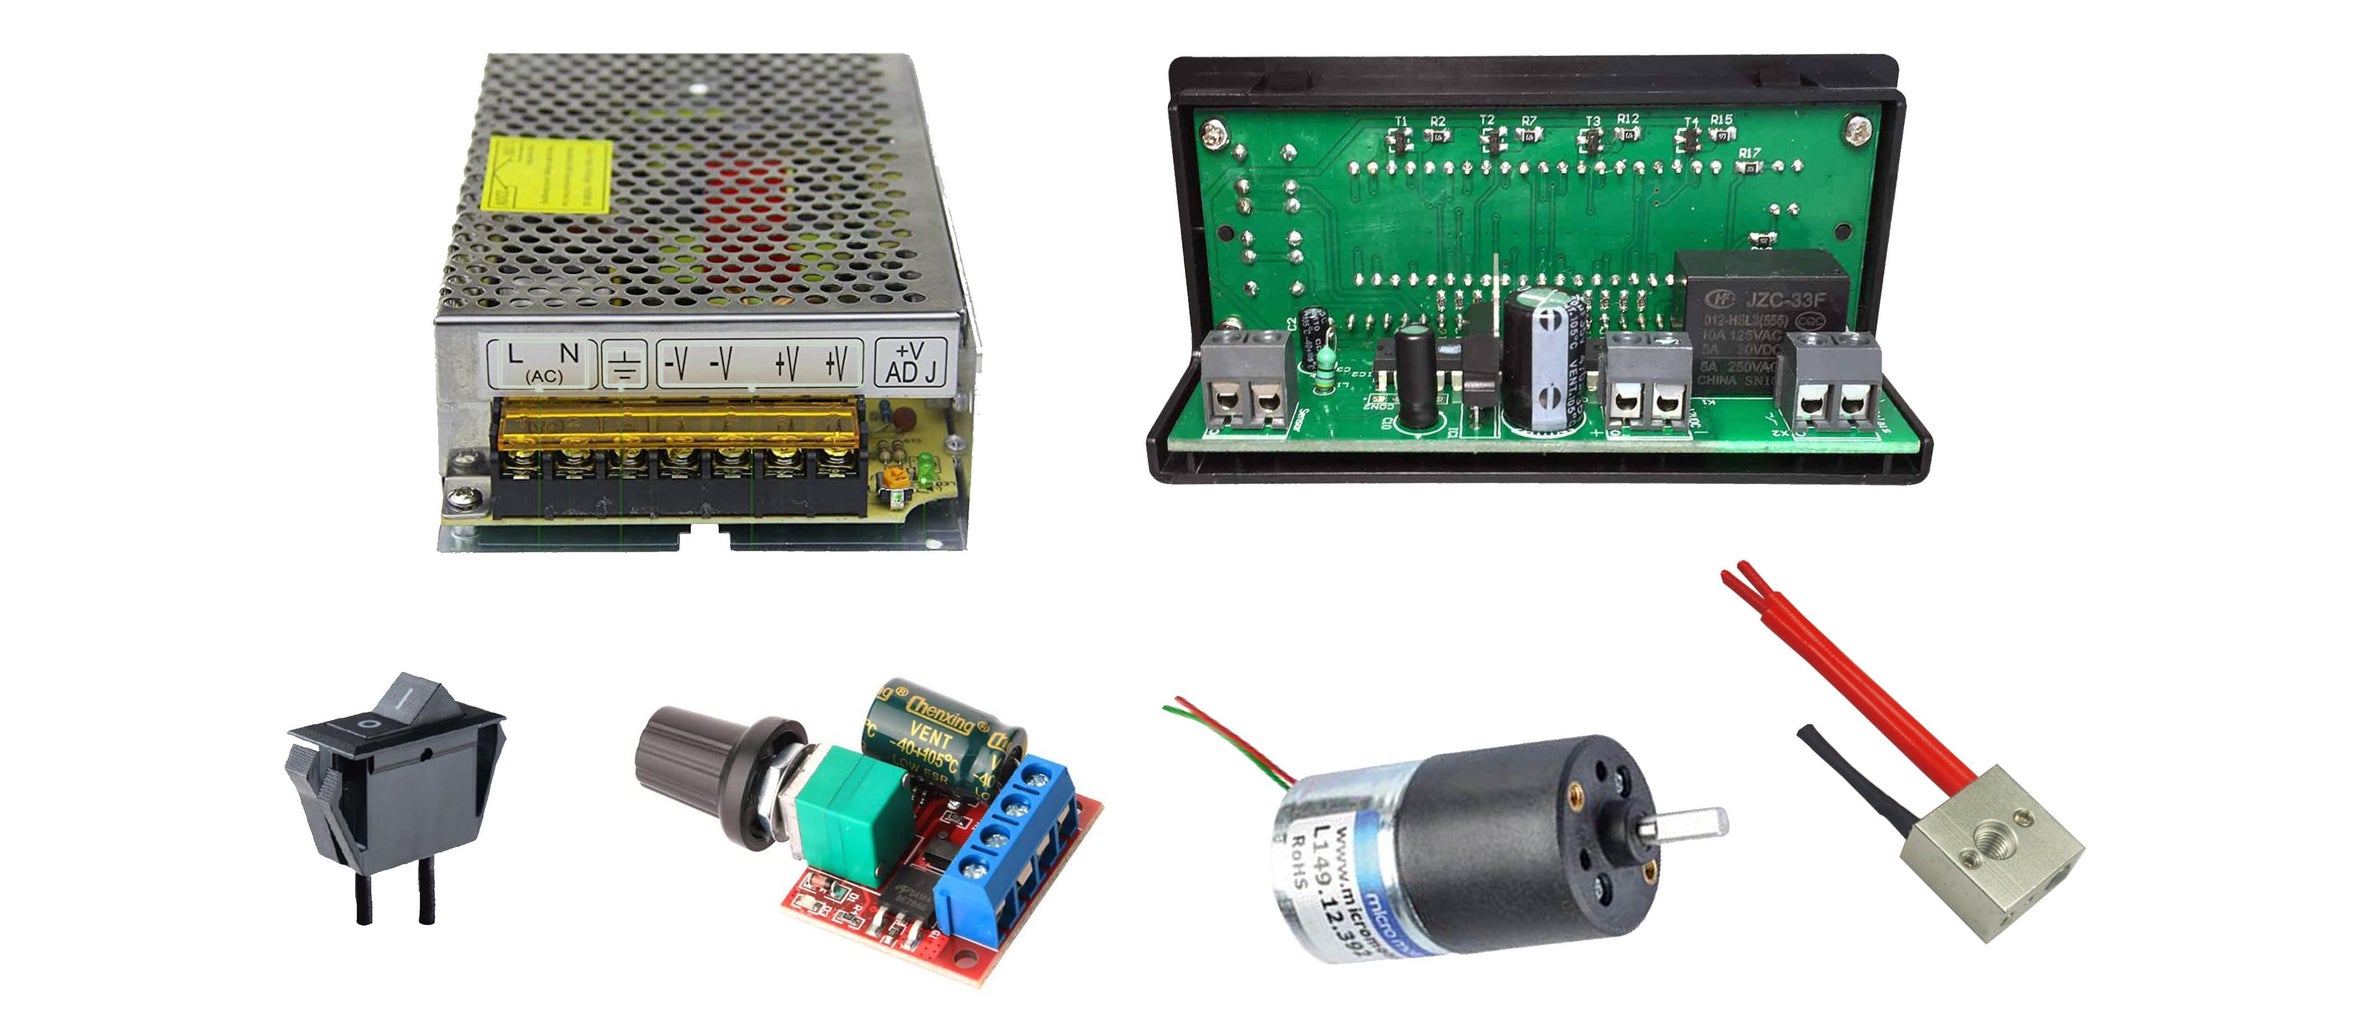
COMMON TOOLS
- A drill with drill and screwdriver bits.
- A rotary tool with grinding bits.
- A pair of needle nose pliers.
- A box cutter.
- A pair of scissors.
- A pair of vice grips or adjustable wrench.
- A soldering iron and solder.
- Hot glue gun and glue sticks.
- Vernier Caliper, ideally digital.
SPECIALIZED TOOLS
- Bottle slicer
- 36-40 steel washers (or coins with holes drilled in their center).
- 9mm wide box cutter blade
- 8 screws (40mm)
- A threaded rod, steel rod, pipe, dowel or coat hanger.
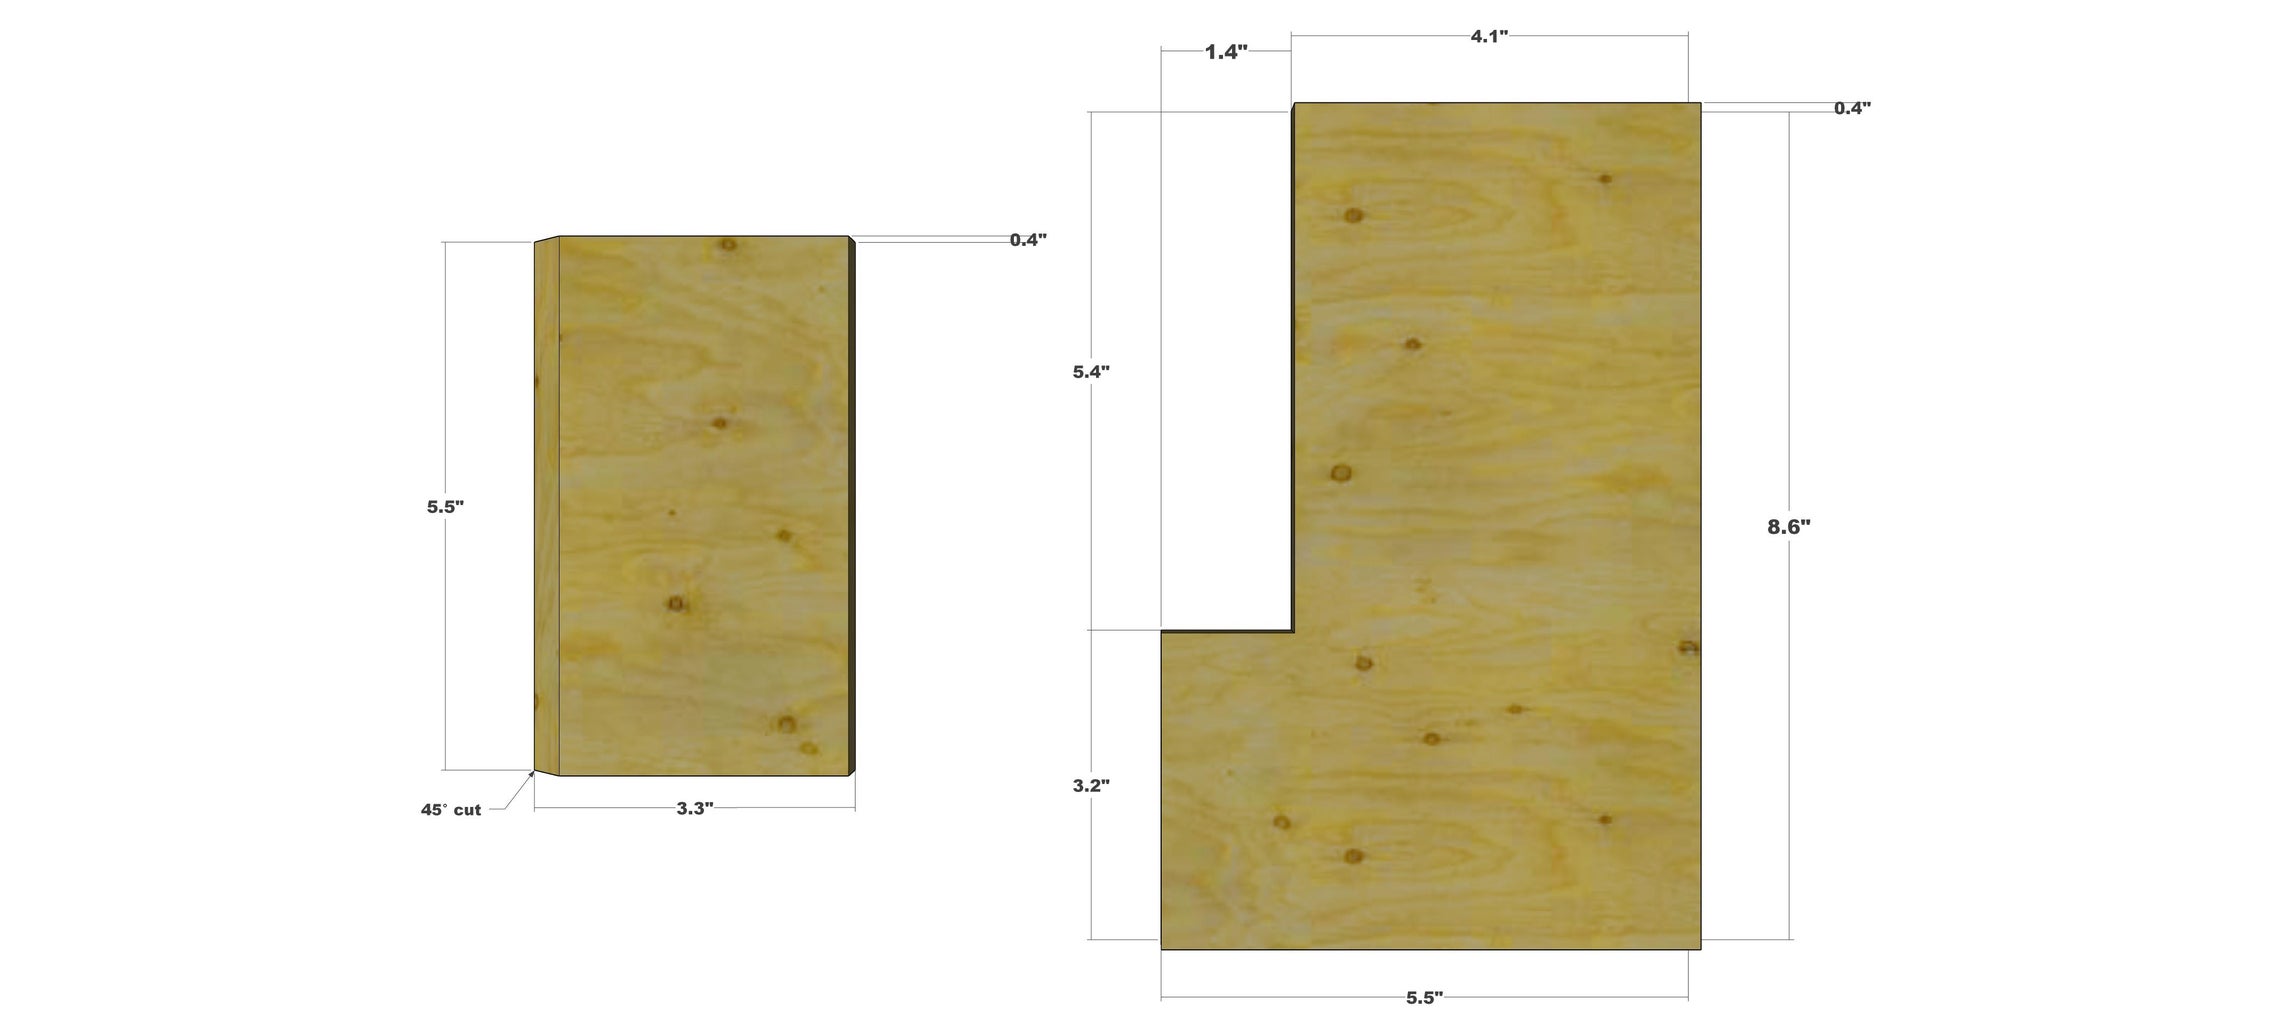
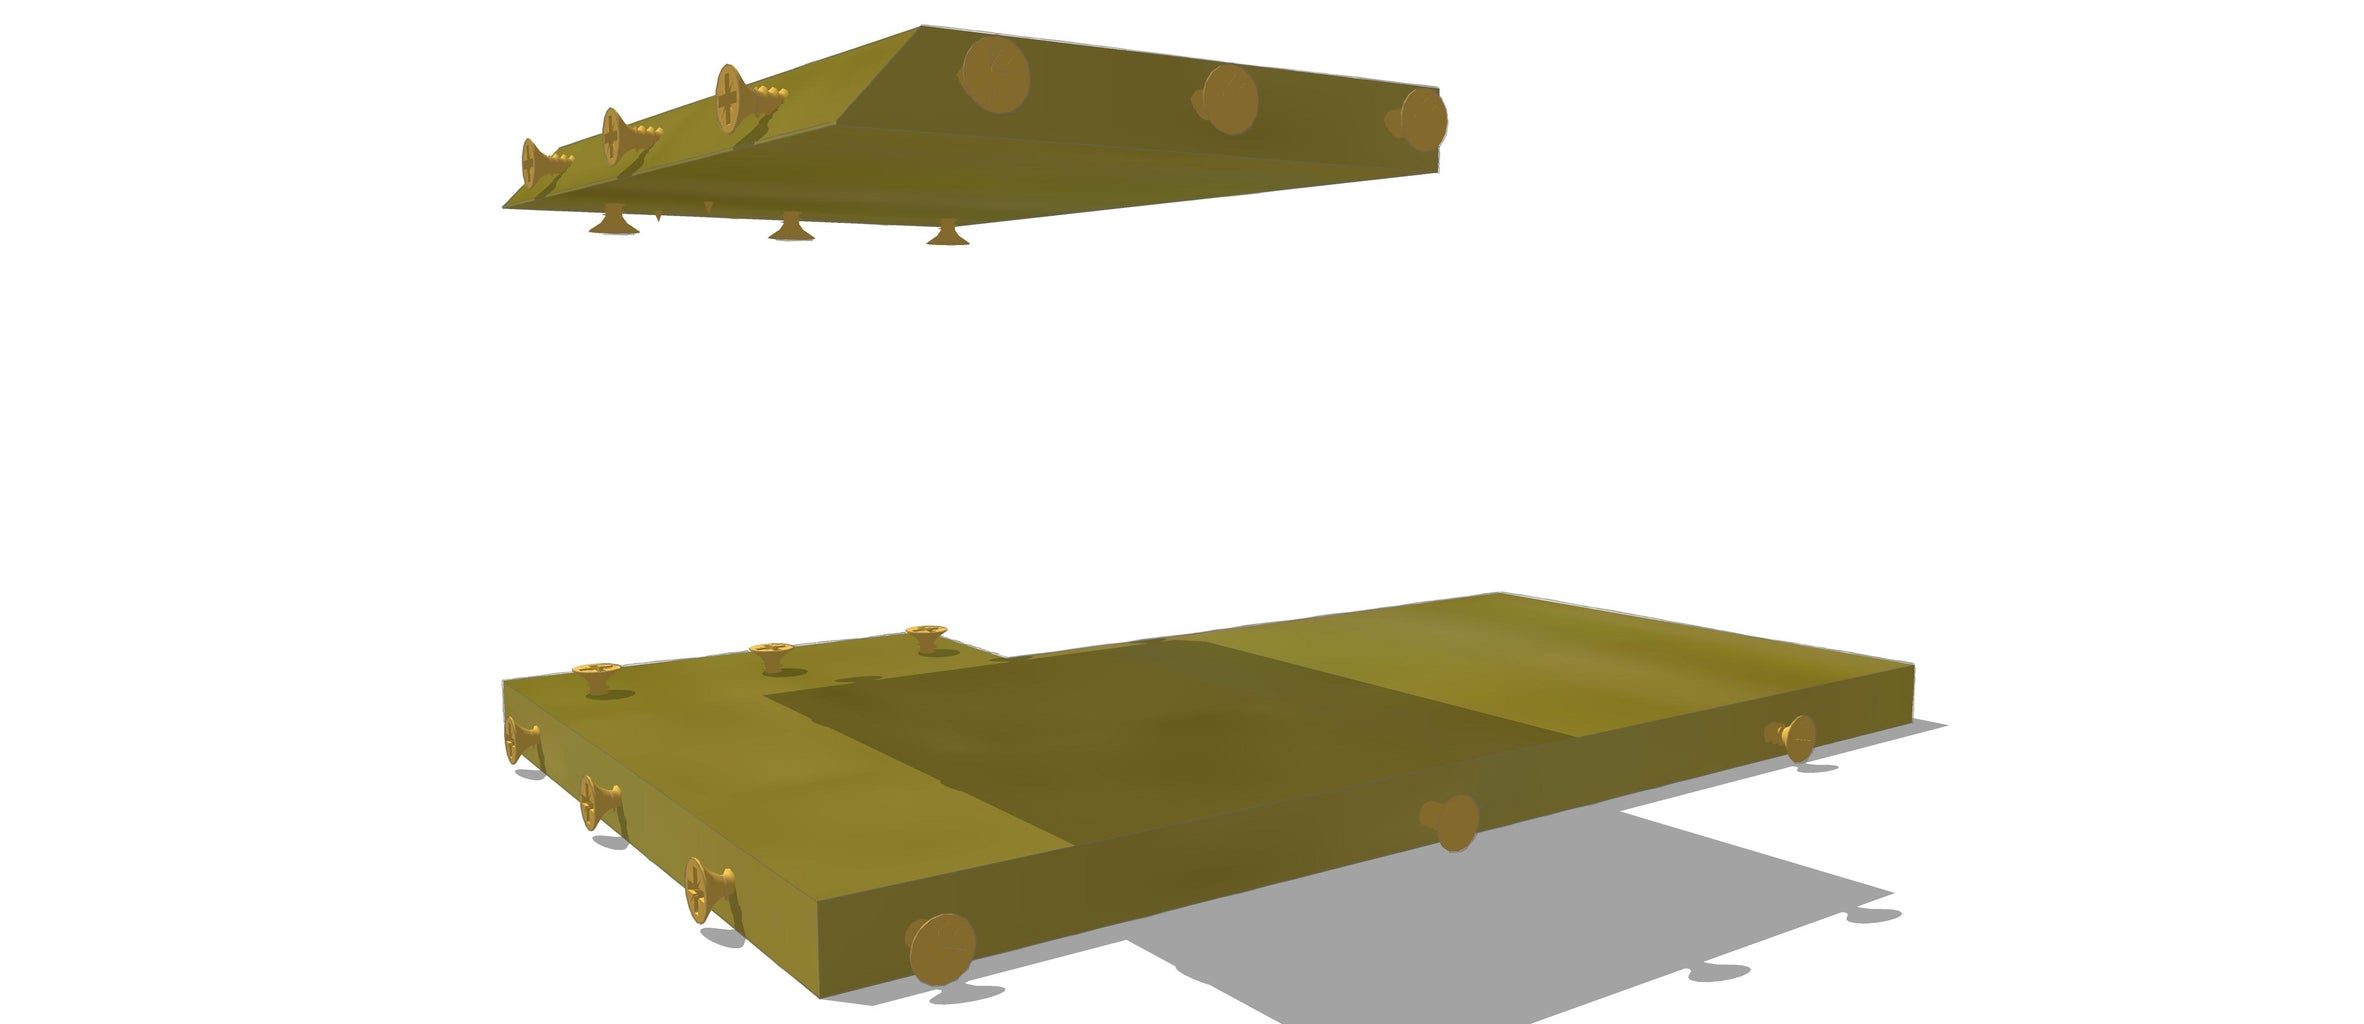
- 1 Small wooden board (~15x10x1cm).
- Filament Extruder
- Two wooden boards (see images for dimensions)
- 1.75mm Drill Bits
- 27mm Geared 392:1 12v DC Motor***
- Extruder Hot End Parts (1)*
- Extruder Hot End Parts (2)**
- Heat Shrink
- PWM Regulator 12V 5A***
- Power supply - 12V/5A***
- Rocker Switch***
- 20x20cm Right Angle Bracket
- 30 M3*10mm Screws
- Temperature Sensor
- Thermocontroller***
- Zip Ties
- 3D Printer
- You need a printer which is capable of printing at 260-265°c in order to print PET filament.
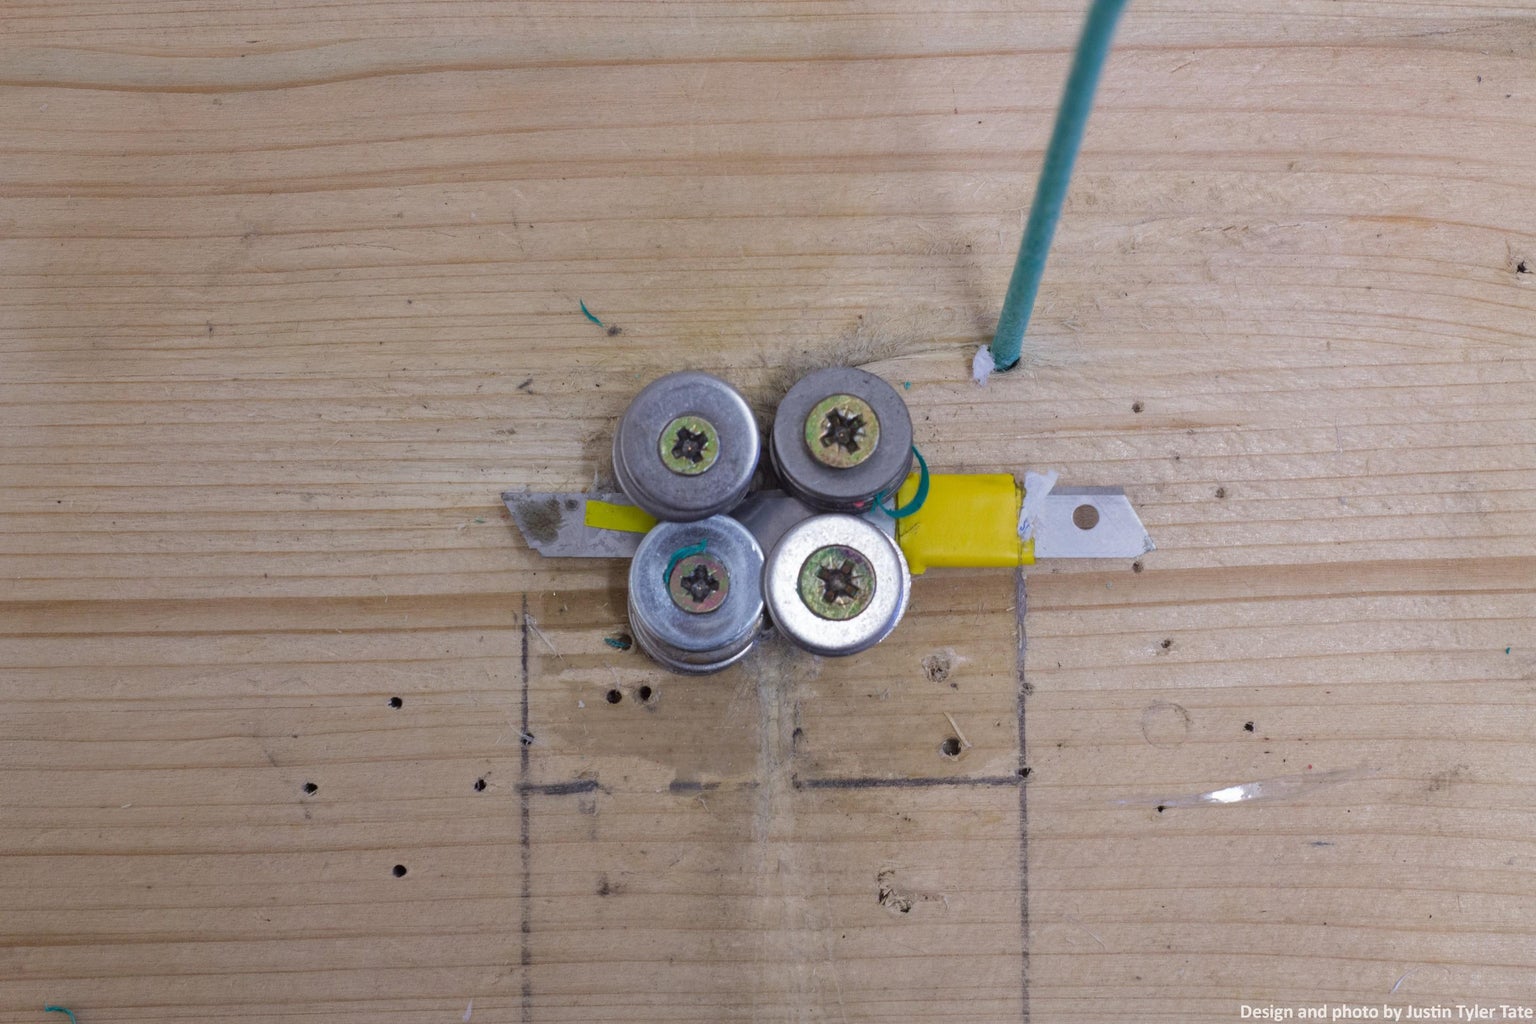
Step 1: Build a Bottle Slicer

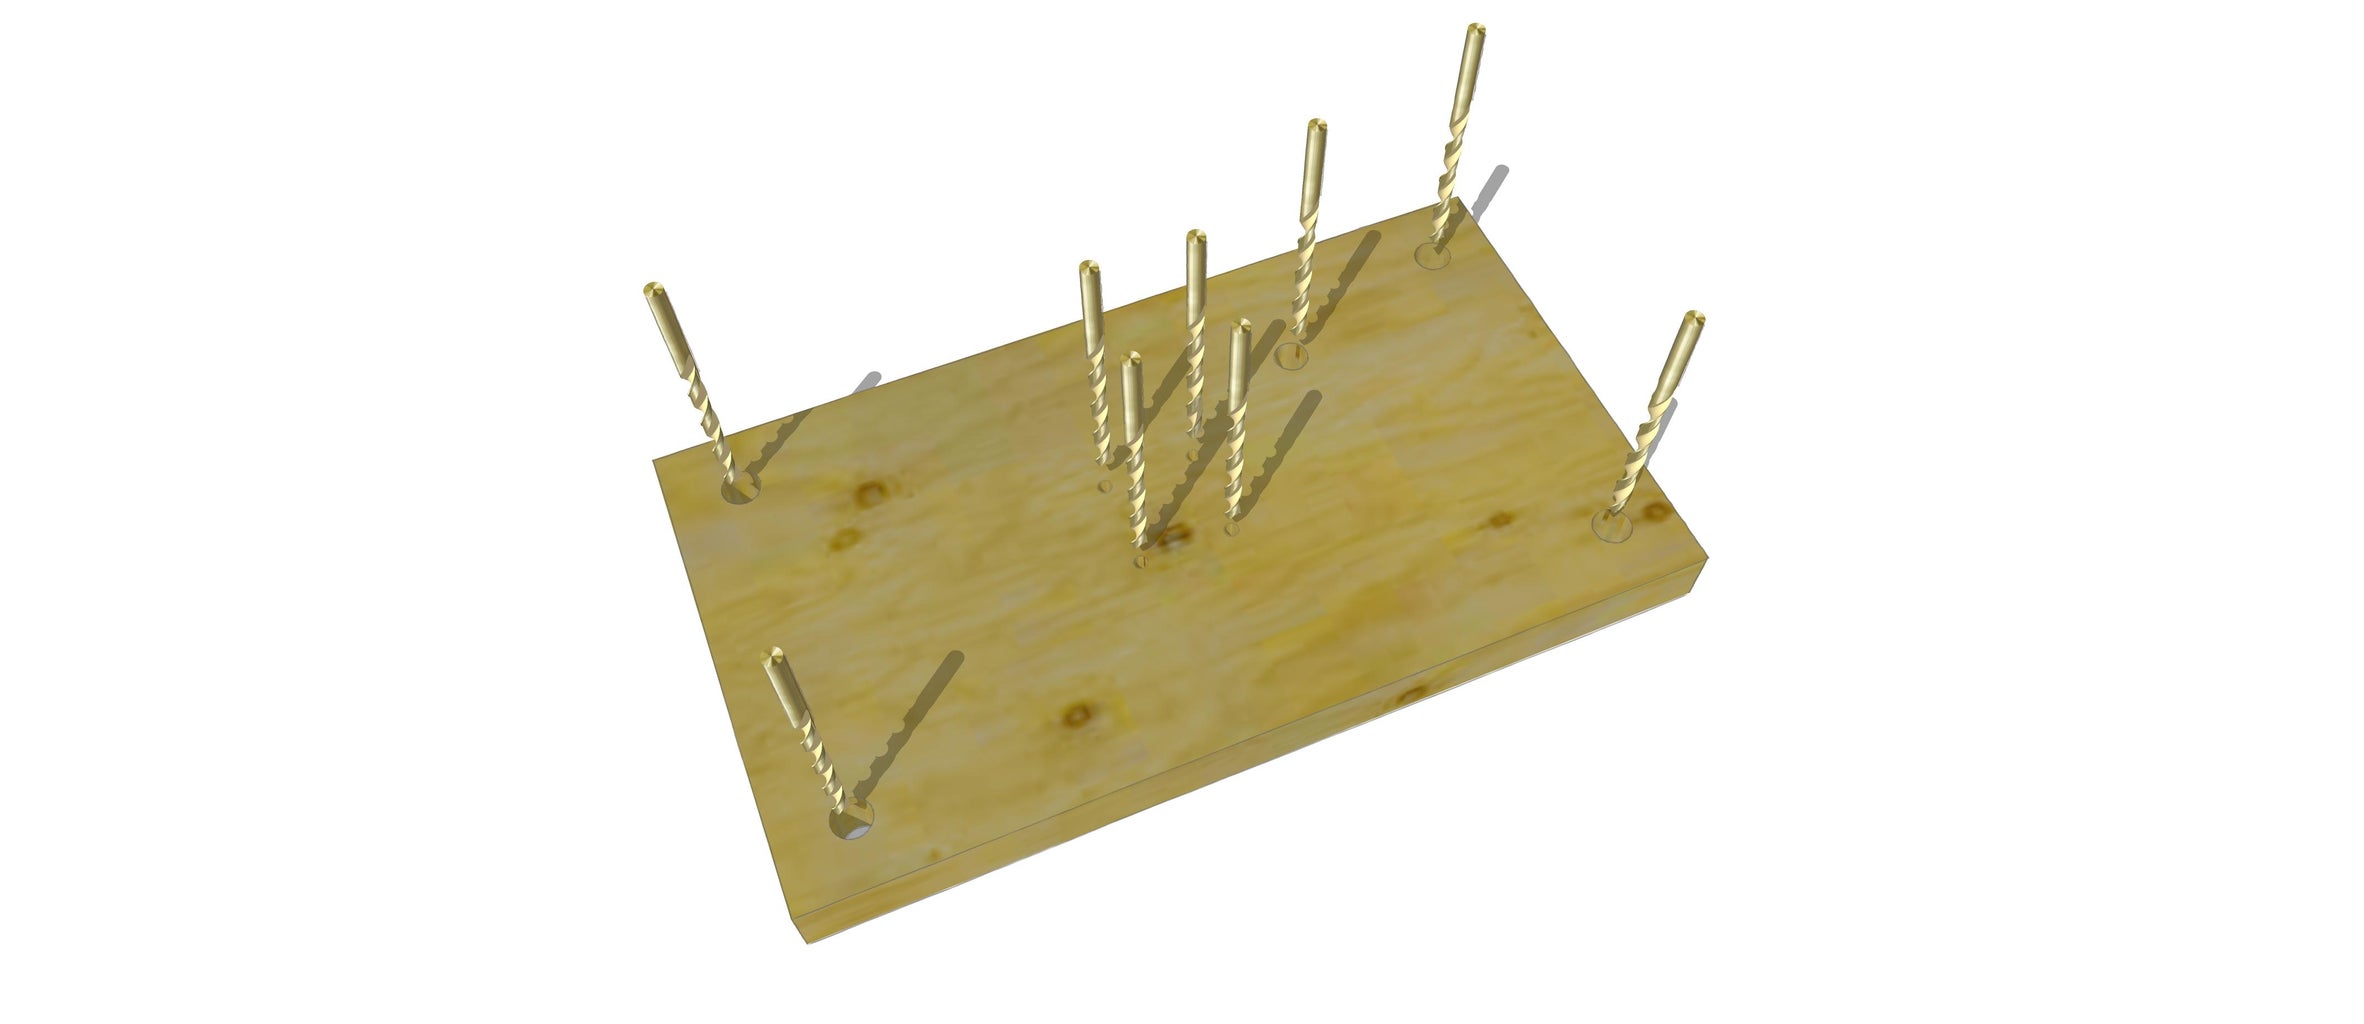
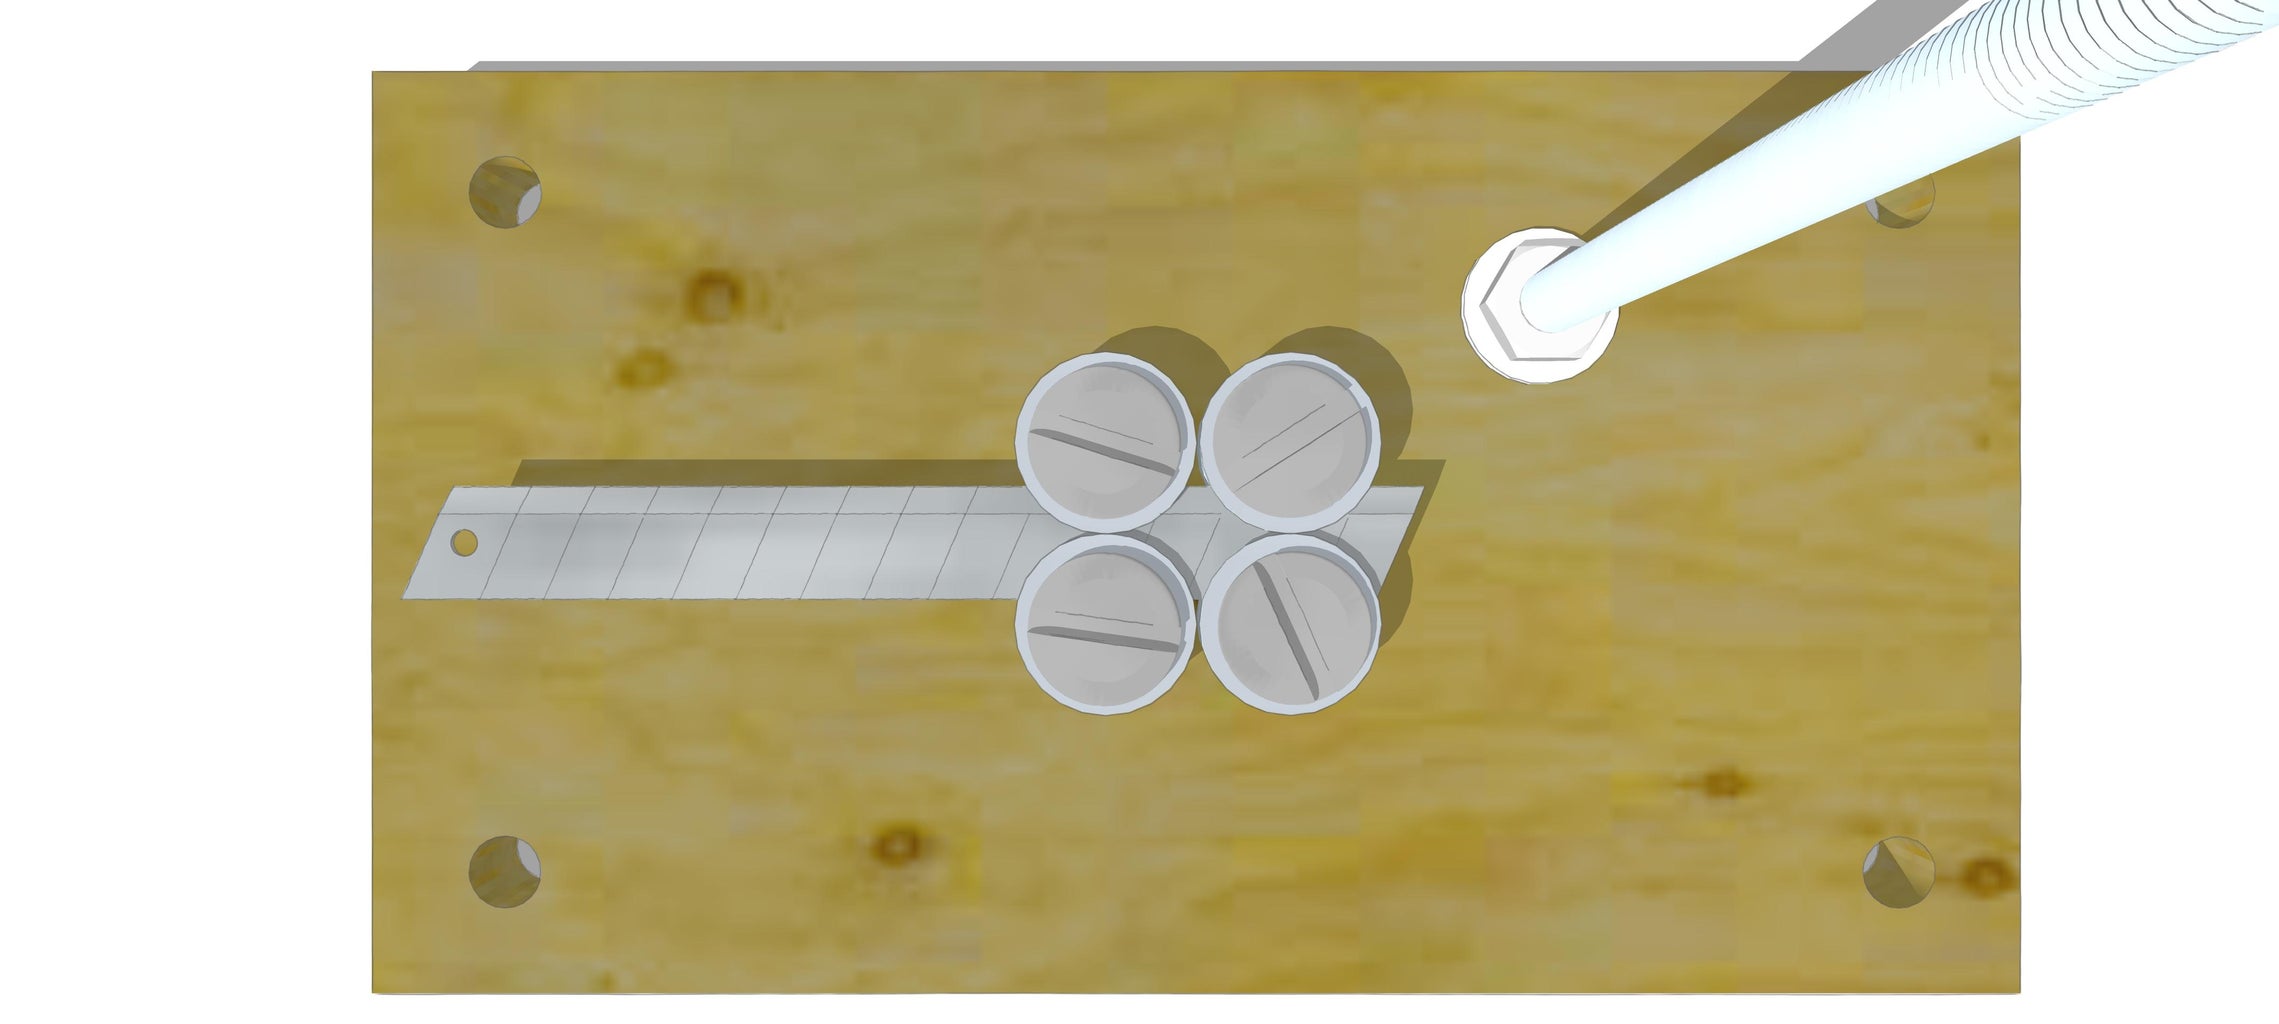


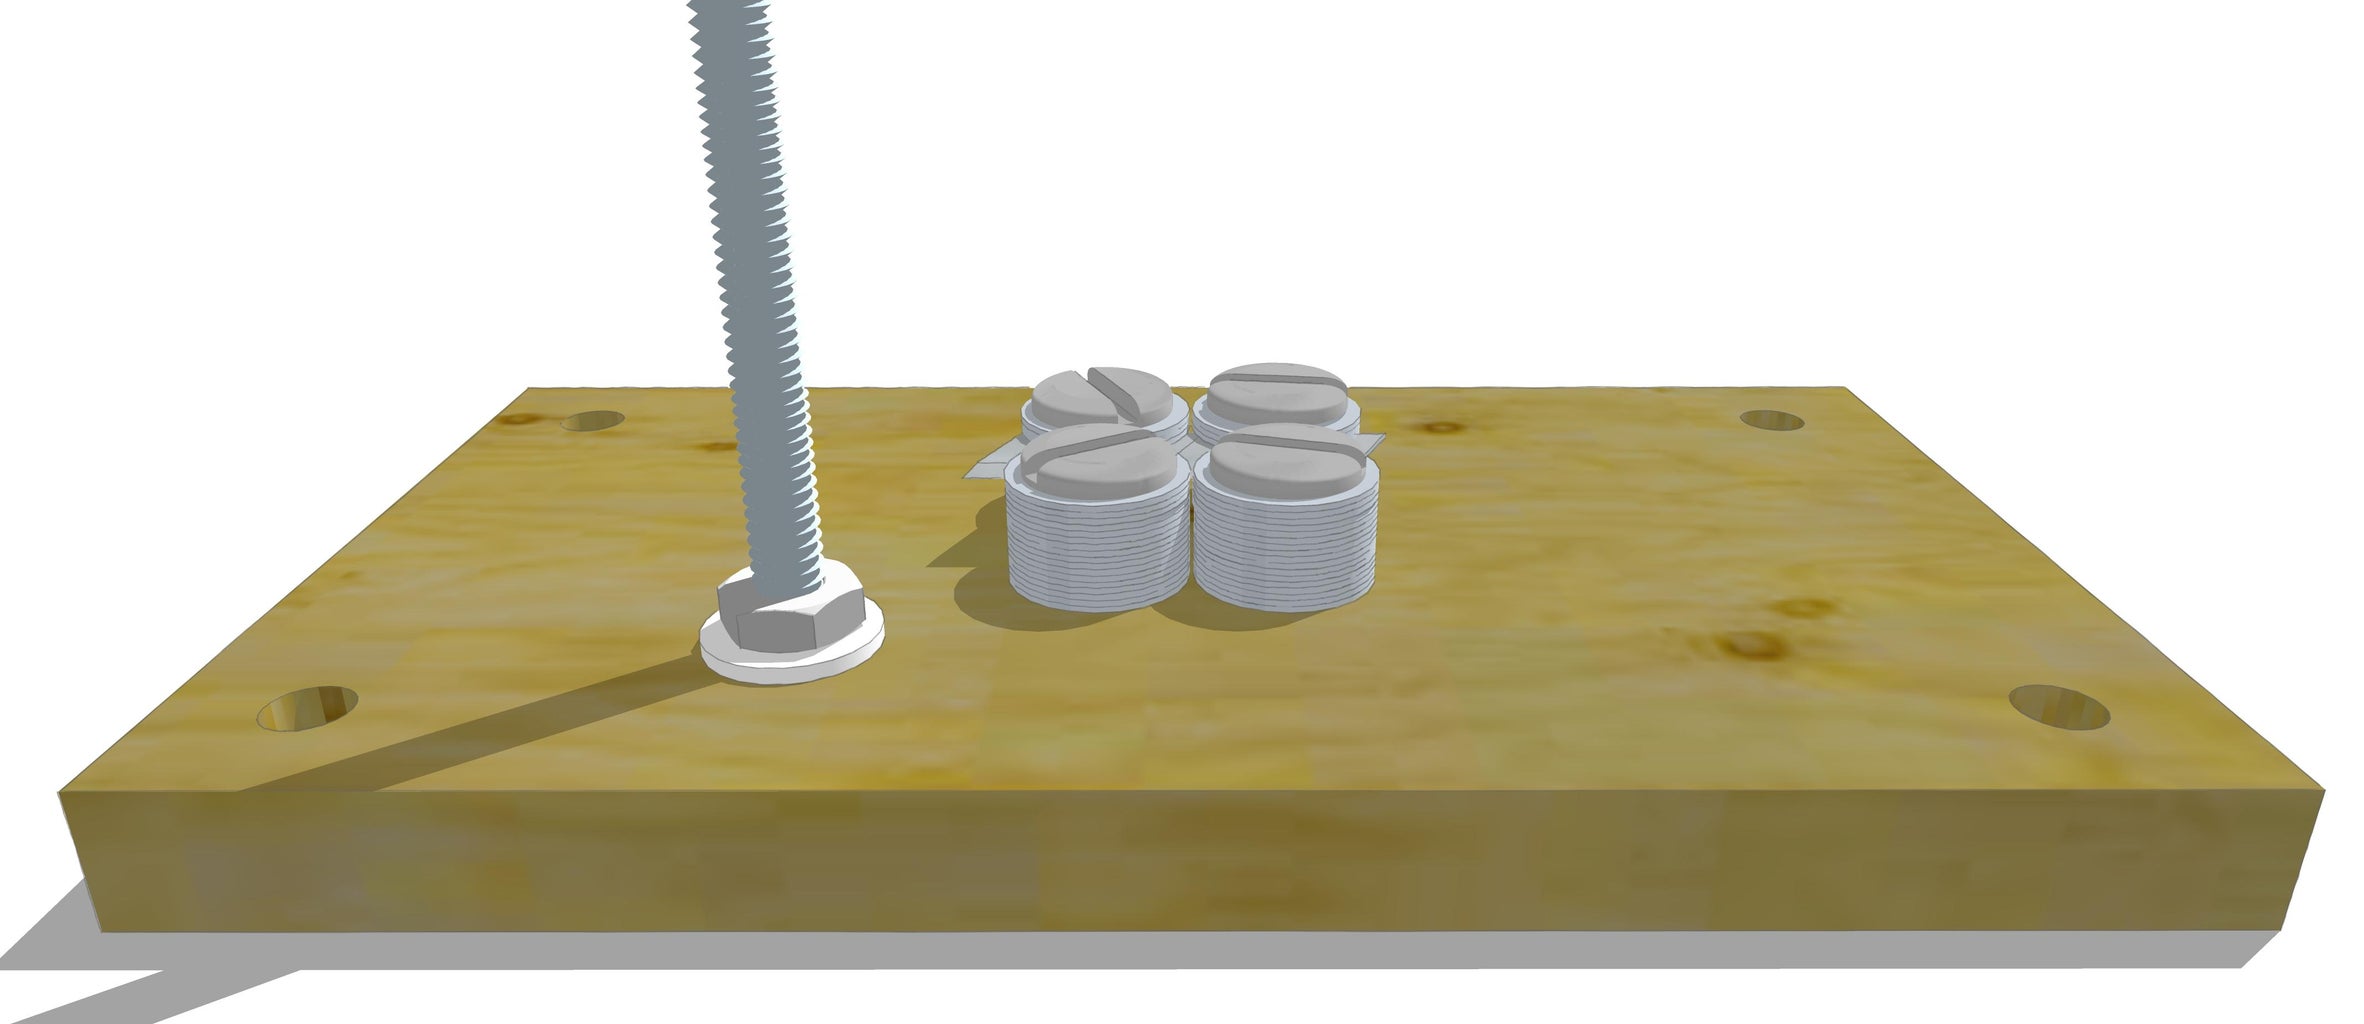

- Start by marking and drilling holes in a small board (~15x10x1cm).
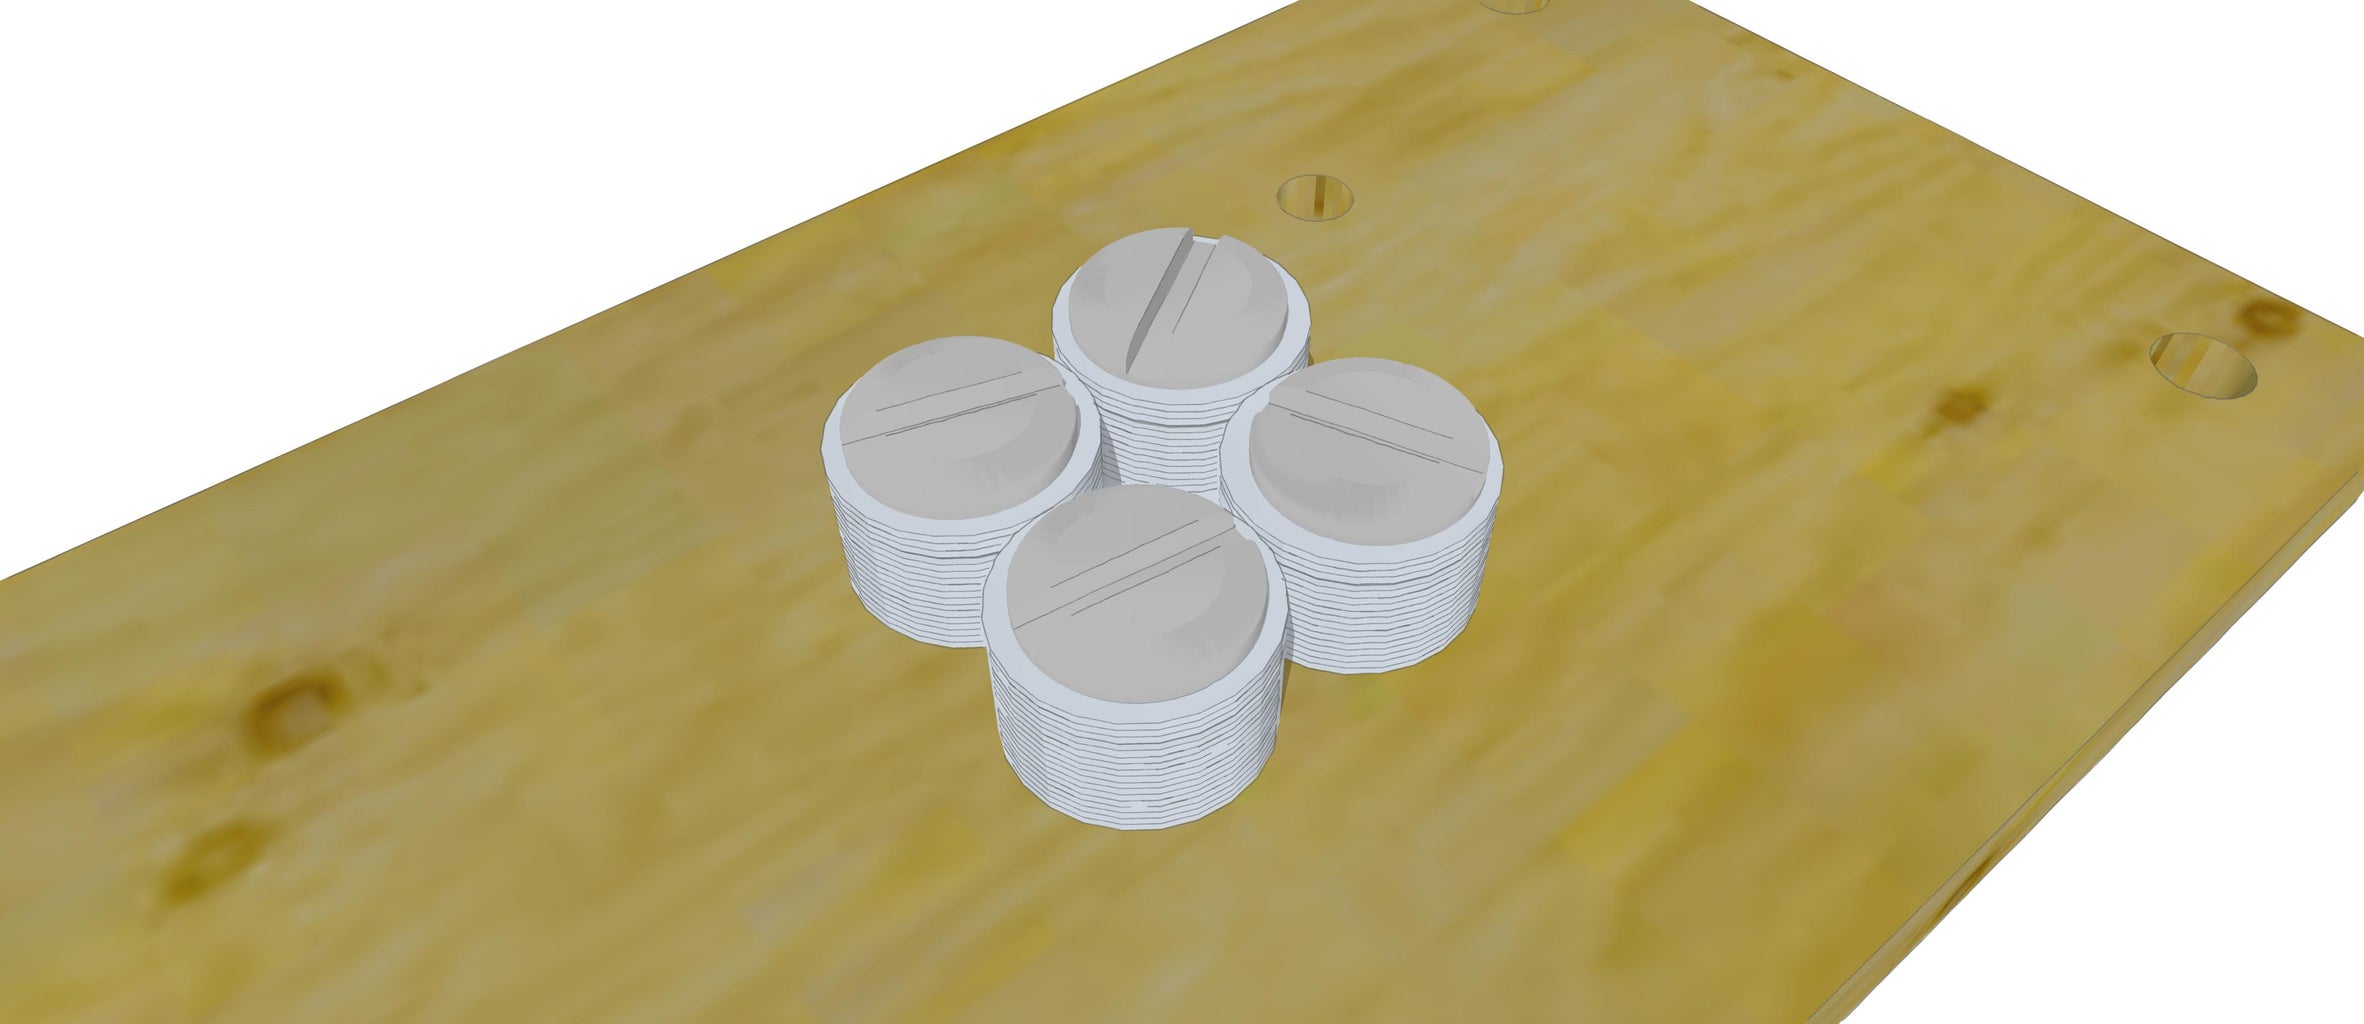
- Four holes located at the corners of the board will secure the bottle slicer to the surface of your choice, preferably a workbench.
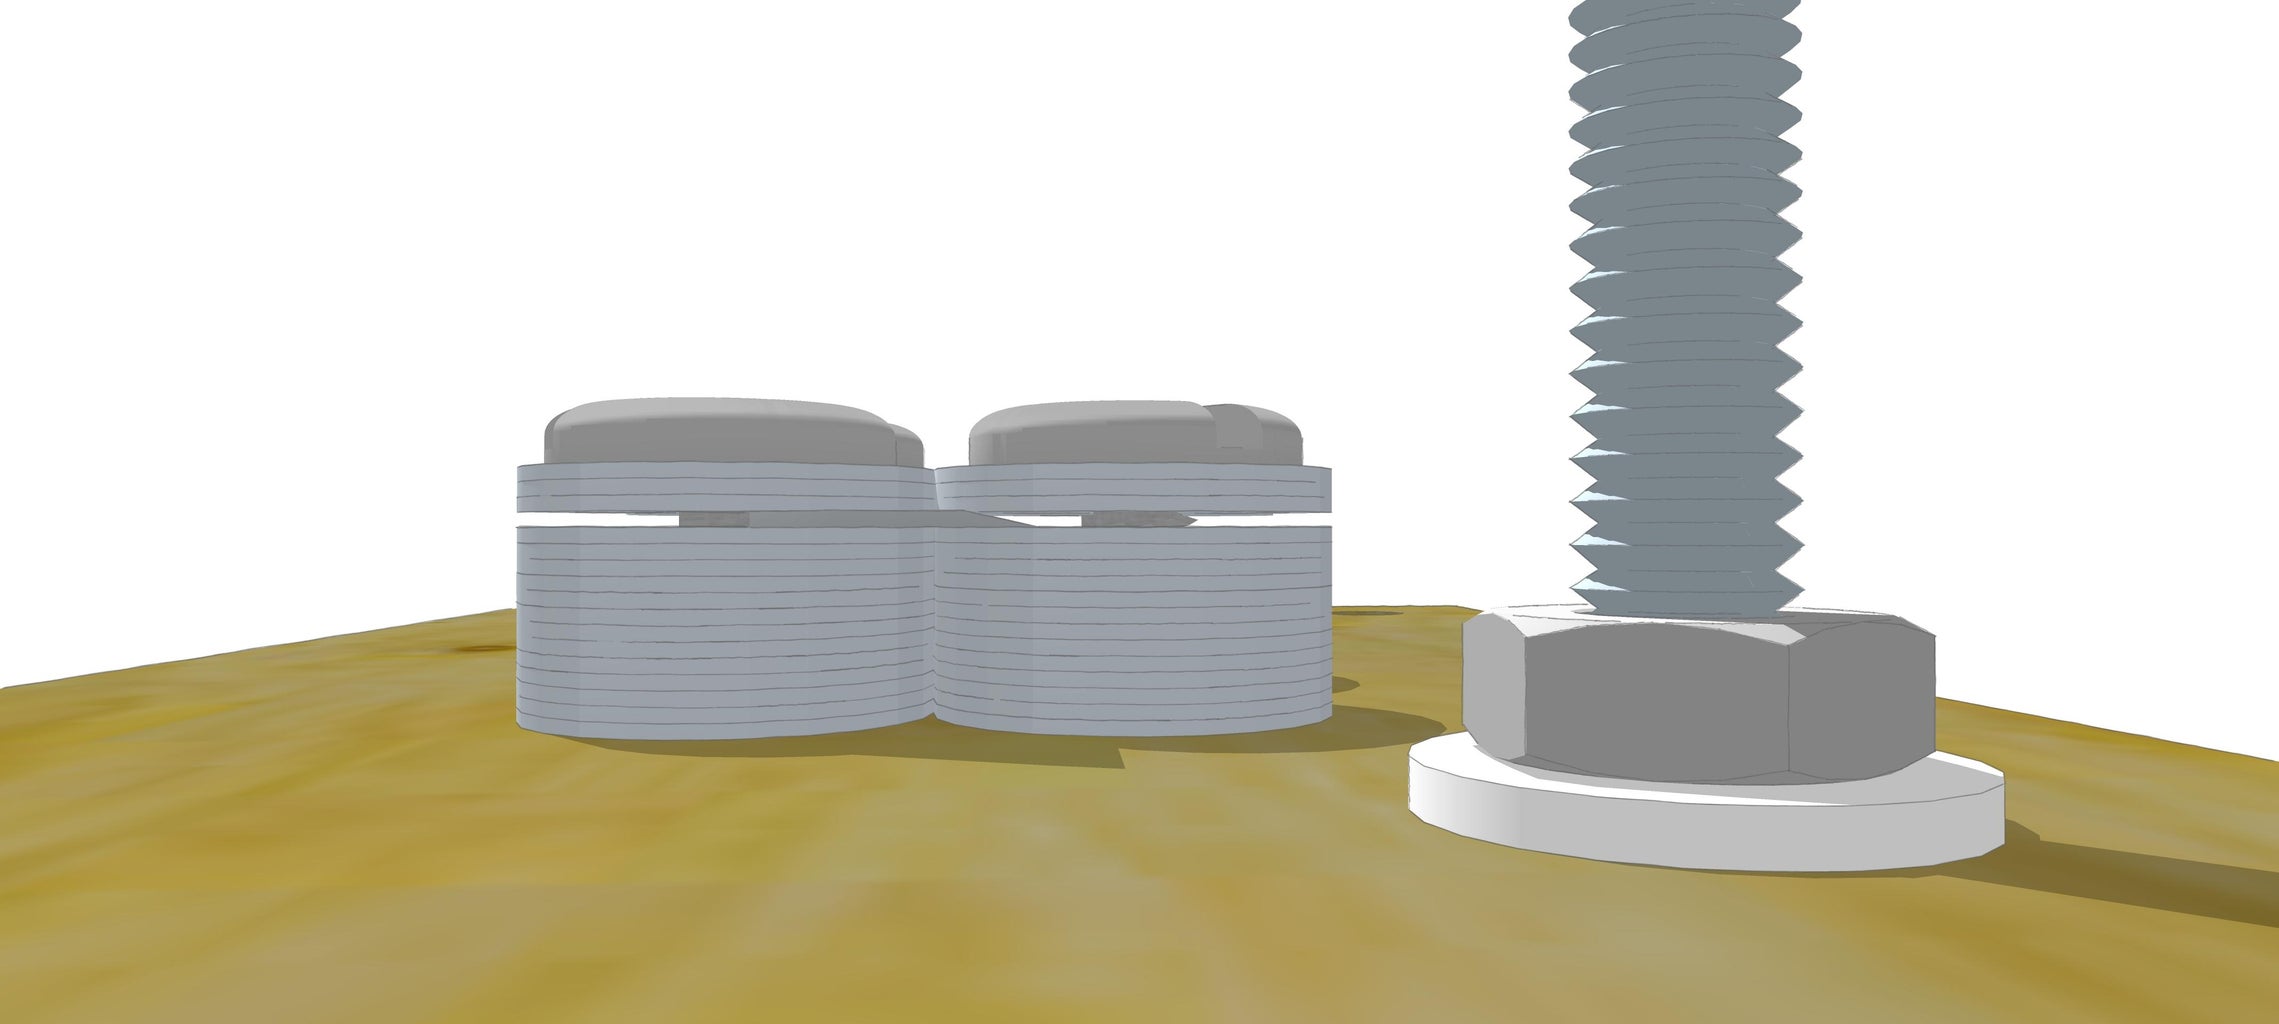
- Four holes in the center of the board will be for screwing the washers to the board. There should be approximately 1mm between the washers, which will allow the plastic to pass between them without bending, slanting or deforming.
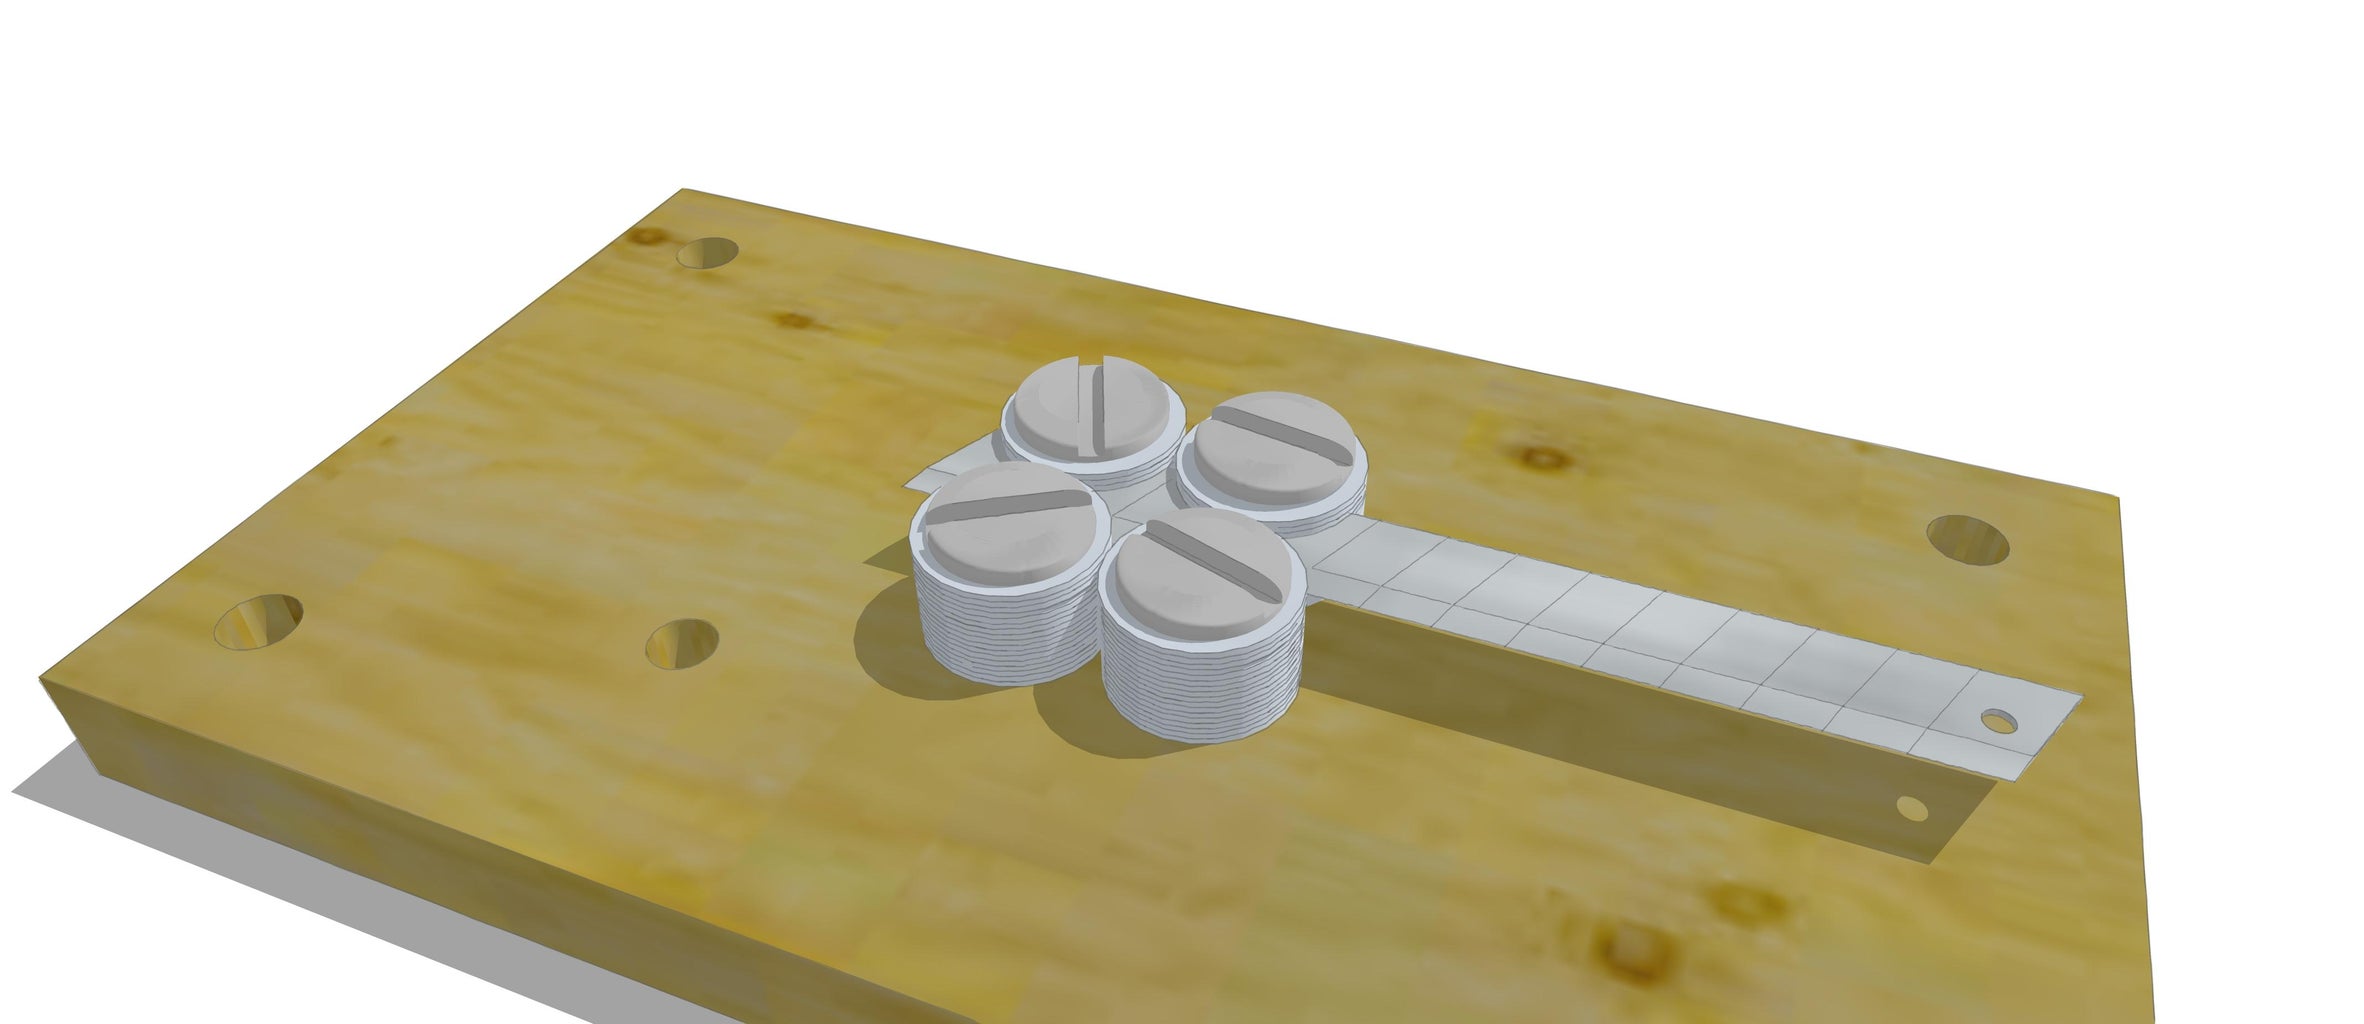
- One more hole should be drilled to the upper right or upper left of the washers for the threaded rod/steel rod/pipe/dowel/coat hanger be fixed to or sit in.
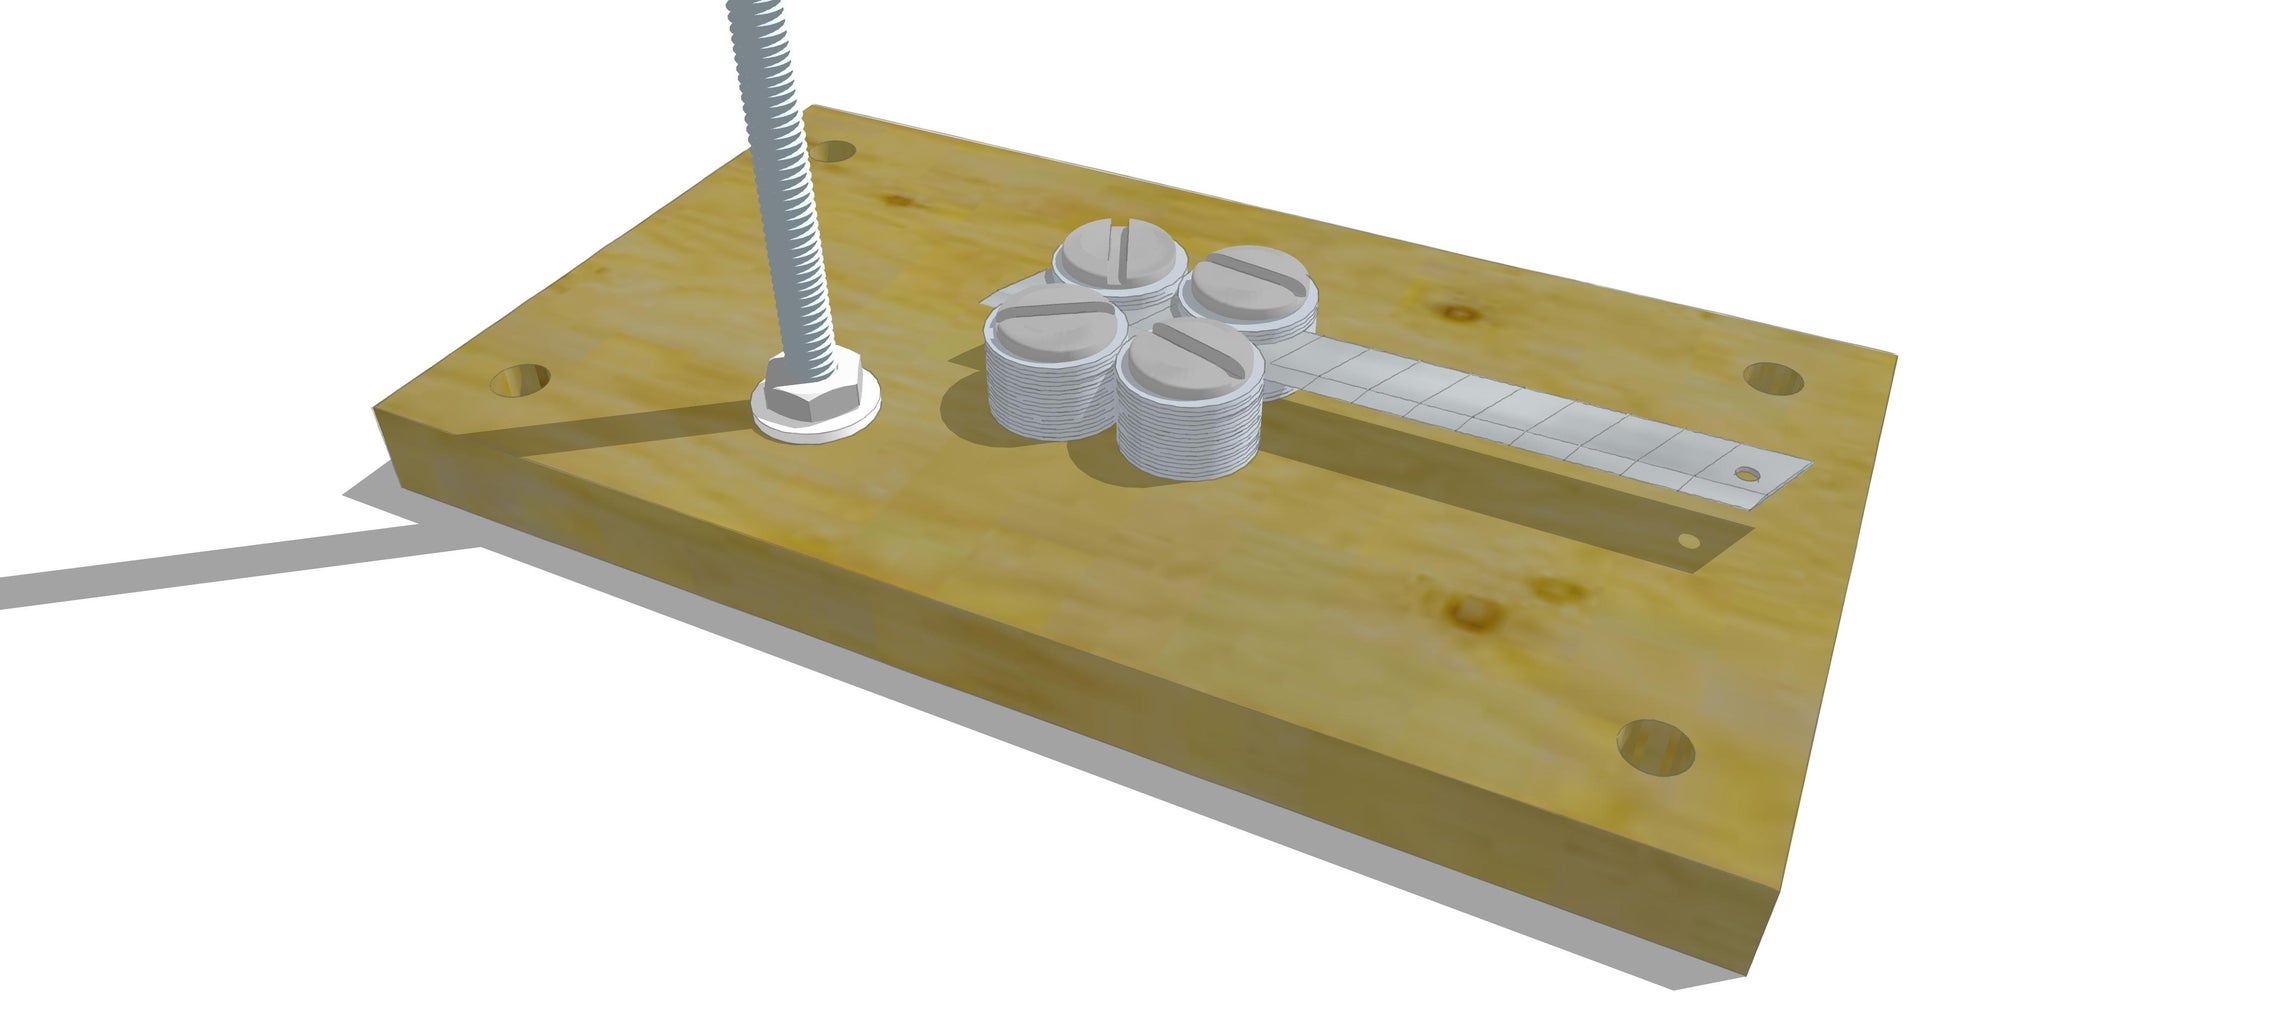
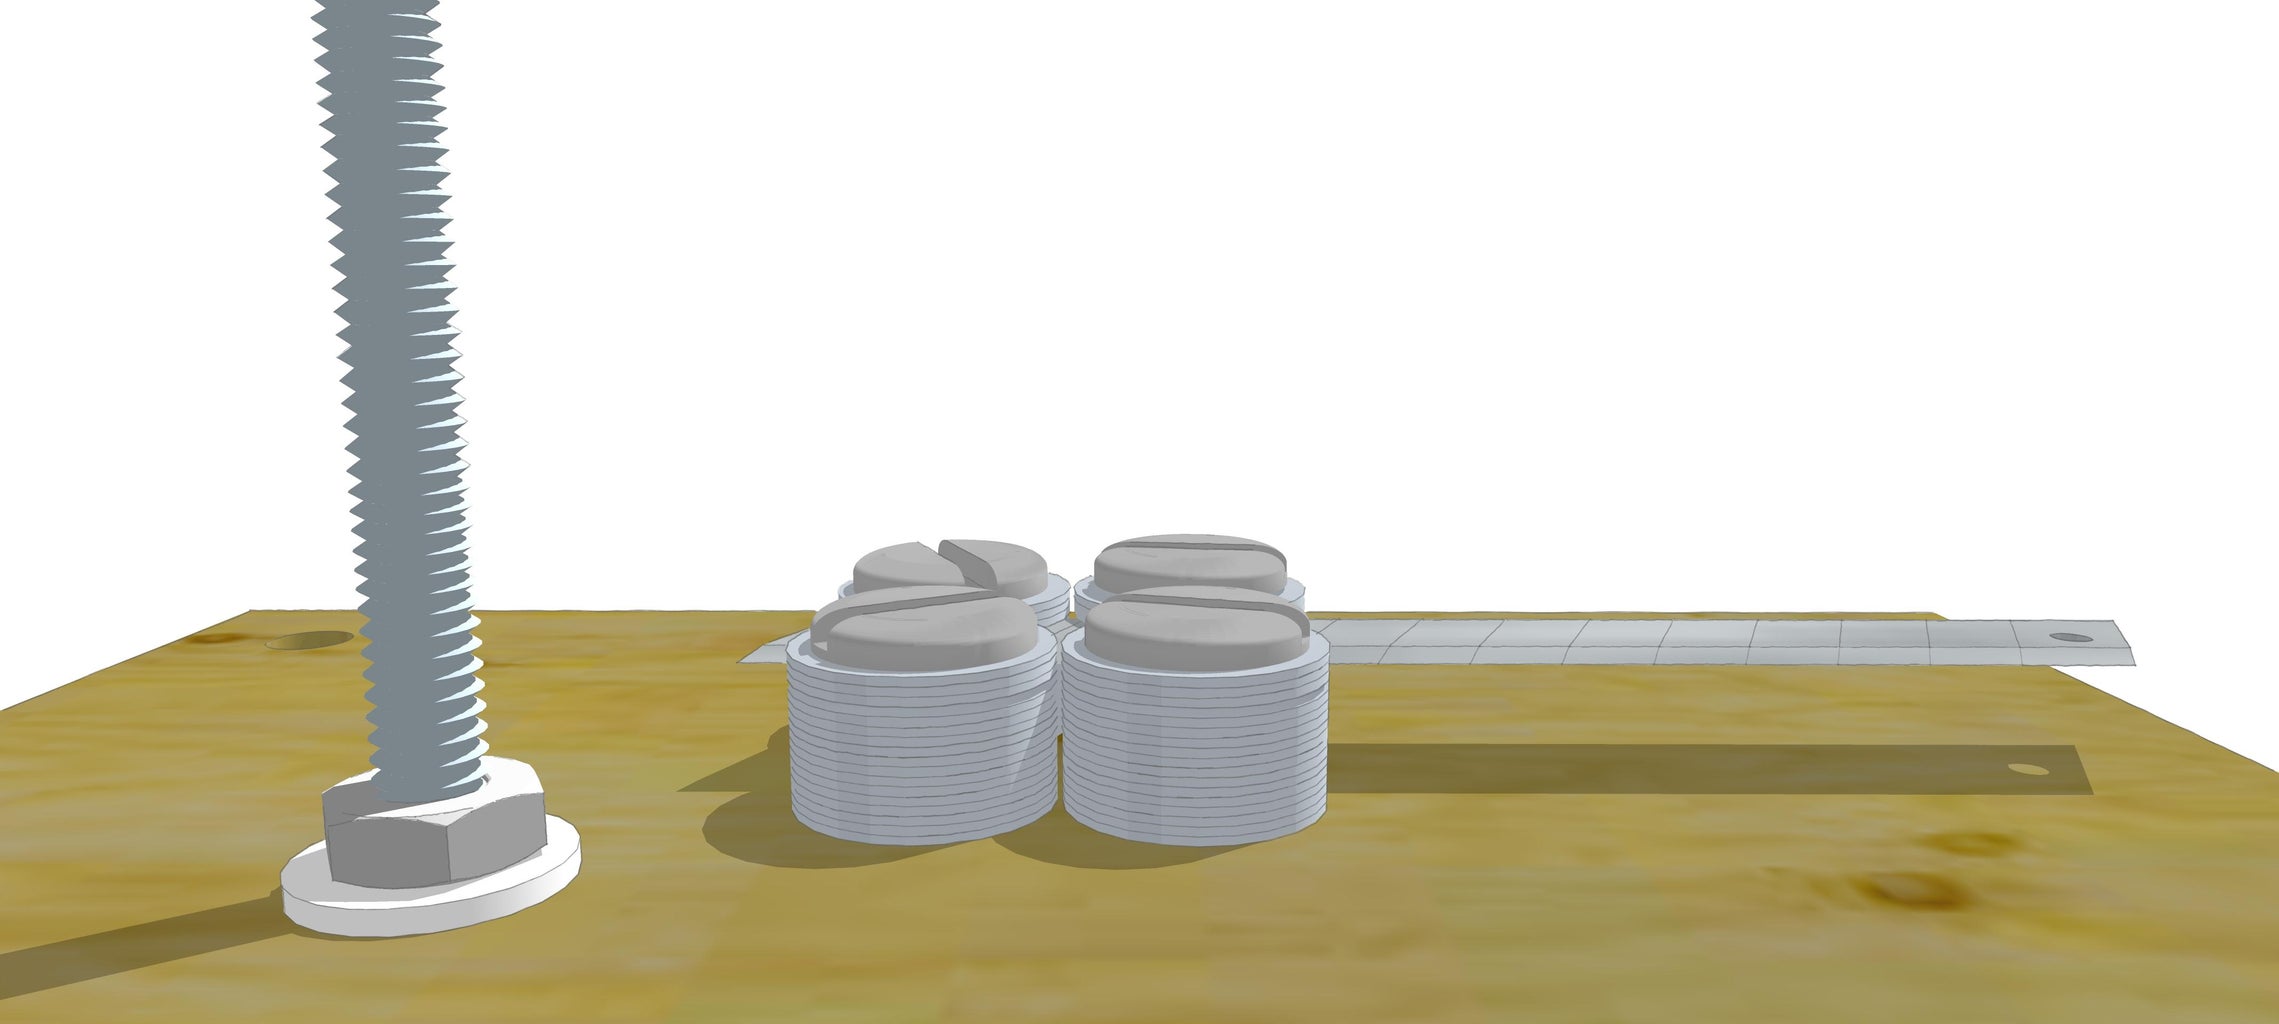
- Separate the washers into 4 even piles and loosely screw them to the board with the 4 screws.
- Be careful as you slide the box cutter blade into the pile at the desired height. Tighten the four screws to secure the blade.
- Break off any excess segments of blade that stick out beyond the washers to prevent frequent injuries.
- Fix the threaded rod/steel rod/pipe/dowel/coat hanger to the board, and if possible bend it towards the midpoint of the board's edge.
- Use the 4 holes at the corner of the board to screw it to your working surface, or alternatively clamp it to your working surface.
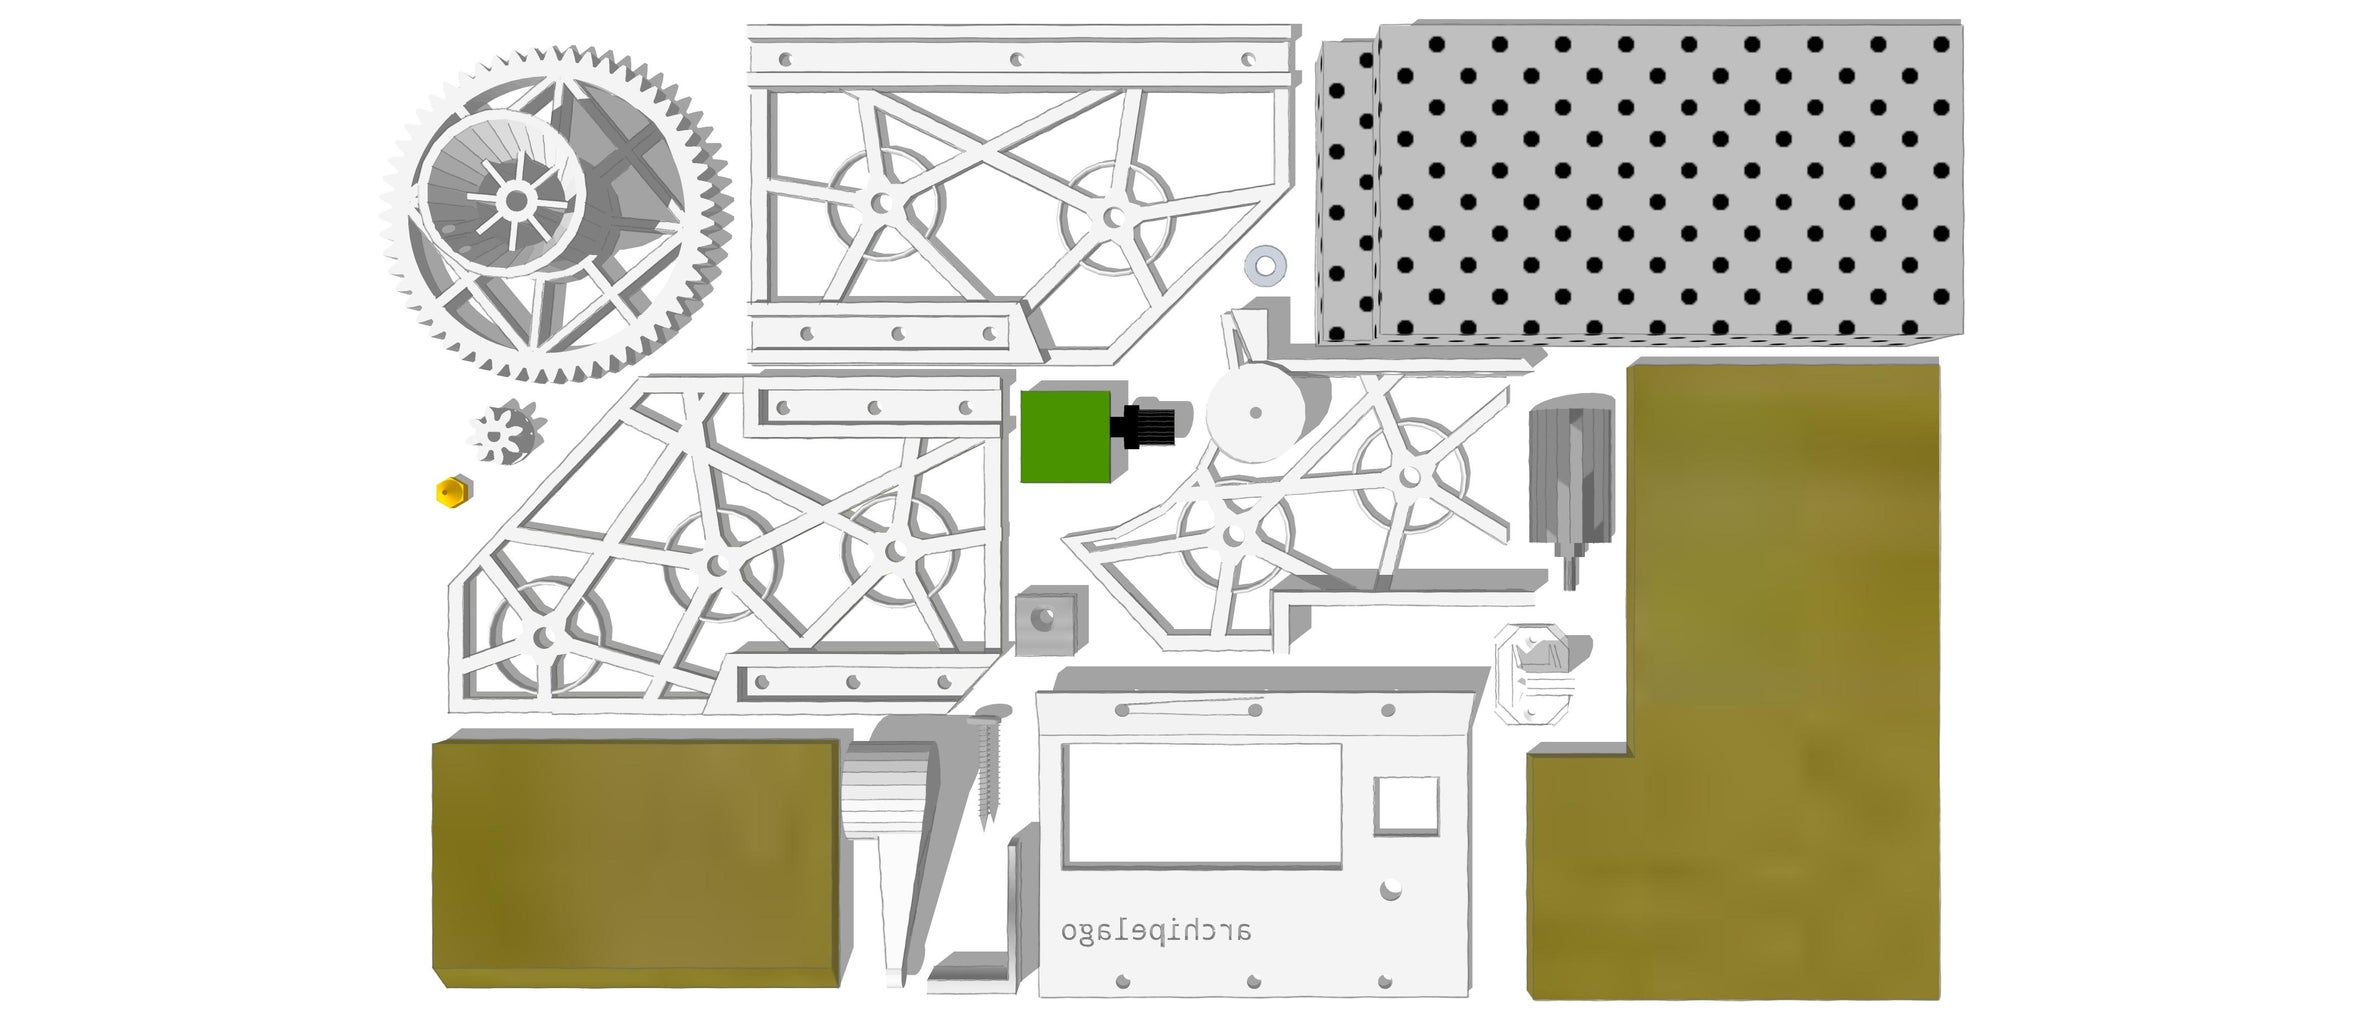
Step 2: Print the Parts for Your Filament Extruder
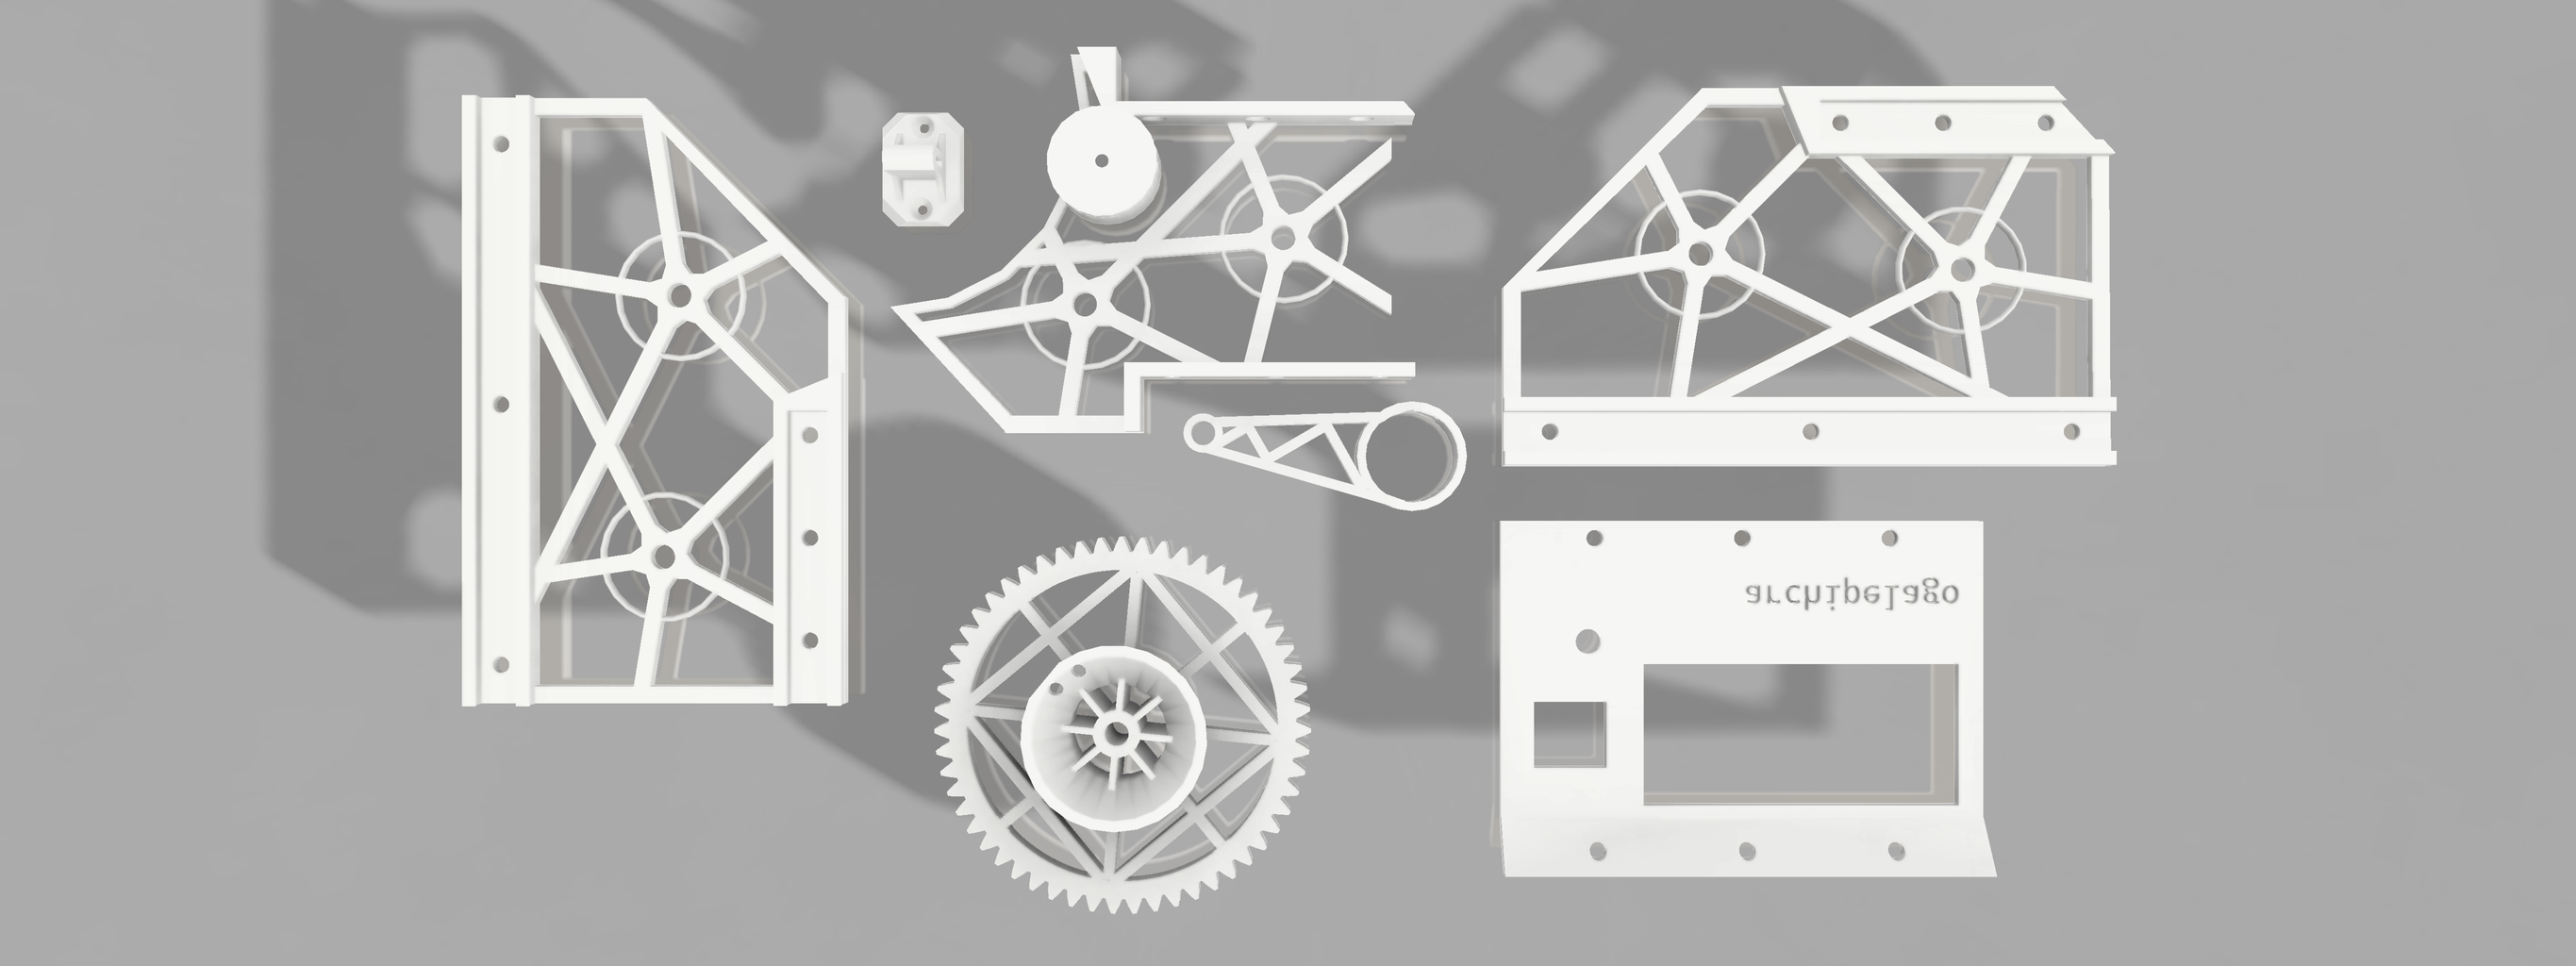
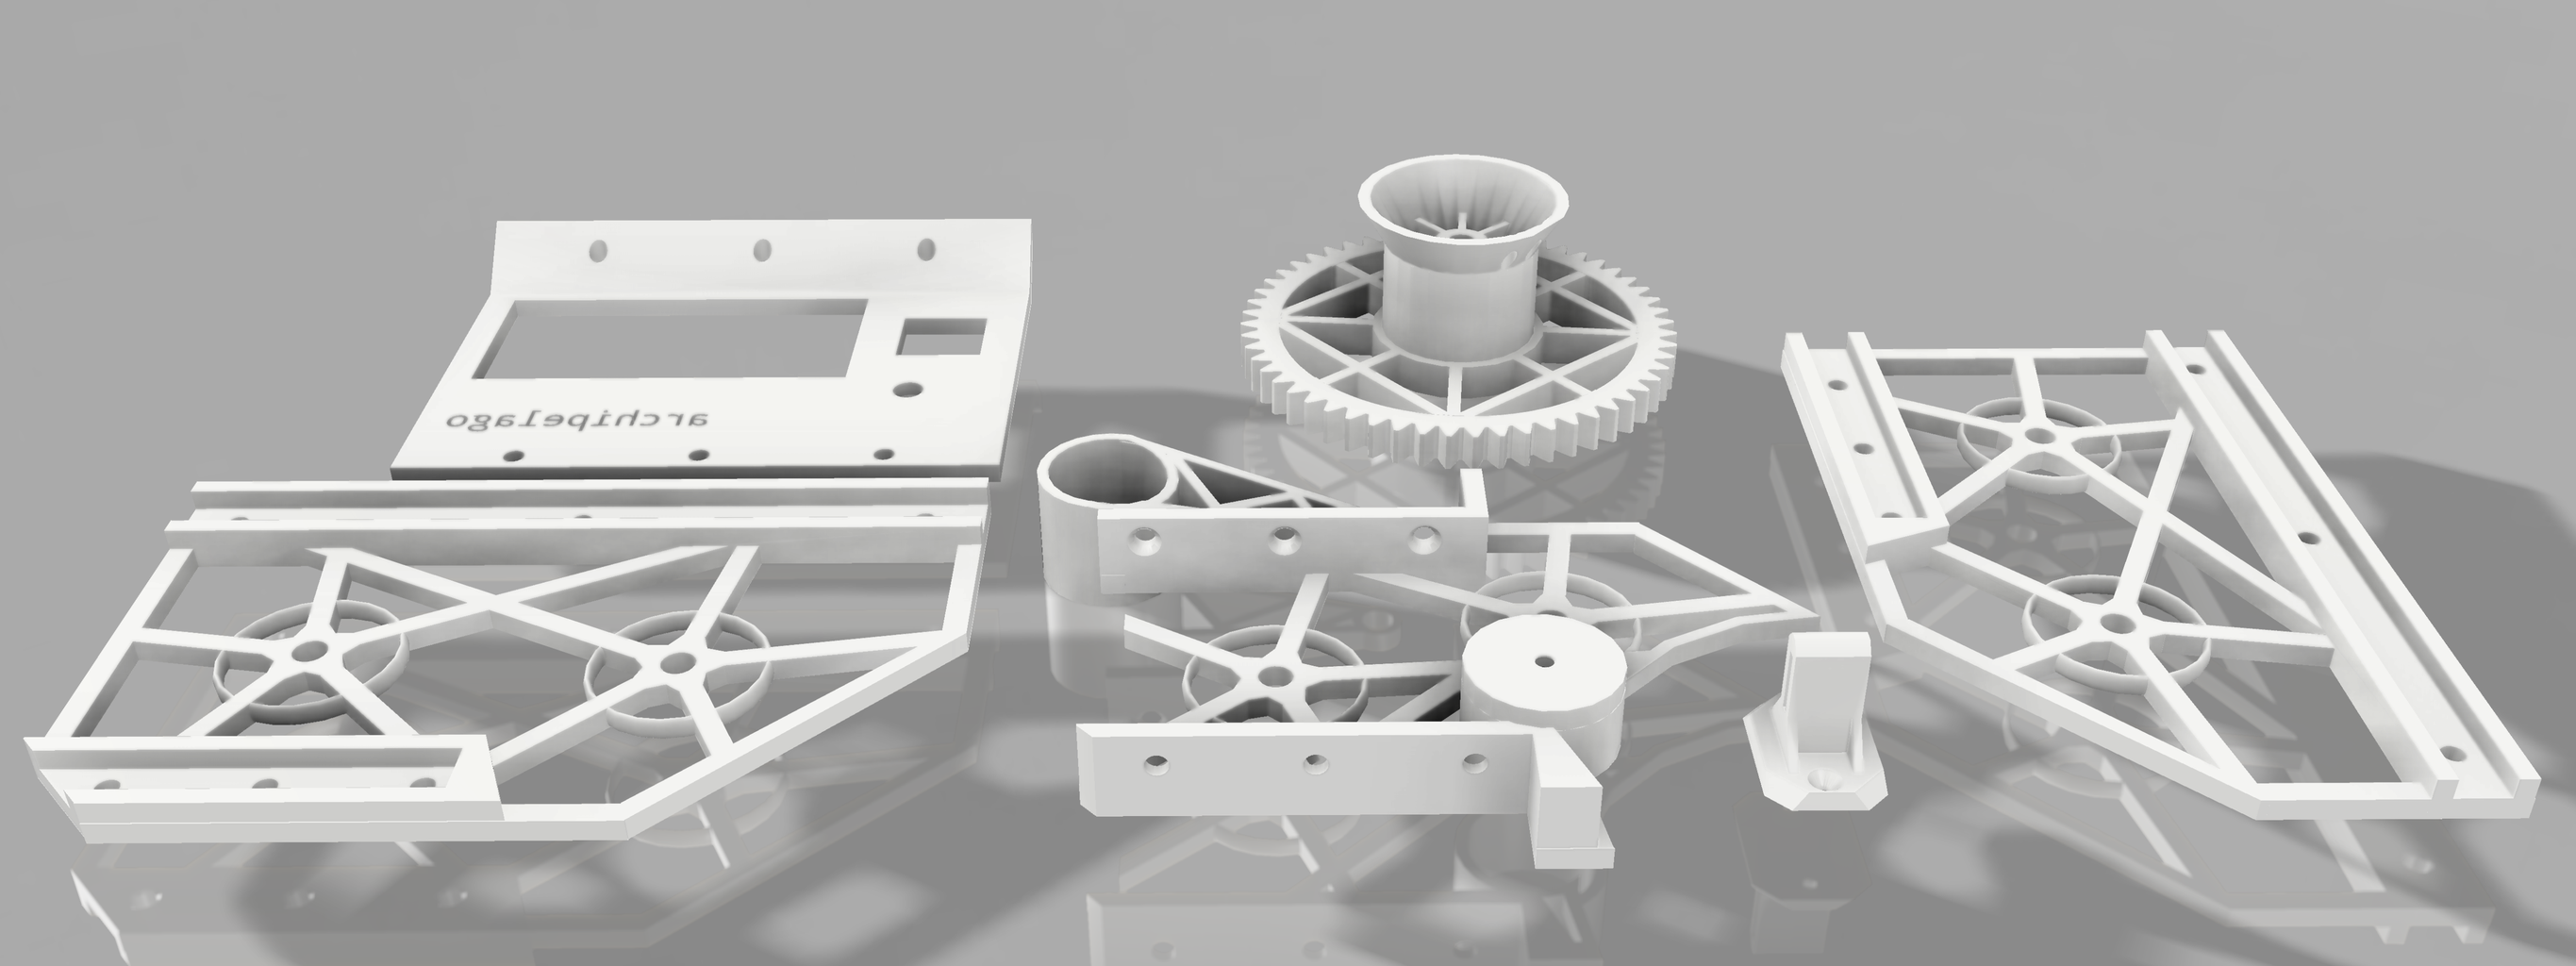
The parts for the filament extruder have all been made with Fusion360. Download and print them in order to assemble the Archipelago PET filament extruder. The models can be downloaded as either .F3D or .STL file types, for your convenience.
*Recommended 50%(or more) infill for the gears and left frame section. Other printed parts can be printed at 20% infill.
Attachments
 Archipelago Big Gear Bobbin.stl
- Archipelago Bobbin Support Arm.stl
- Archipelago Extruder Faceplate.stl
- Archipelago Extruder Frame (center).stl
- Archipelago Extruder Frame (left).stl
- Archipelago Extruder Frame (right).stl
- Archipelago PET Strip Guide.stl
- Archipelago Bobbin Support Arm.f3d
- Archipelago Extruder Frame Center.f3d
- Archipelago Extruder Frame Left.f3d
- Archipelago Extruder Frame Right.f3d
- Archipelago_Strip_Guide.f3d
- Big Bobbin Gear.f3d
- Faceplate.f3d


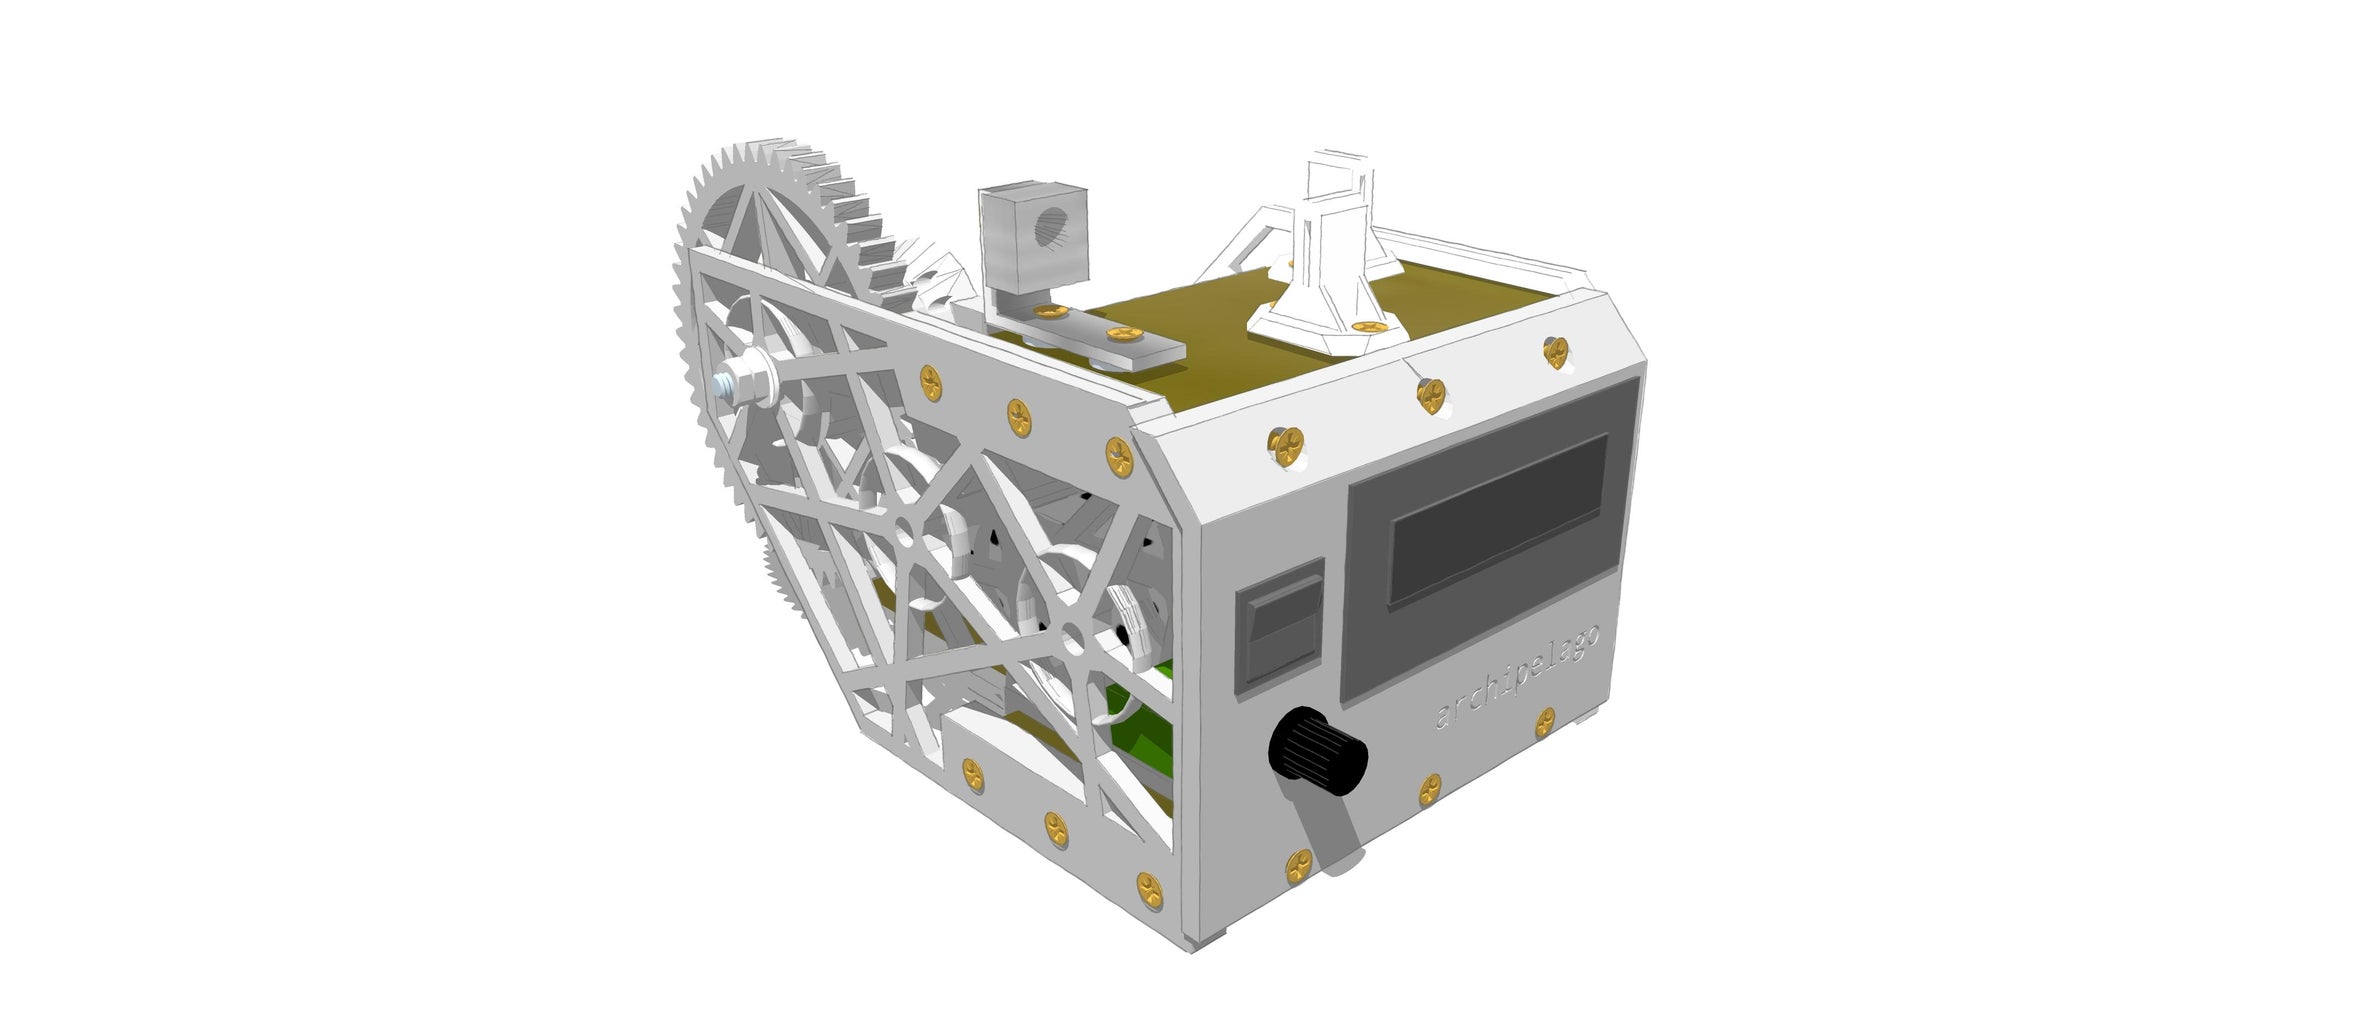
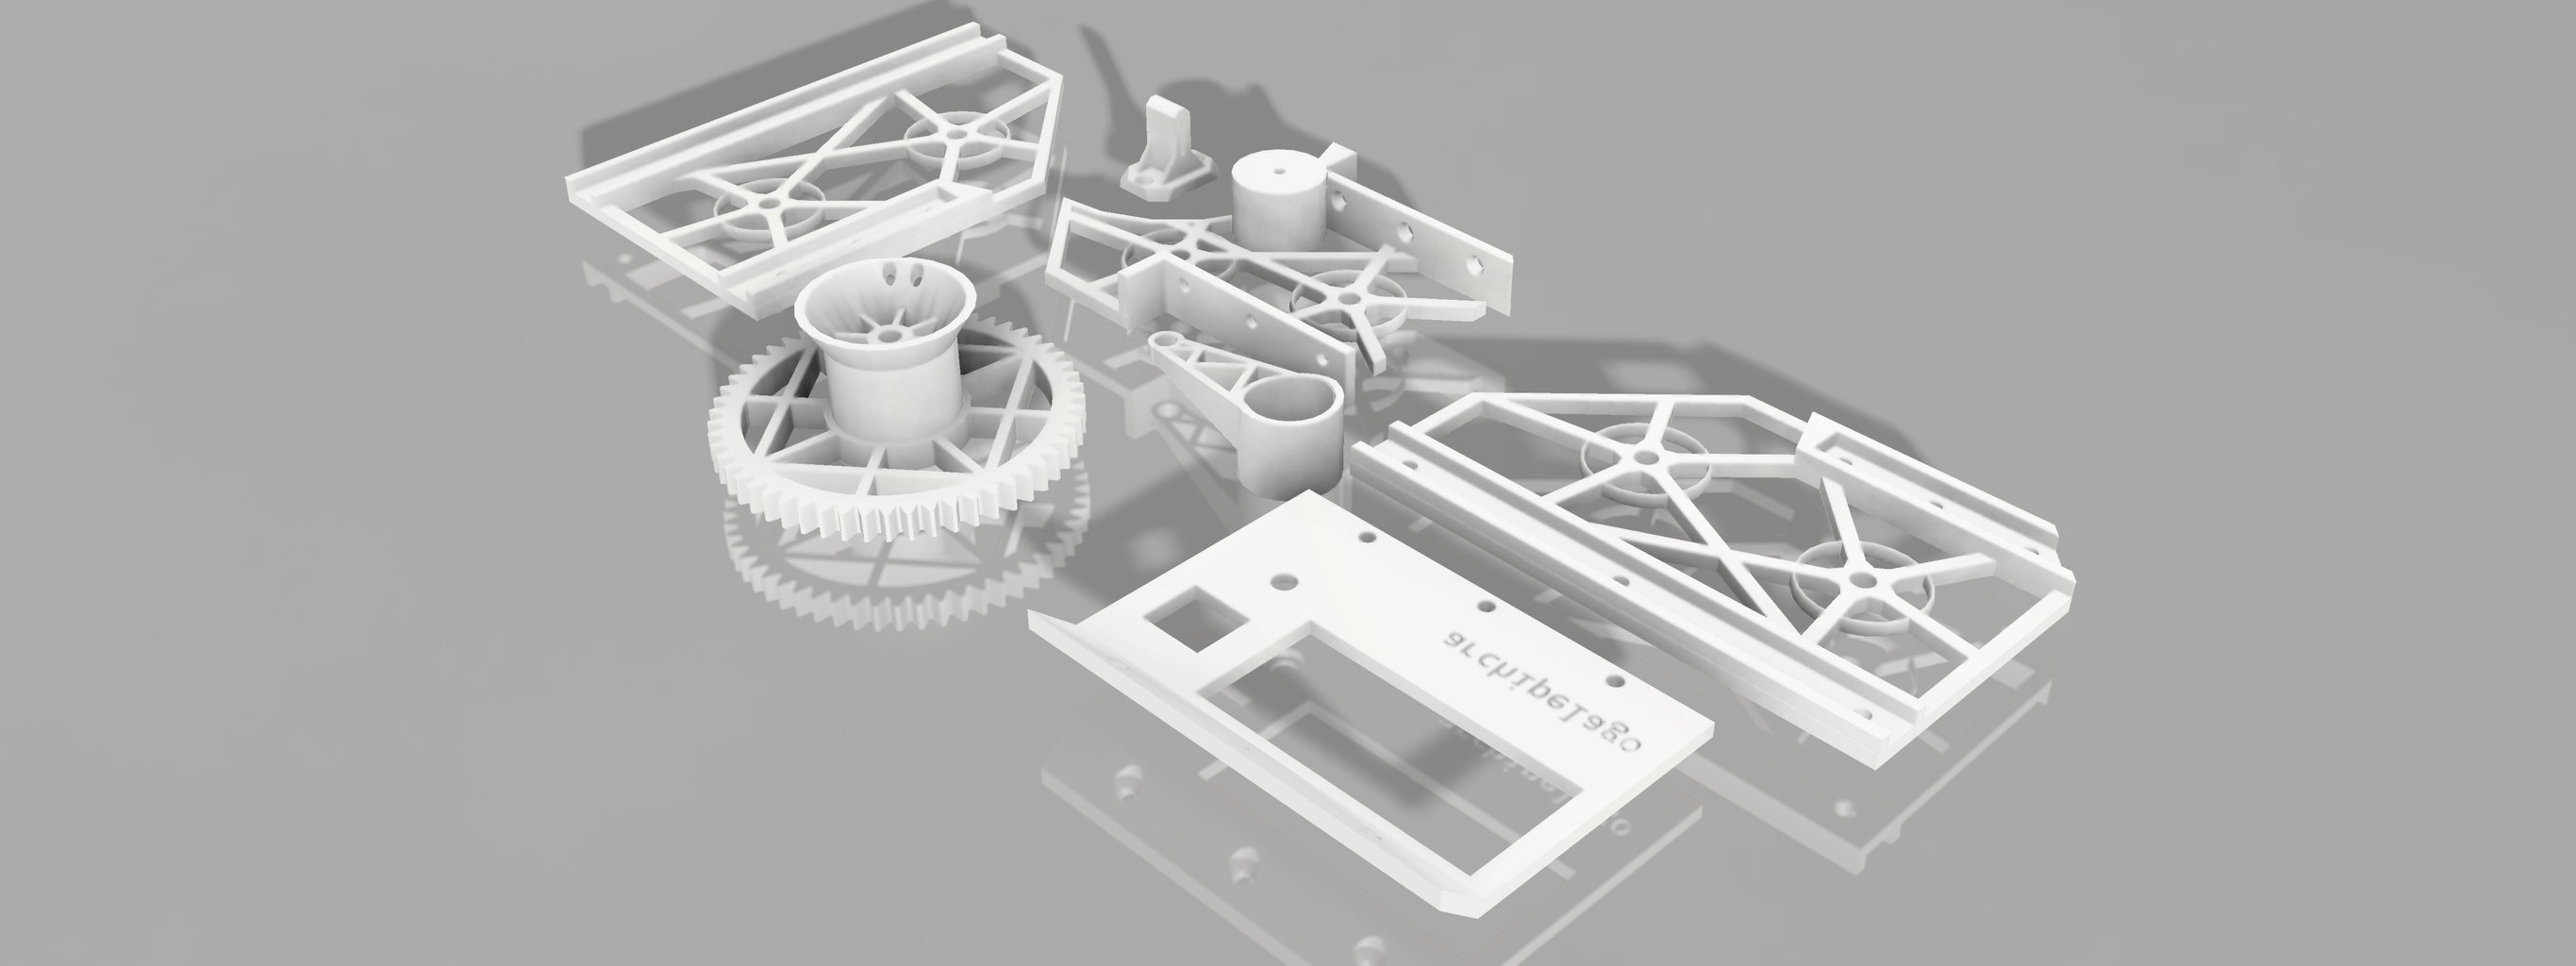
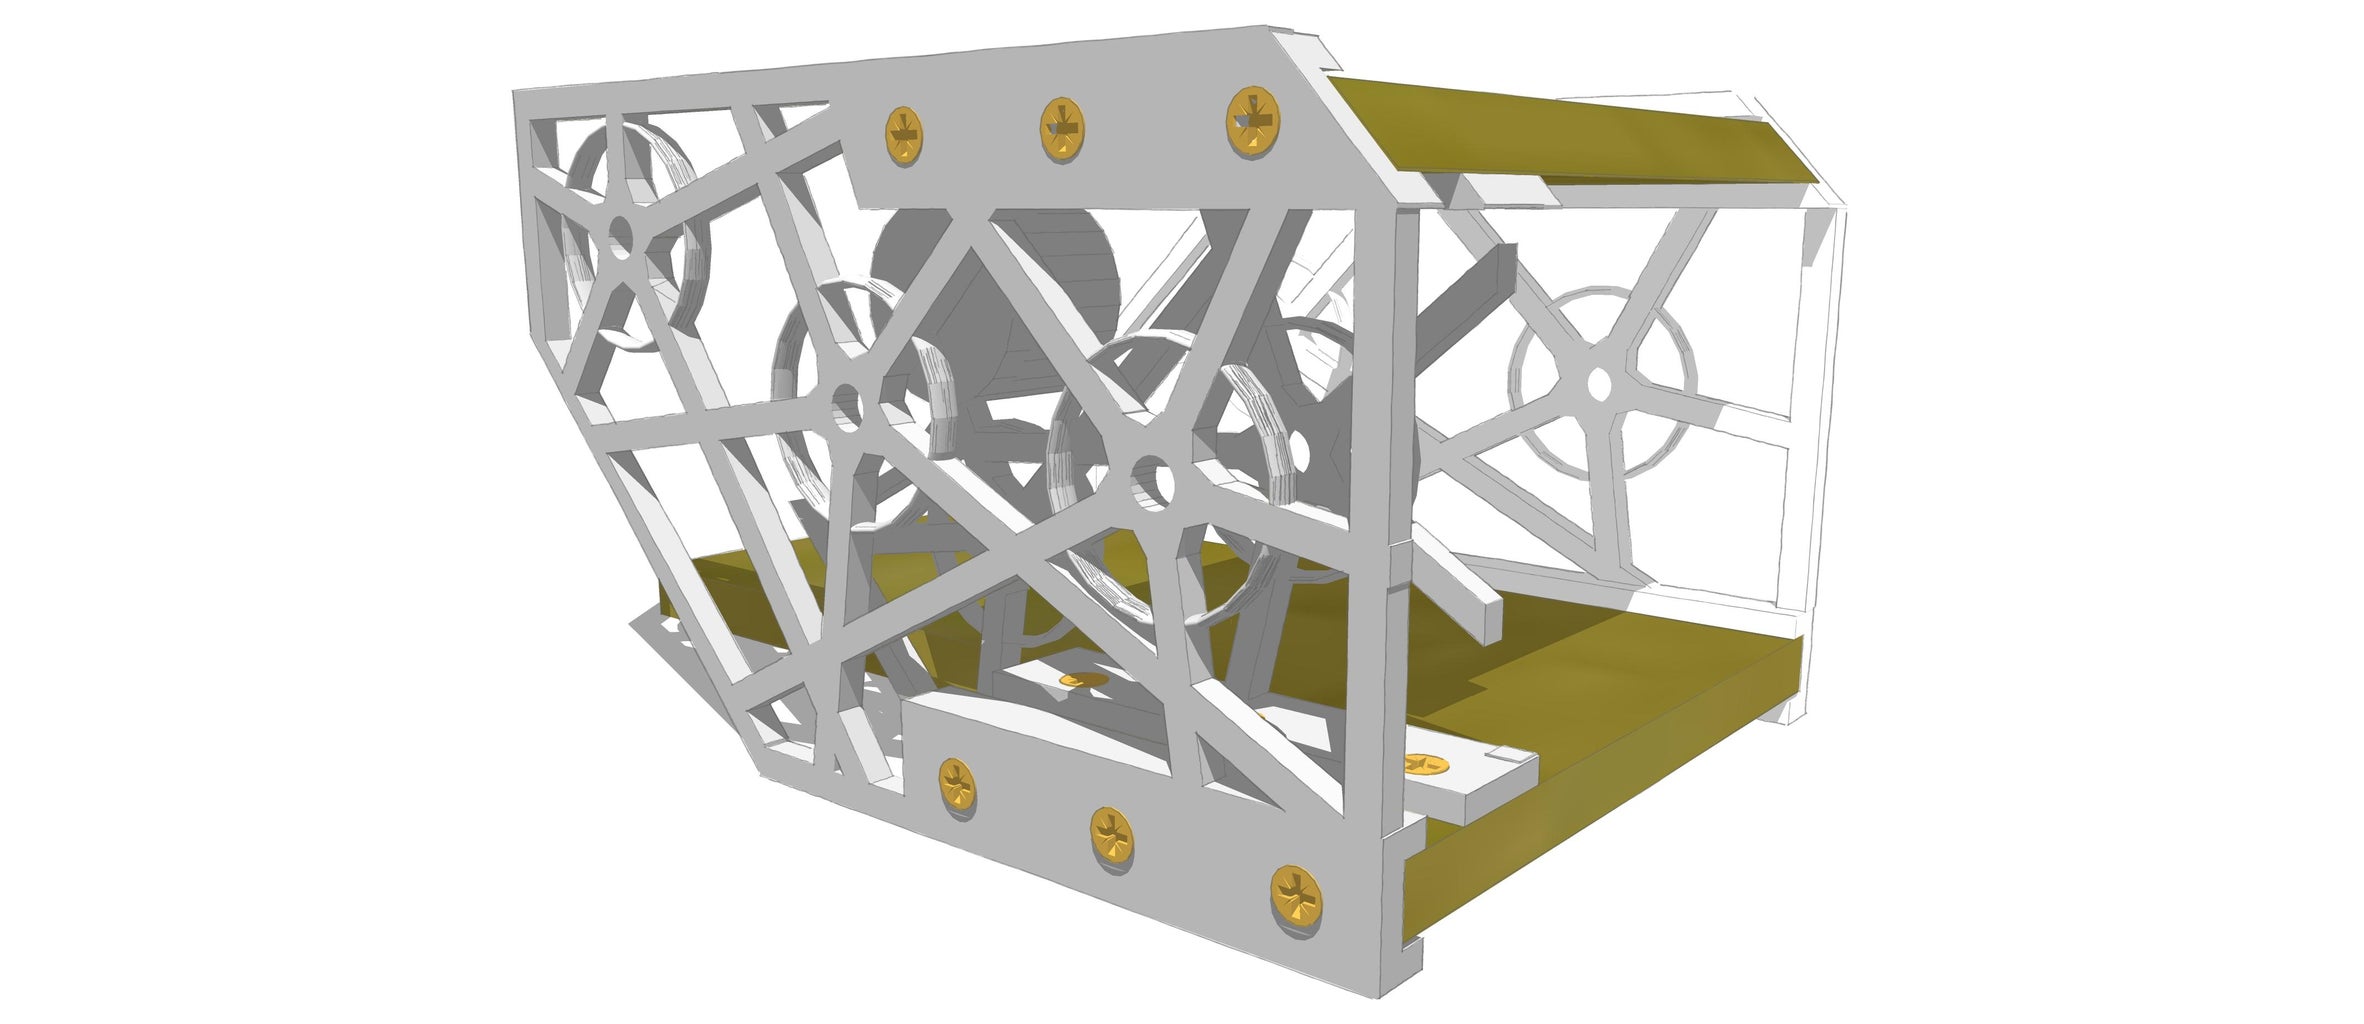
Step 3: Assemble the Filament Extruder (mostly)


*Redrill the .04mm hole in the extruder nozzles to be 1.75mm.
**Grind a cone shaped cavity into the heating block, while still leaving threads so that the extruder nozzle can attach to it, and then fit the sensor and heating resistor into the heating block.
***If you find alternative parts or buy from different suppliers, make sure the dimensions and specifications are the same as the parts listed.
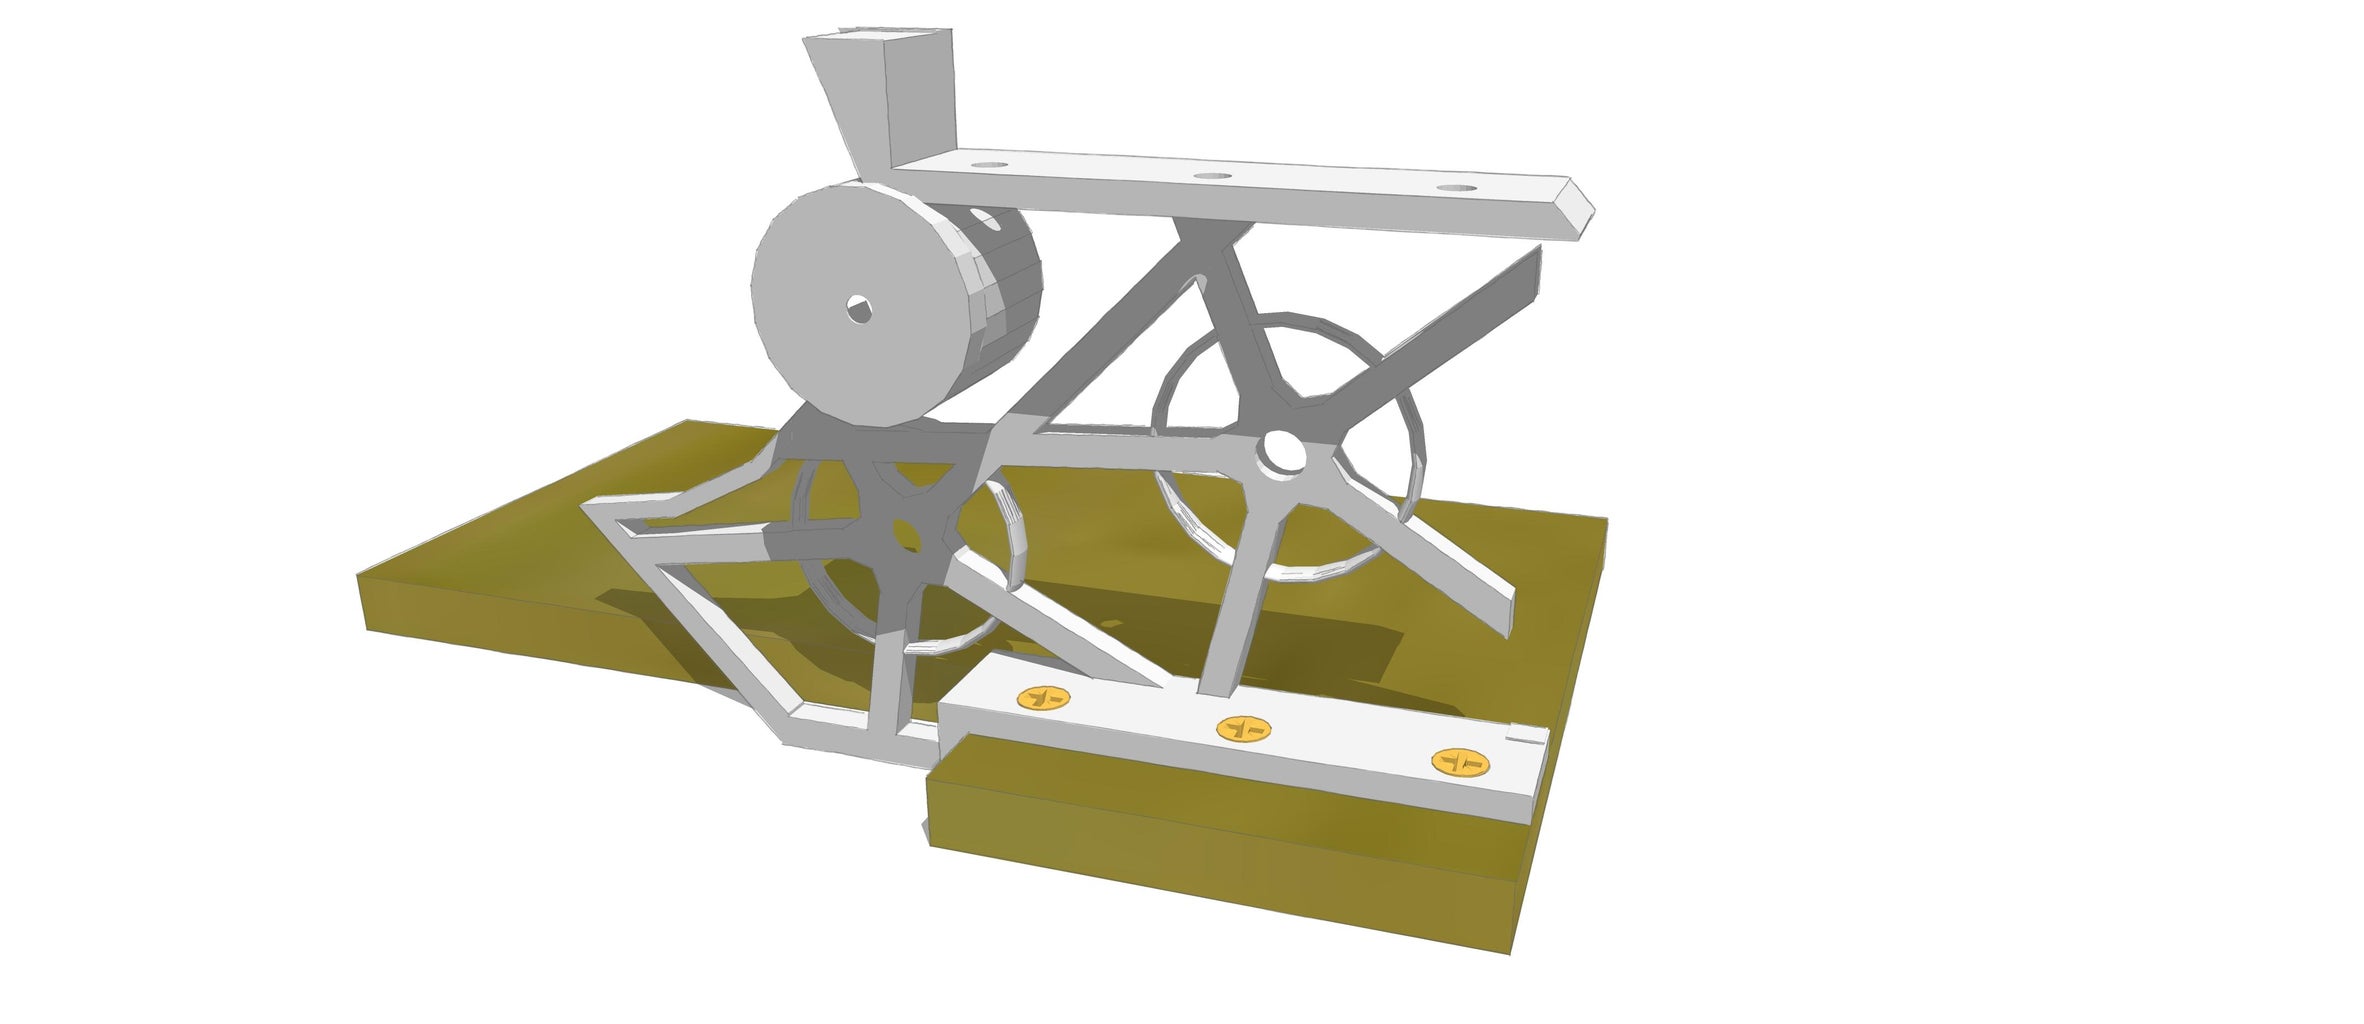
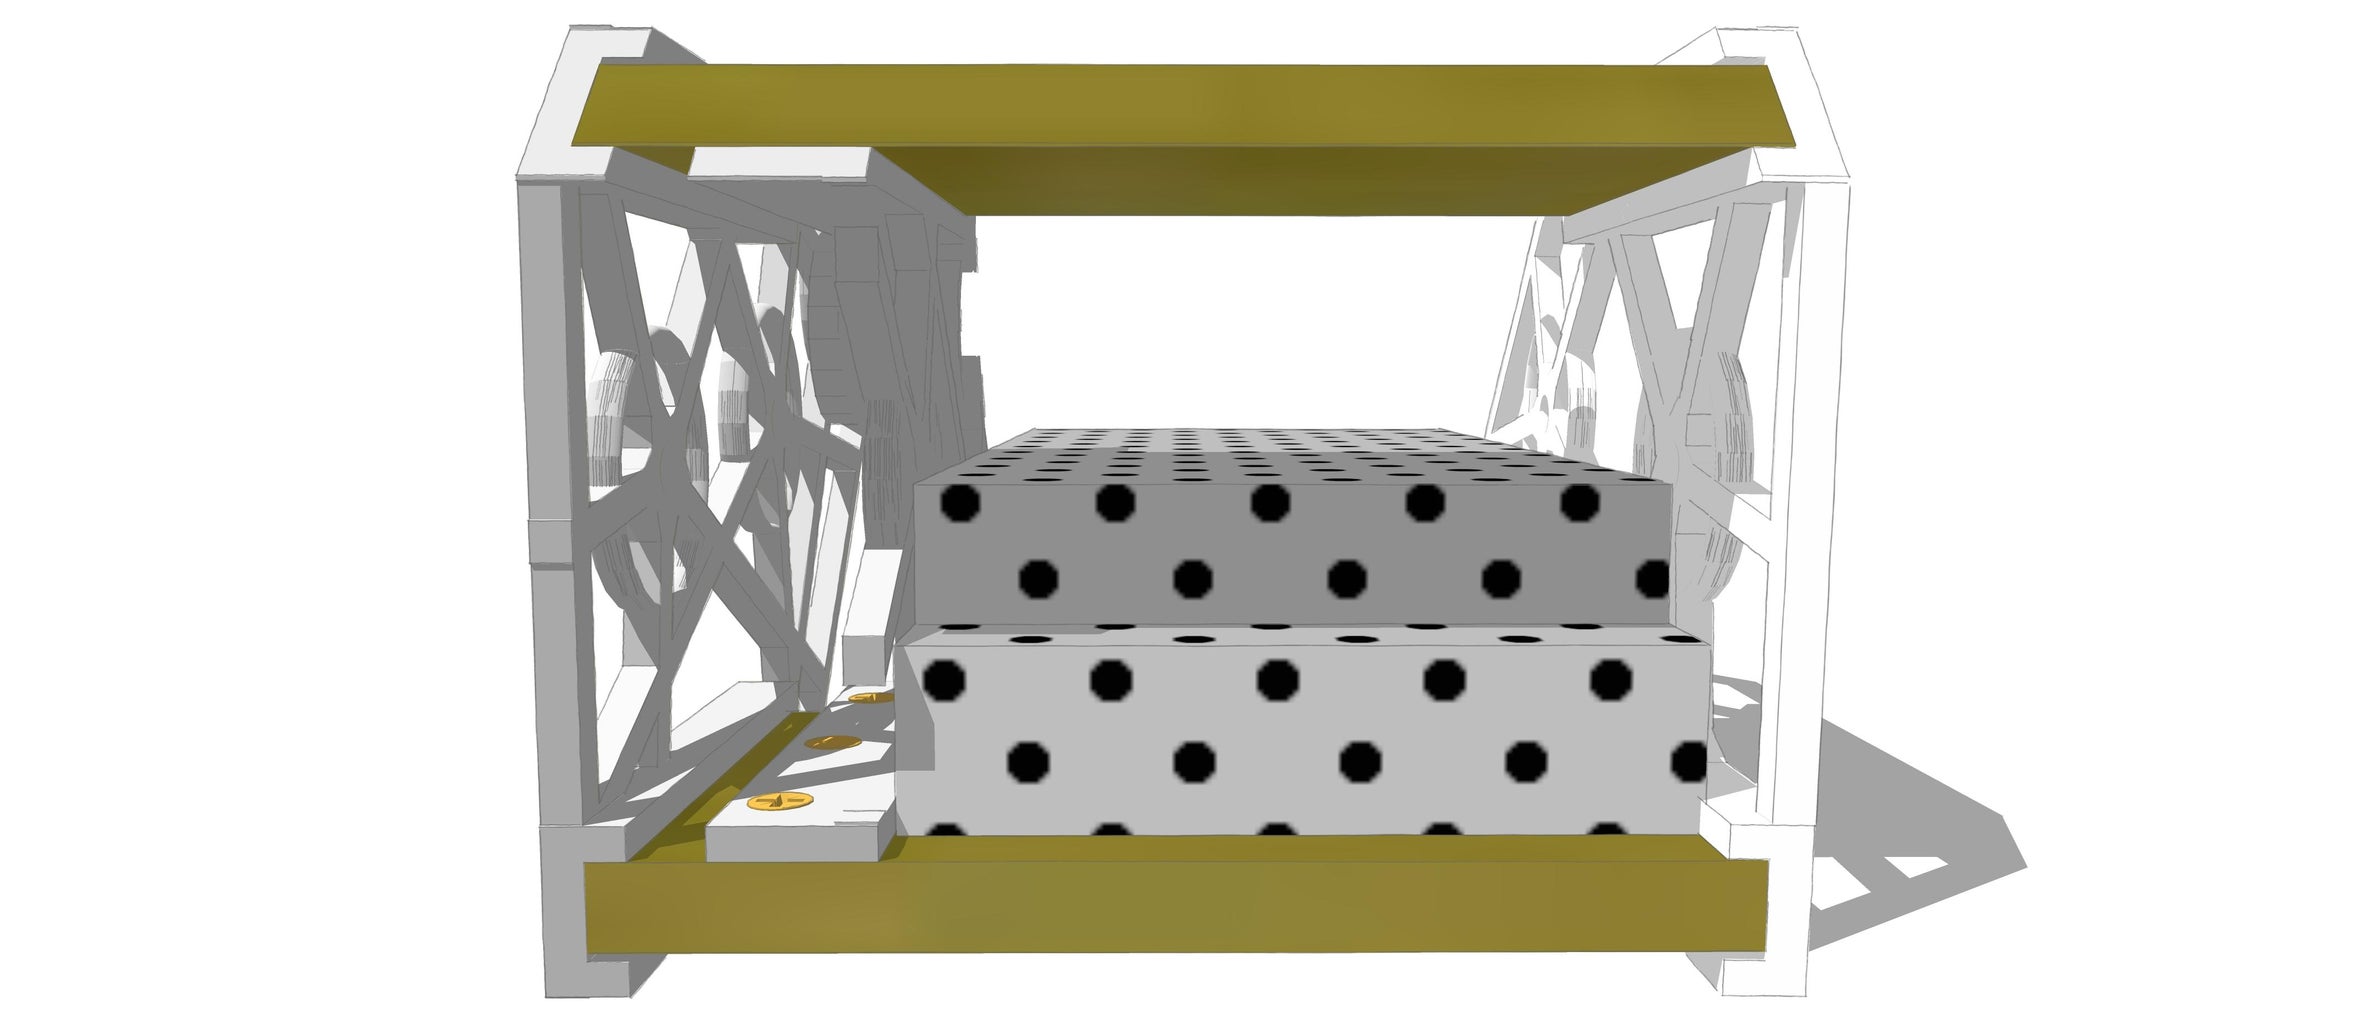
- Start by drilling pilot holes on each board where you will need to screw the extruder frame sections and the faceplate to the boards.
- Screw the bottom of the central frame section to the larger board.
- Screw the right frame section to the larger board.
- Slide the smaller board into the groove of the right frame and screw it into place.
- Screw the central frame to the smaller board.
- Fit the left frame section onto the boards and screw them together.
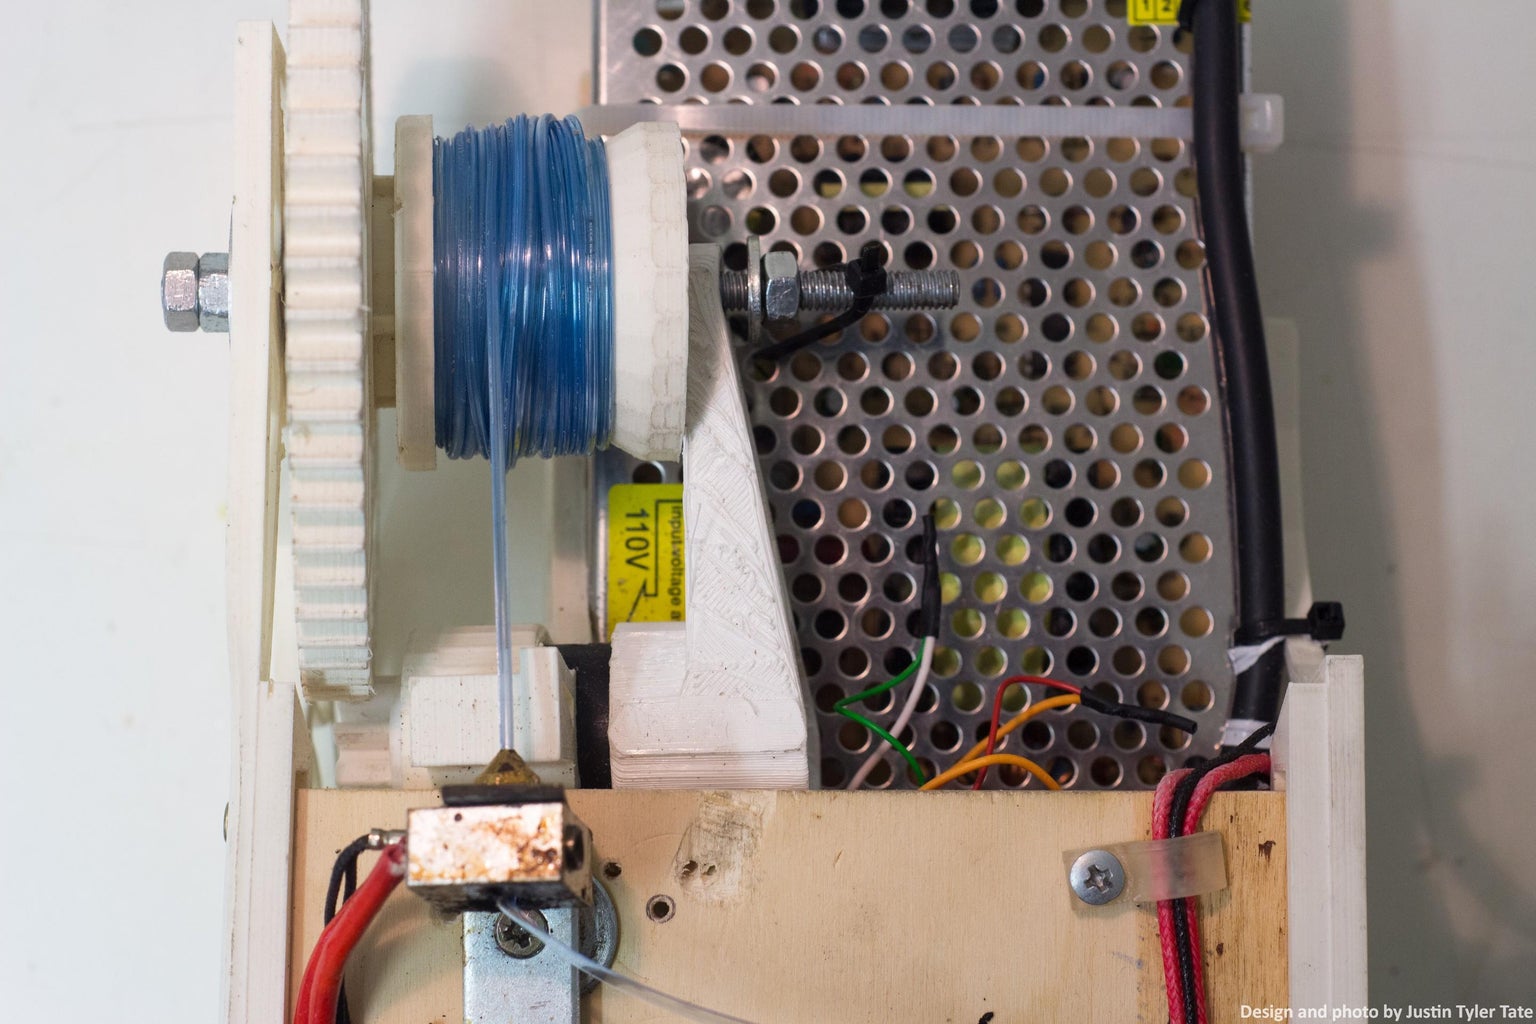
- Slide the 12v power supply into the space between the central and right extruder frame sections and attach it to the larger board.
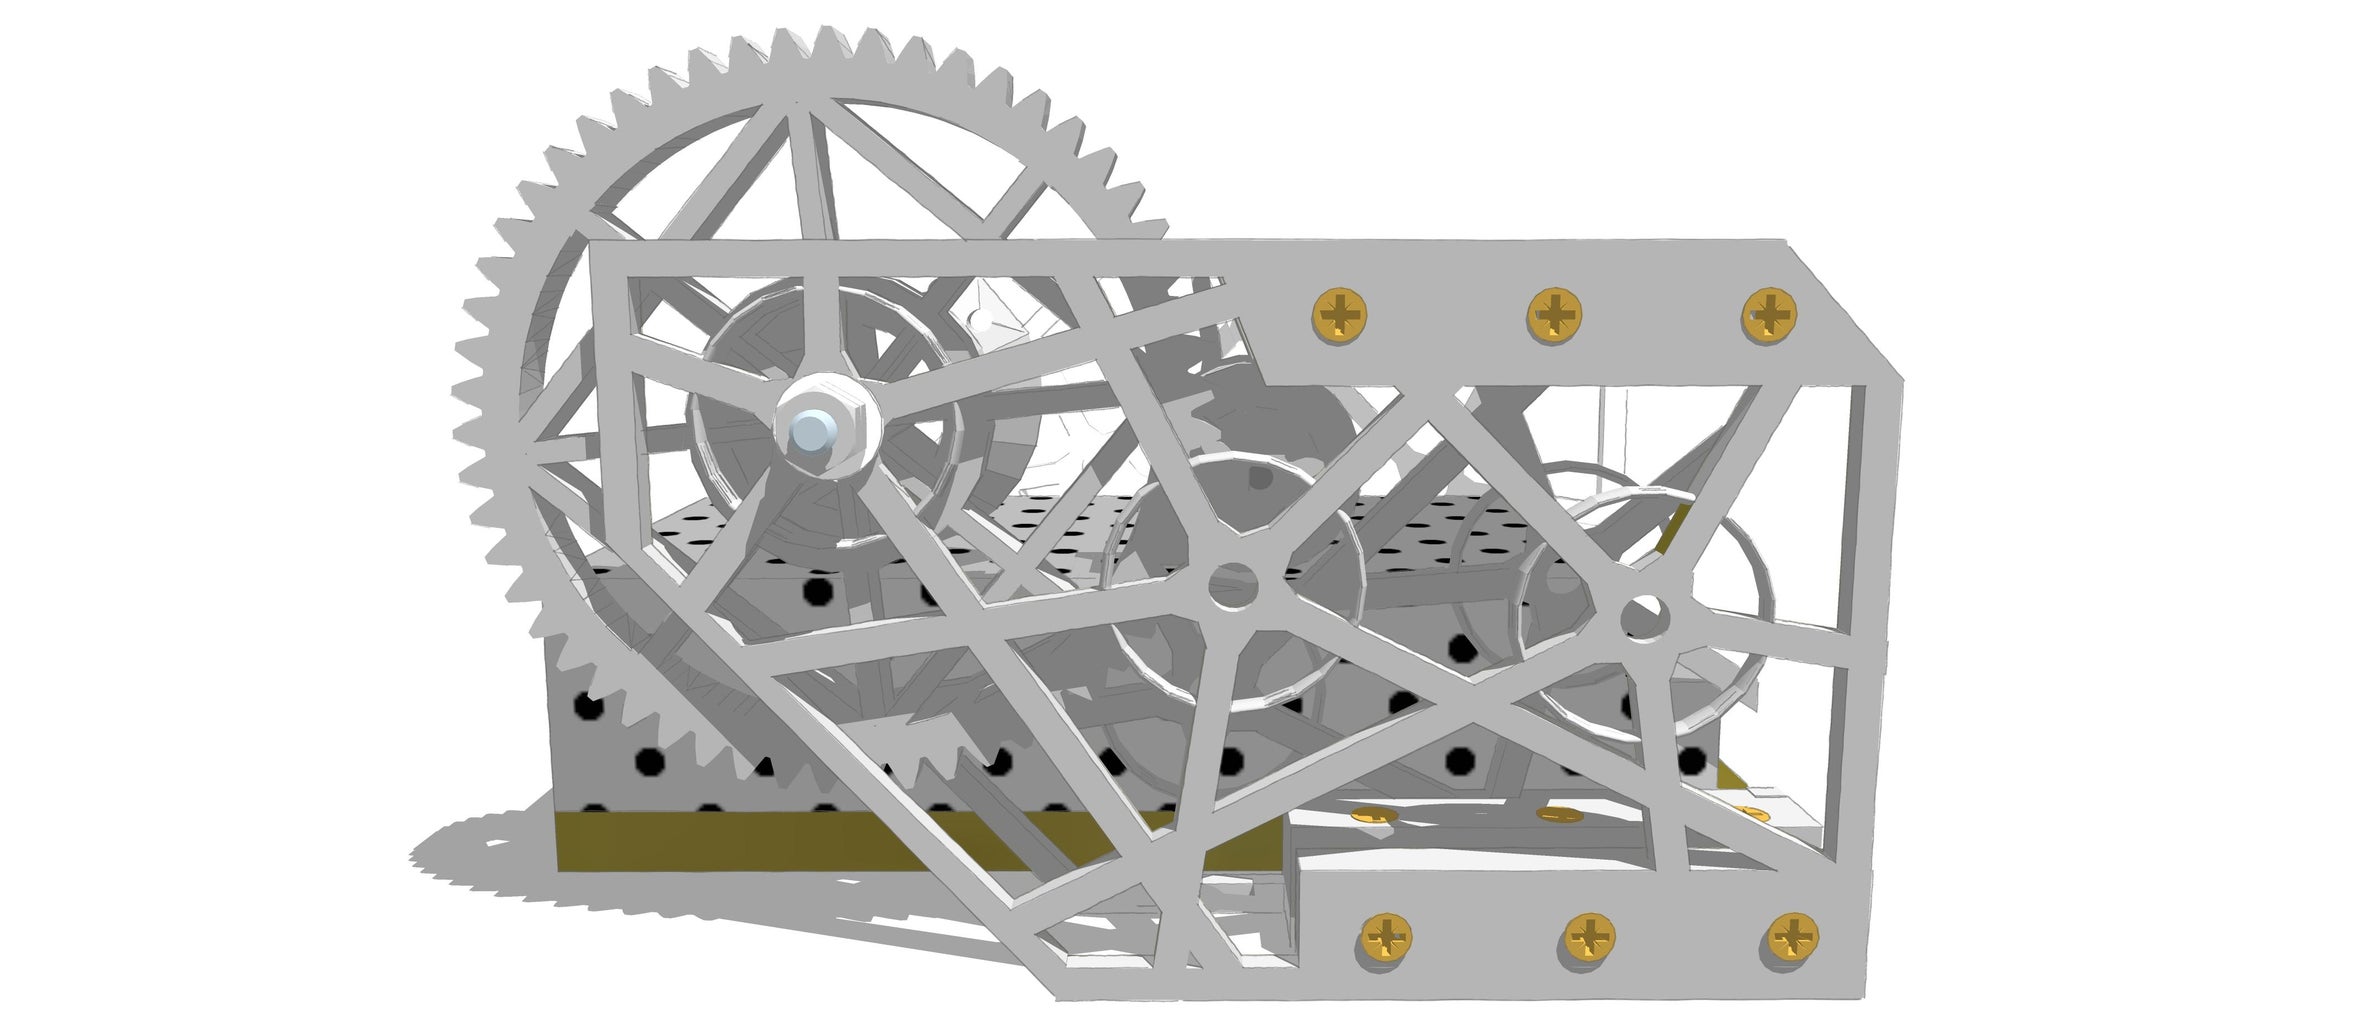
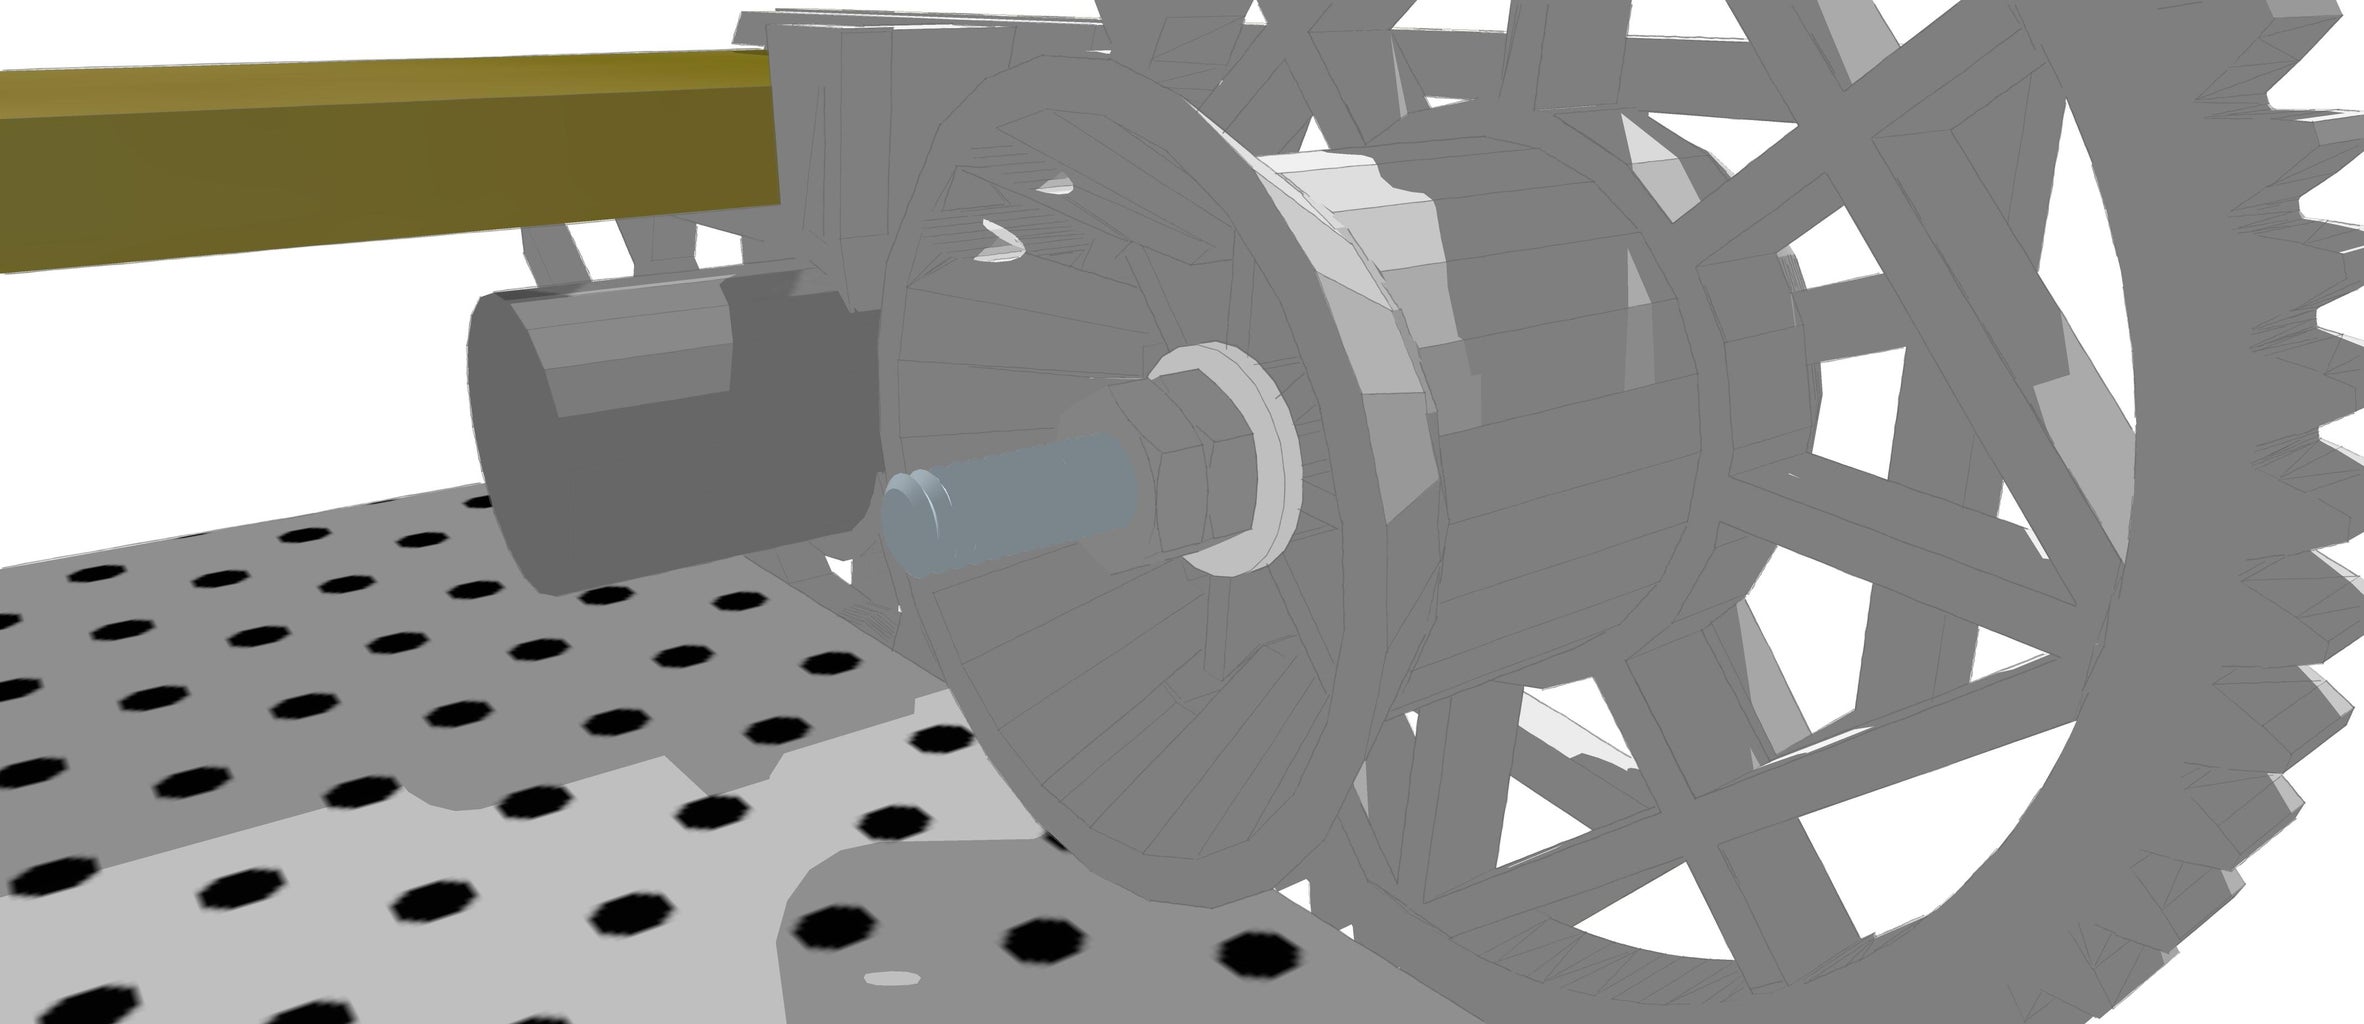
- Slide the gear motor partially into the space provided for it, so that the motor shaft barely pokes through the hole in the central frame.
- Place the pinion gear between the left and central frame sections and slide it onto the shaft of the motor, pressing the two together so that the motor slides into the central frame. They should all fit snugly.
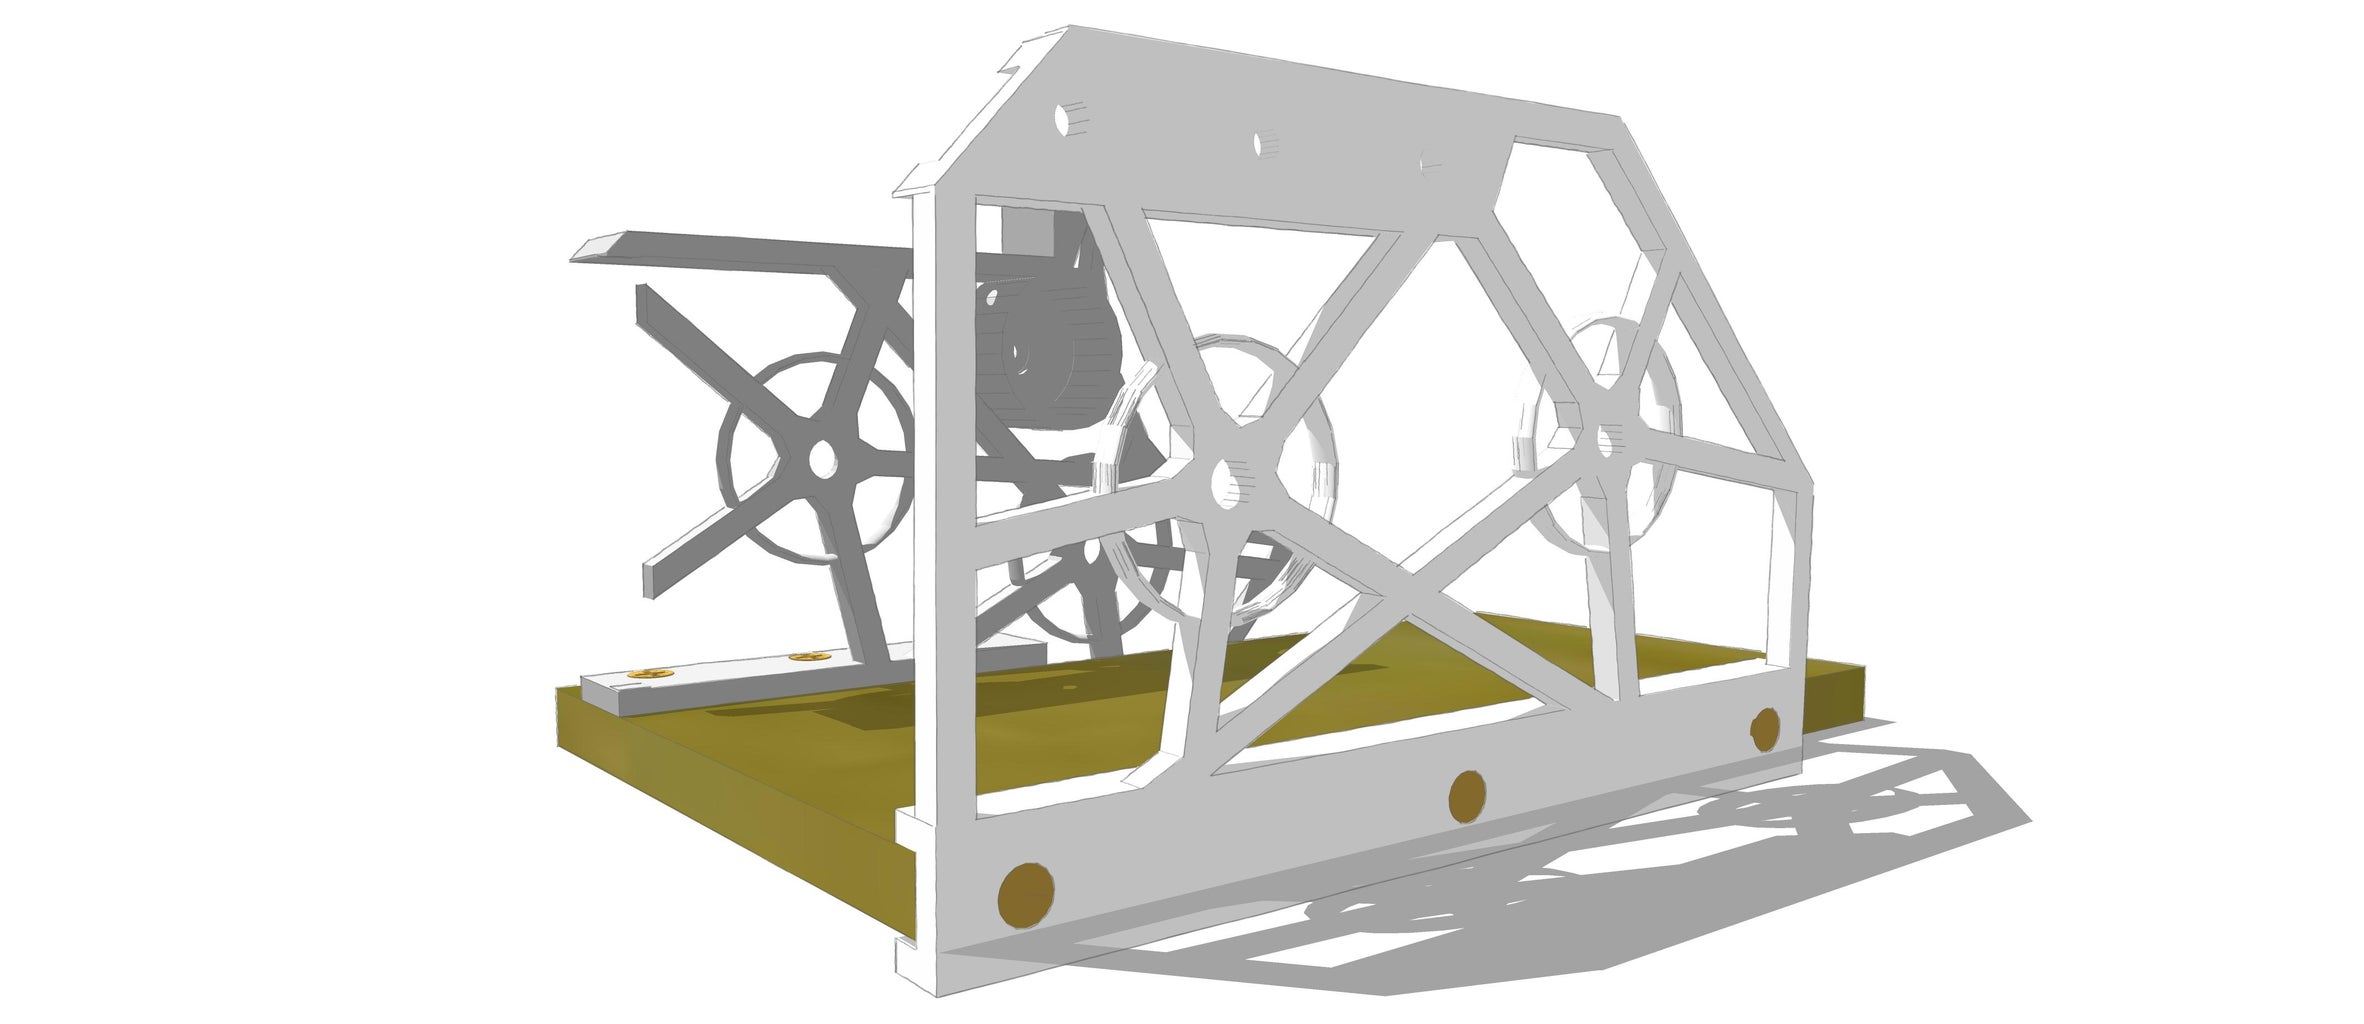
- Place the big bobbin gear into the frame so that it aligns with the pinion gear. Place the threaded rod through the hole in the frame and through the big bobbin gear.
- Secure the big bobbin gear in place with a washer and two hex nuts on either side, so that it is snug but will be able to move freely when the motor is running.
- Slide the support arm onto the motor and threaded rod. This will keep the two parallel while the filament extruder is running.
- Separate 2 piles of 4 washers, and screw the right angle to the top board using the two piles of washers to insulate and isolate the wood from the right angle.
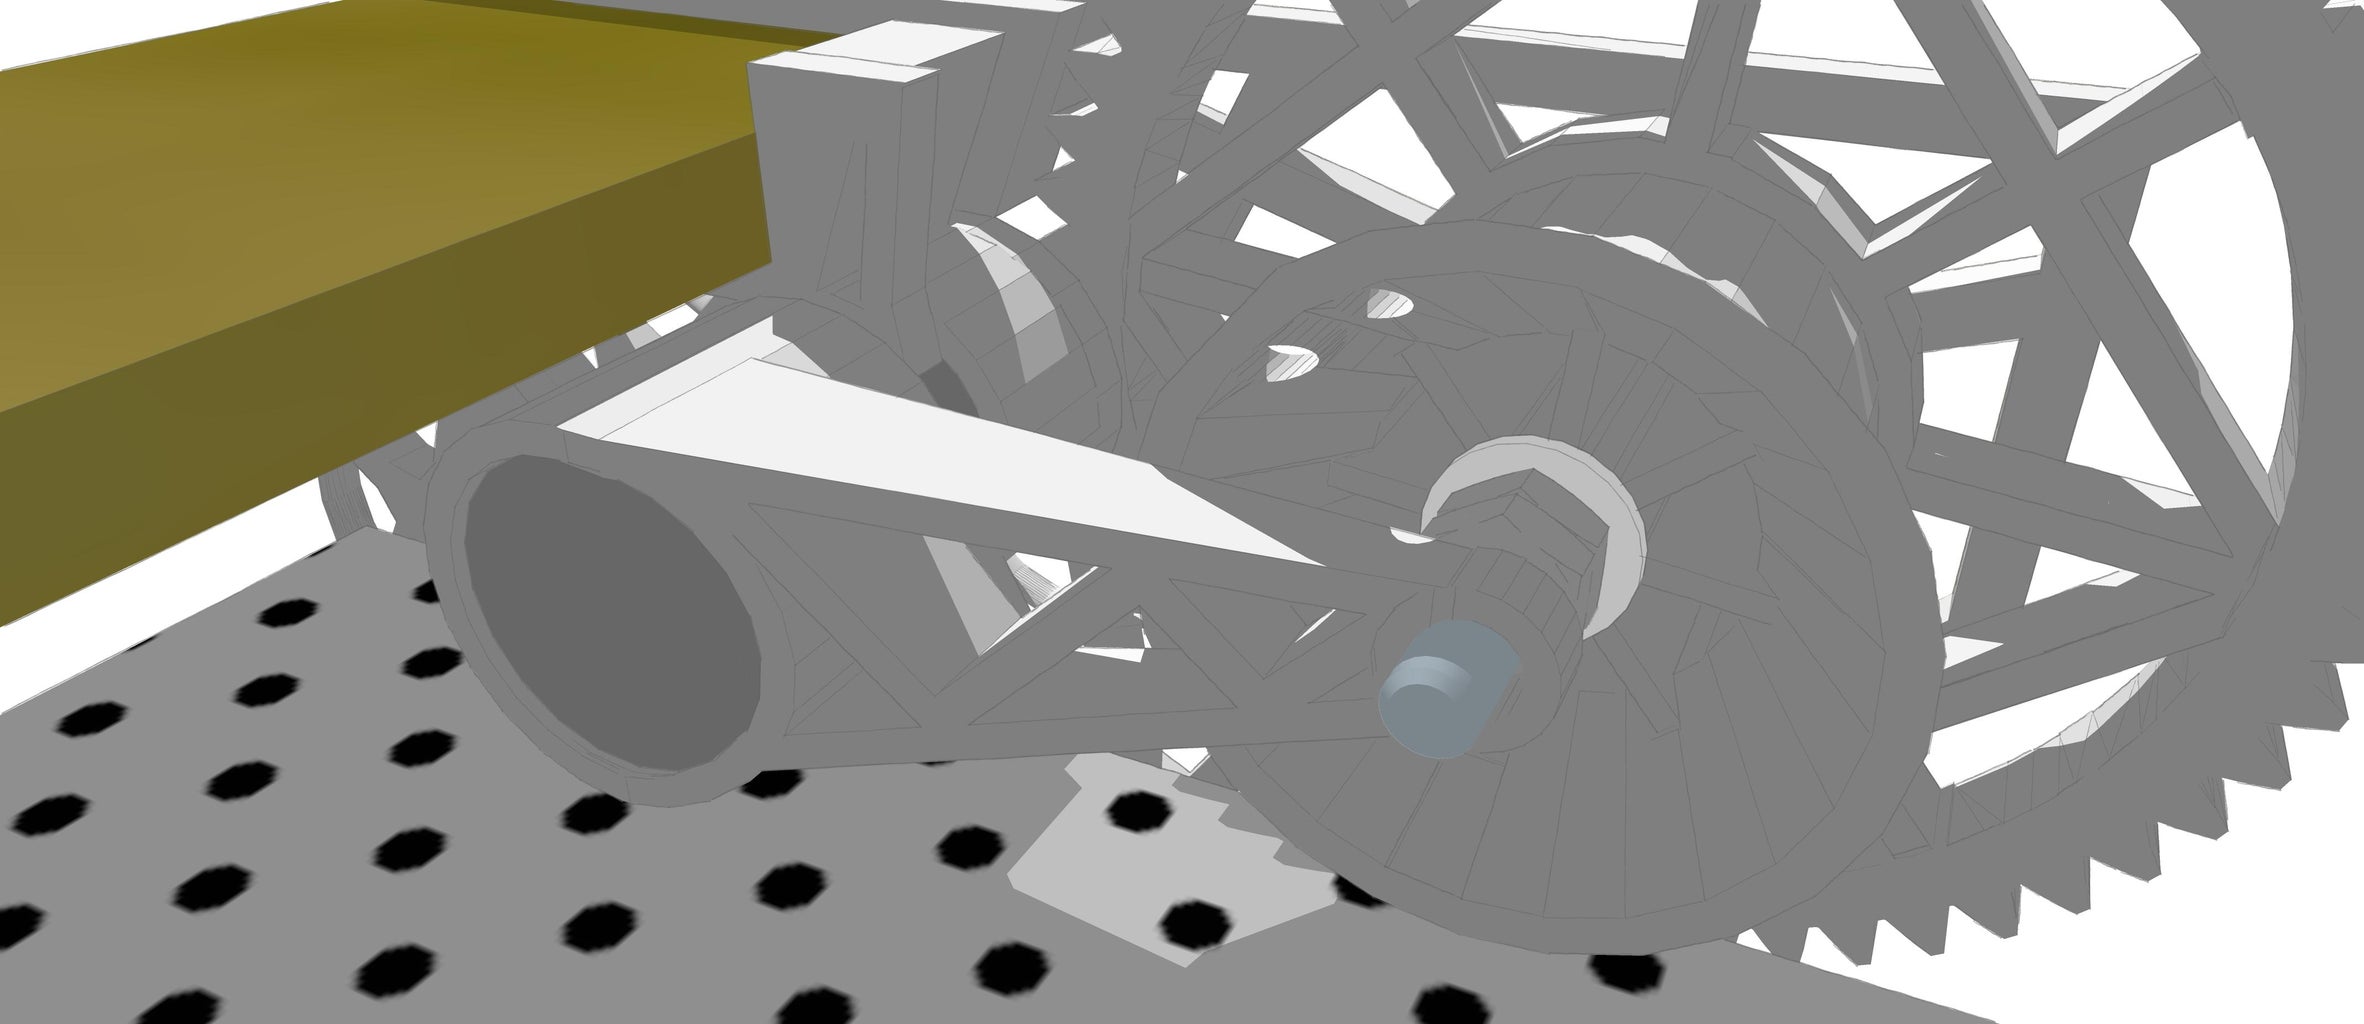
- Slide the filament nozzle through the lower hole in the right angle and screw the heating block onto it so that the three pieces are secure.
Step 4: Wire the Electronics

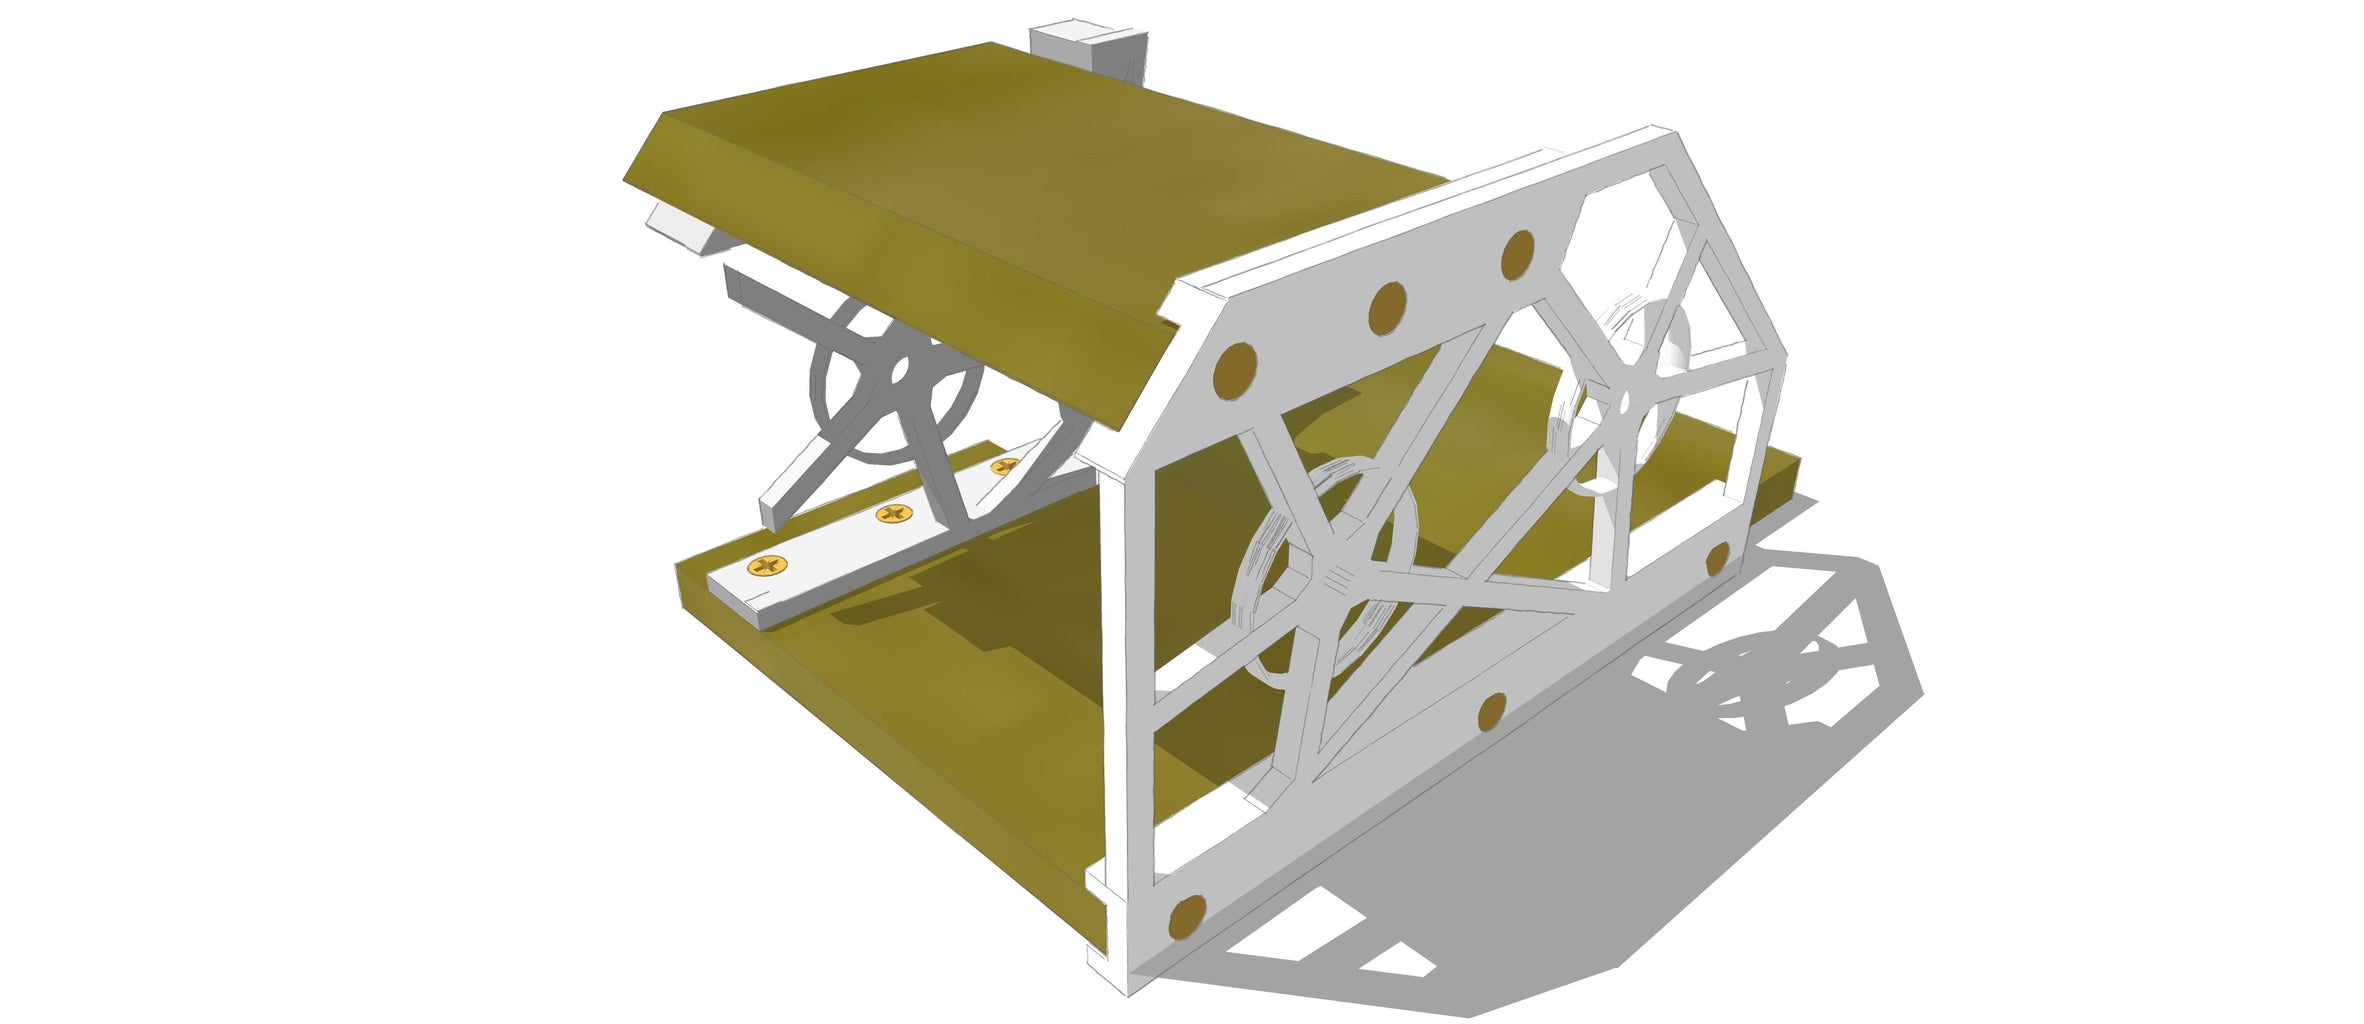
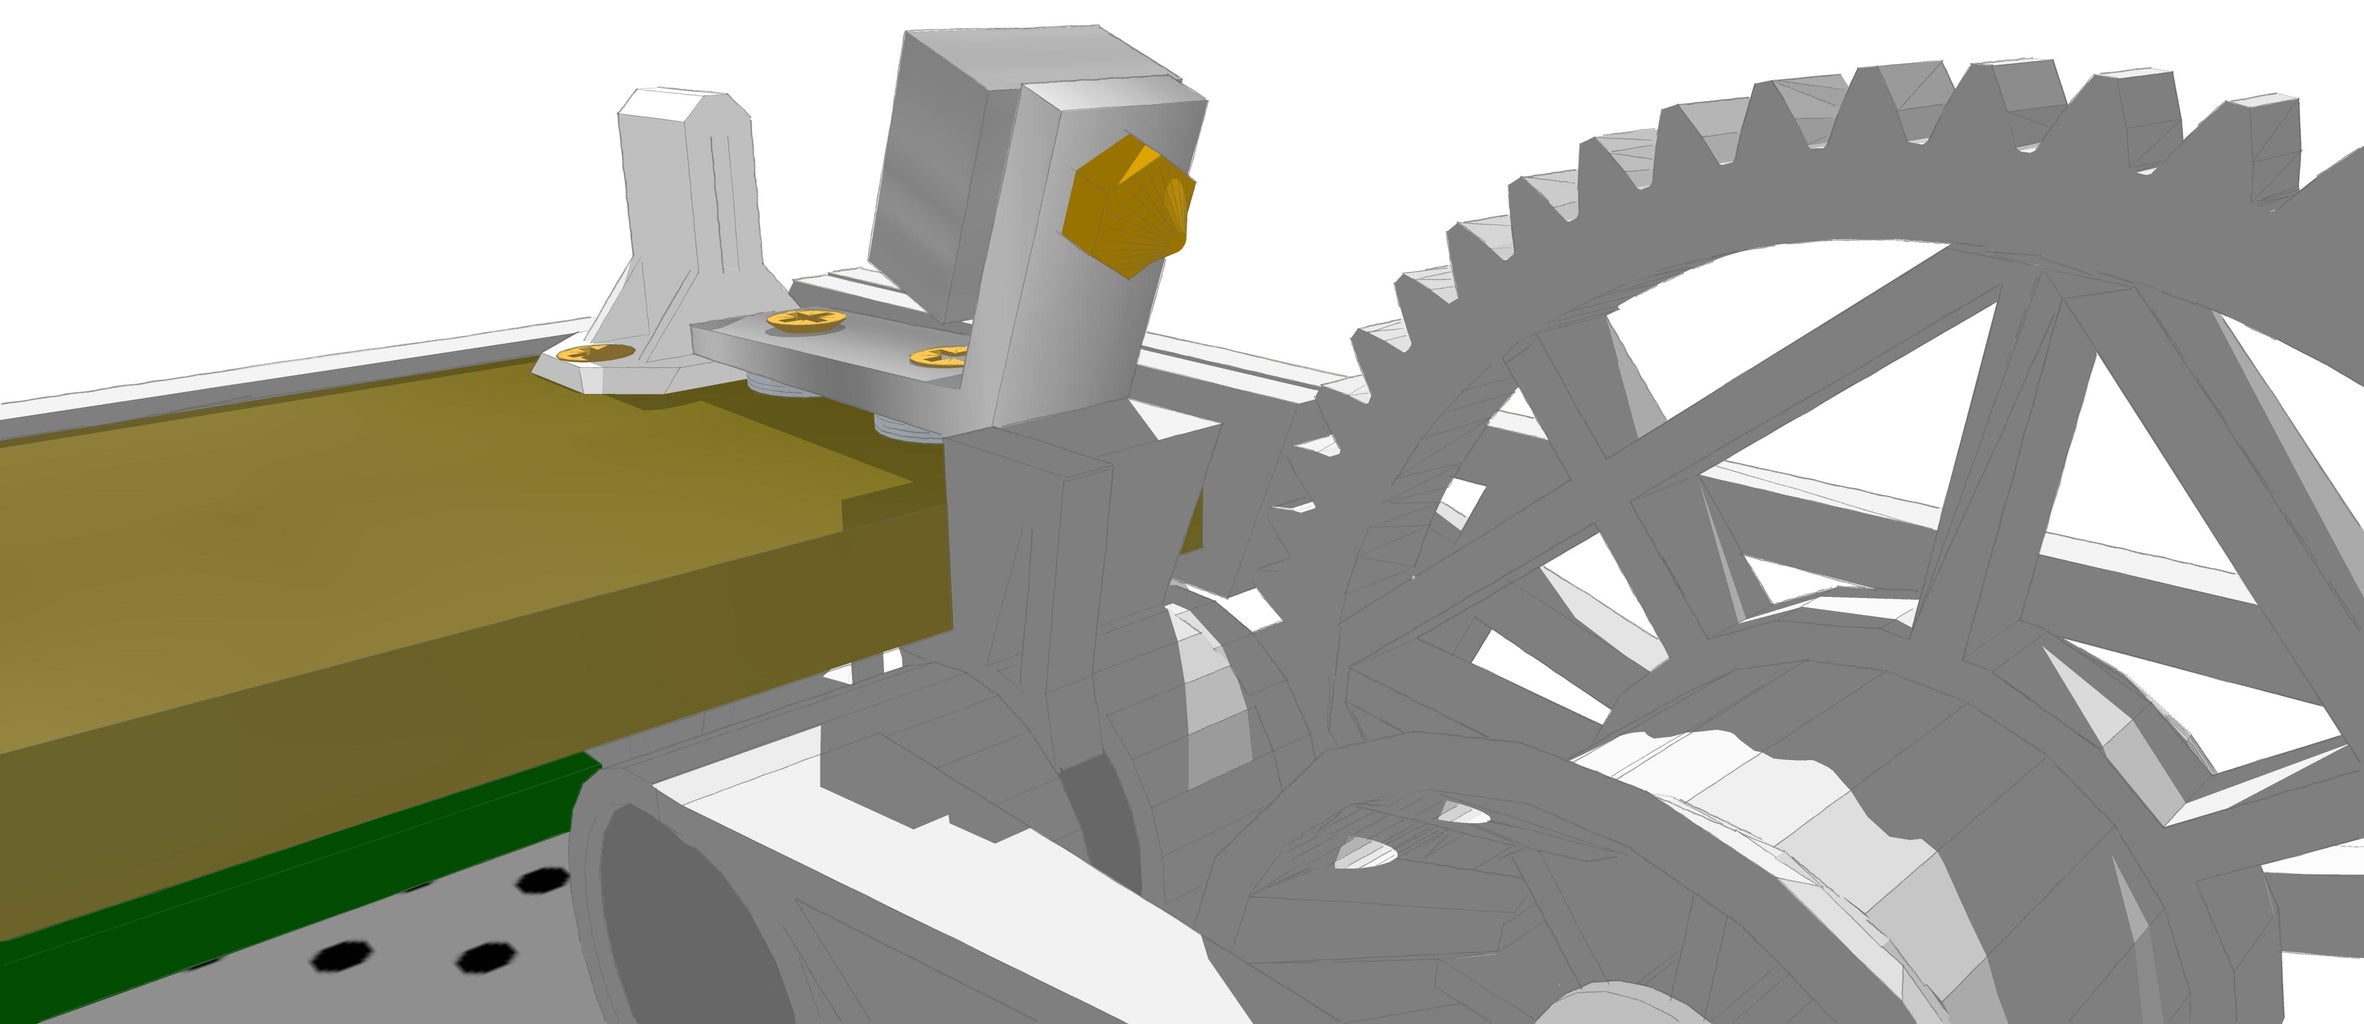
- Slide the thermocontroller into the faceplate.
- Slide the PWM potentiometer through the faceplate from behind and attach the plastic knob. Use hot glue to secure it to the faceplate if necessary.
- Push the switch through the remaining opening in the faceplate.
- Using a 110/220v power cable, strip off some of the plastic insulation so that 20cm of the three wires are exposed. Connect the ground (yellow/green) wire to the power supplies port that is marked as ground. Connect one of the other wires to one of the power supply’s 110/220v input ports. Cut the remaining wire about halfway, connecting the two halves to the two connectors of the switch, and then connect the remaining end to the last of the power supply’s 110/220v input ports. Check to see if it turns on, and then turn it off again.
- Wire the motor to the PWM, and the PWM to one positive and one negative 12v port of the power supply. Turn on the power supply, and then turn on the PWM to check to see the motor is working, and then turn everything off.
- Wire the thermocontroller’s positive and negative ports to the same positive and negative ports being used by the PWM. Turn on the power supply to check to see if the thermocontroller is working - it should show an error message.
- Connect one wire from the thermistor to the thermocontroller’s port marked “relay”, the other wire from the thermistor to one of the remaining two 12v output ports on the power supply, and then a final wire to connect the final port of the relay on the thermocontroller to the final output port on the power supply.
- Connect the two wires coming from the temperature sensor to the two remaining ports on the thermocontroller.
- Test to see that all of the electronics are working properly before tying all of the wires together and to the extruder frame, and then screwing the faceplate to the boards.
- Turn on the power supply and PWM to make sure the motor is turning the correct way - if looking from the left side of the filament extruder, the big gear bobbin should be spinning clockwise so that the filament will be pulled to the back of the machine before being pulled down and then back towards its interior.
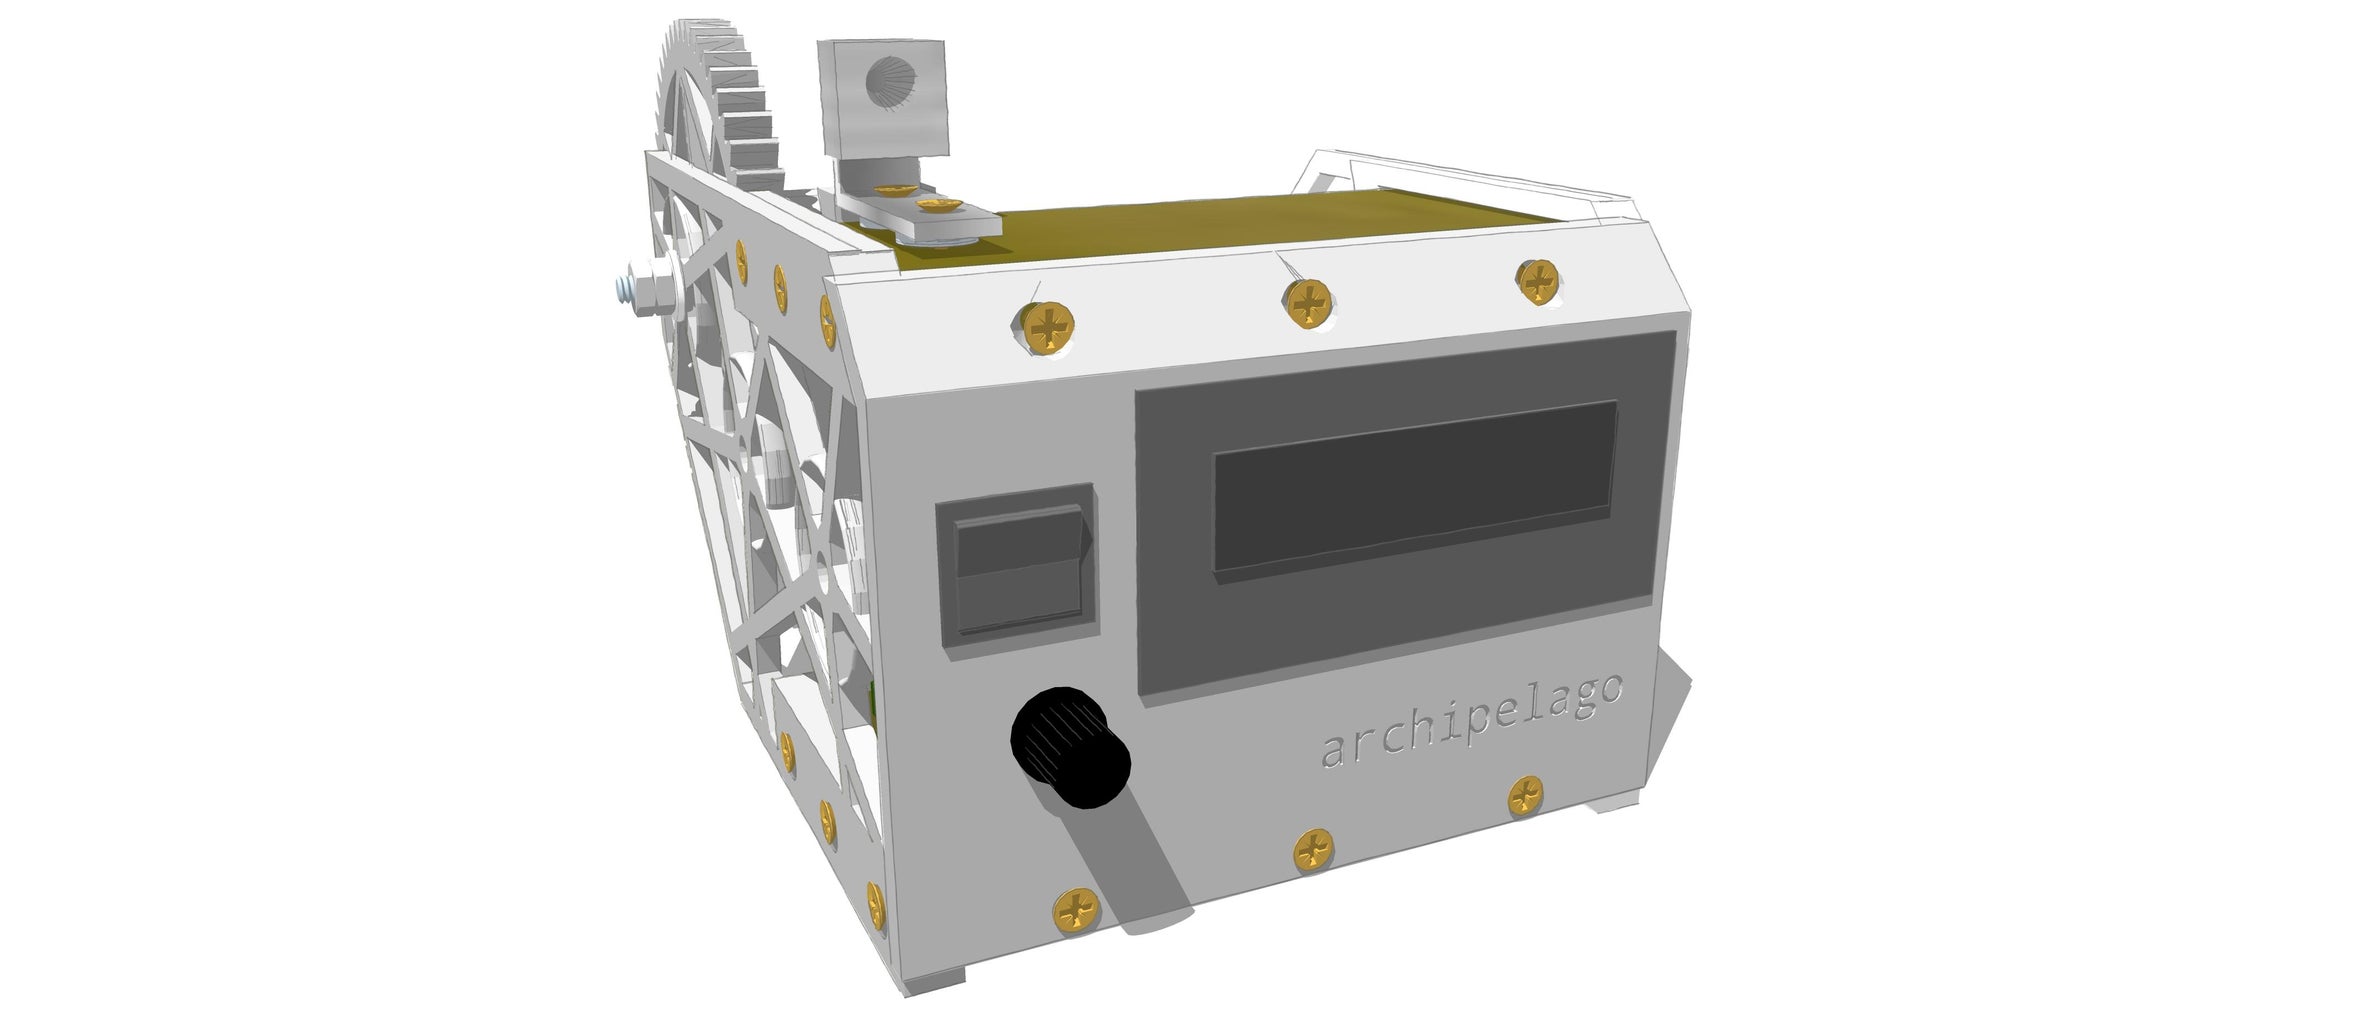
Step 5: Finishing the Filament Extruder

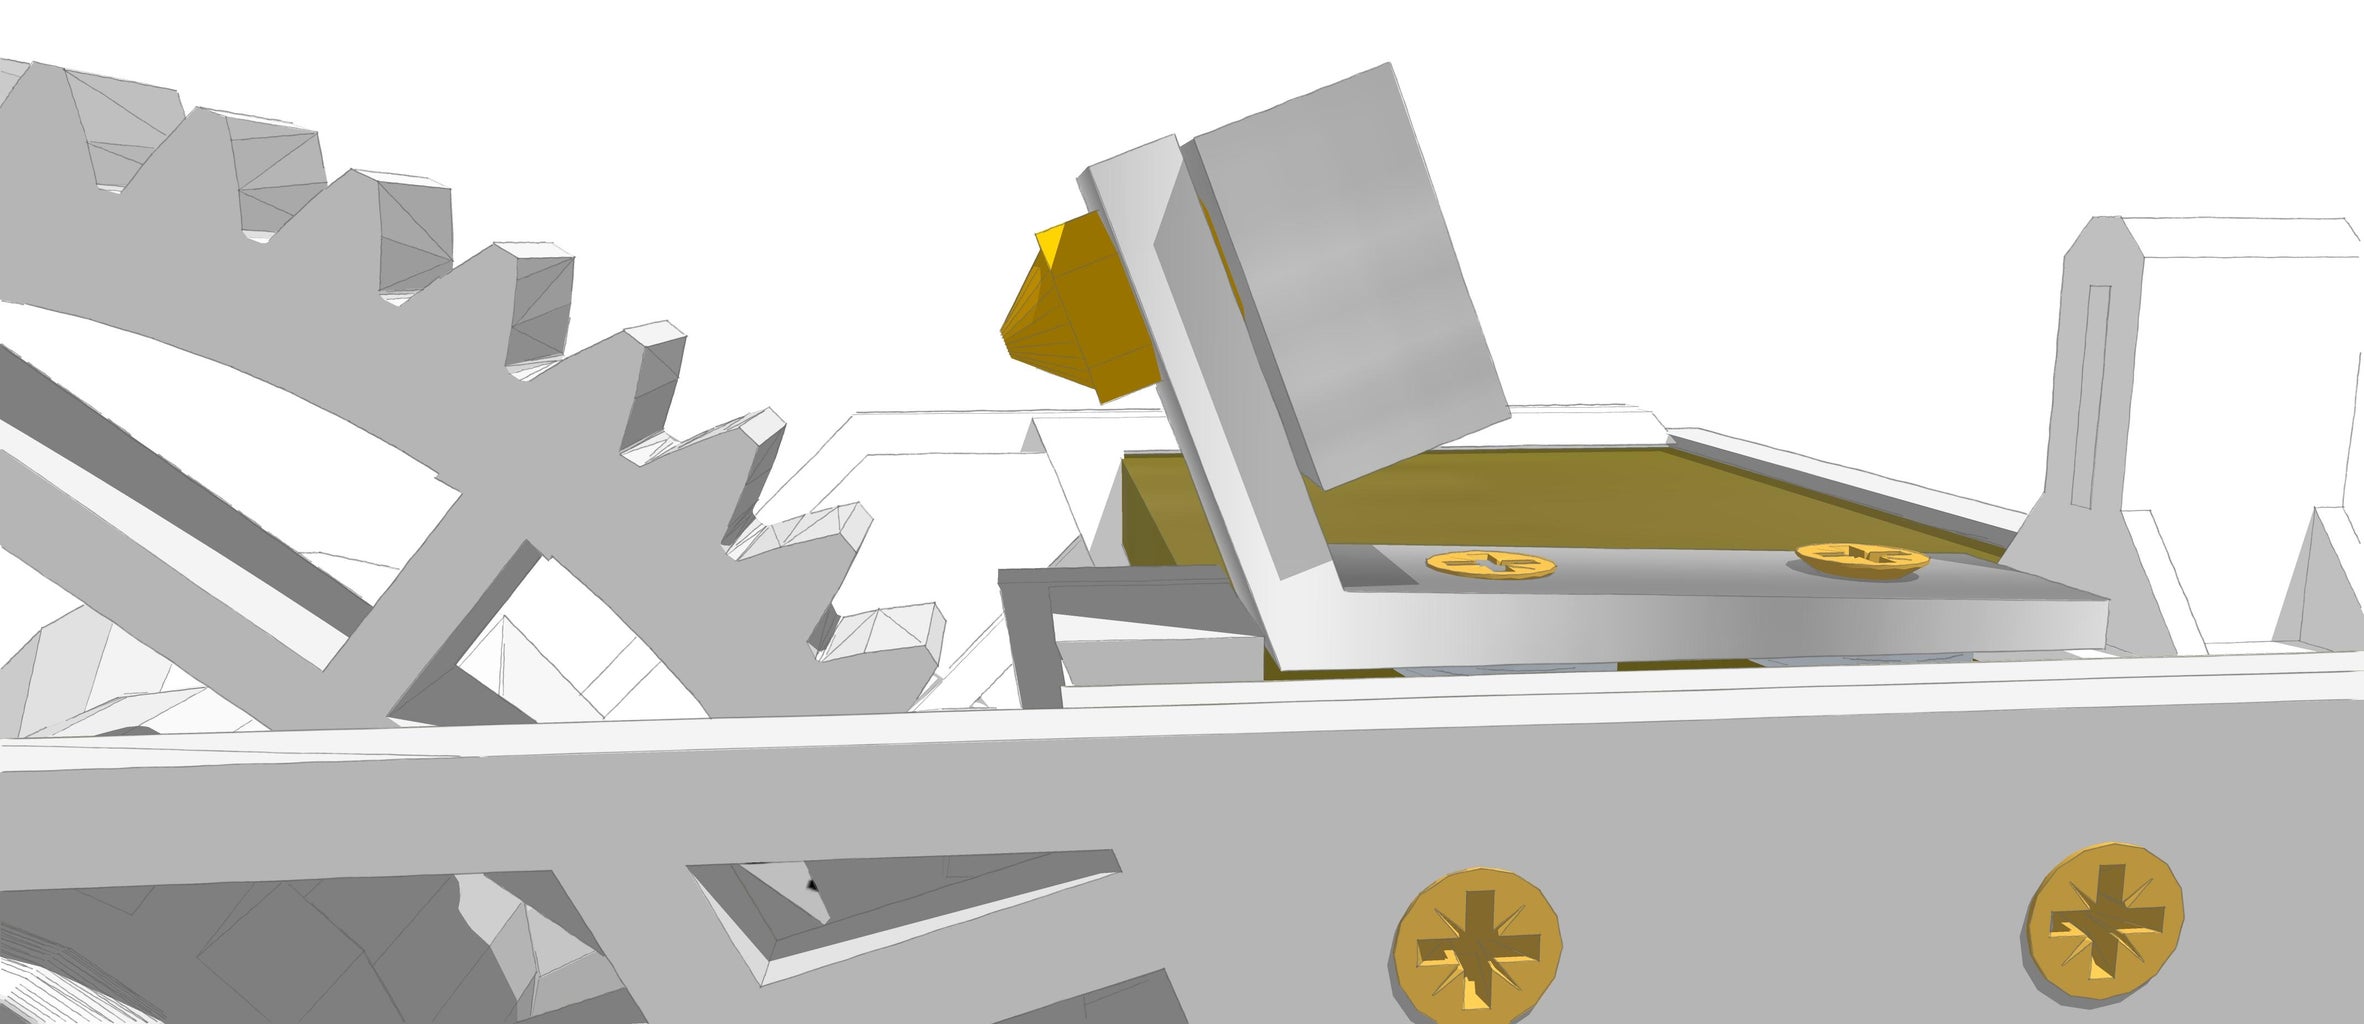
- You can now screw one or two of the PET strip guides onto the top of the Archipelago Filament Extruder. These are not necessary, but may help to direct the flow of PET material through the heating block.
- Lastly, bend the right angle bracket so that the angle becomes larger and the brass nozzle points towards the uppermost point of the bobbin.
- Test your Archipelago Filament Extruder to make sure all parts are working together properly.
Step 6: Recycling

Now that all of the tools have been gathered, you can begin to recycle PET. The process is pretty straightforward, quick and easy. Just collect, sort, clean, slice and dry your bottles. Because you’re not reliant on the speed of any machines, this stage can go very quickly. Depending on how quick you want to be, you can take on a more active role to collect bottles by asking friends or collecting them from bins, or passive by just collecting a bottle here or there as you find them in public spaces. In either case, you will know exactly how the material is being recycled. Next you’ll need to sort your bottles as some of them will be better suited to produce printer filament with, than others. Cleaning will get any residue or labels off that could cause problems for your 3D printer. And while all of the previous steps are very necessary, slicing your PET bottles into strips will be the most crucial step, in addition to being very satisfying. Afterwards, just dry the strips as you get ready to start producing.
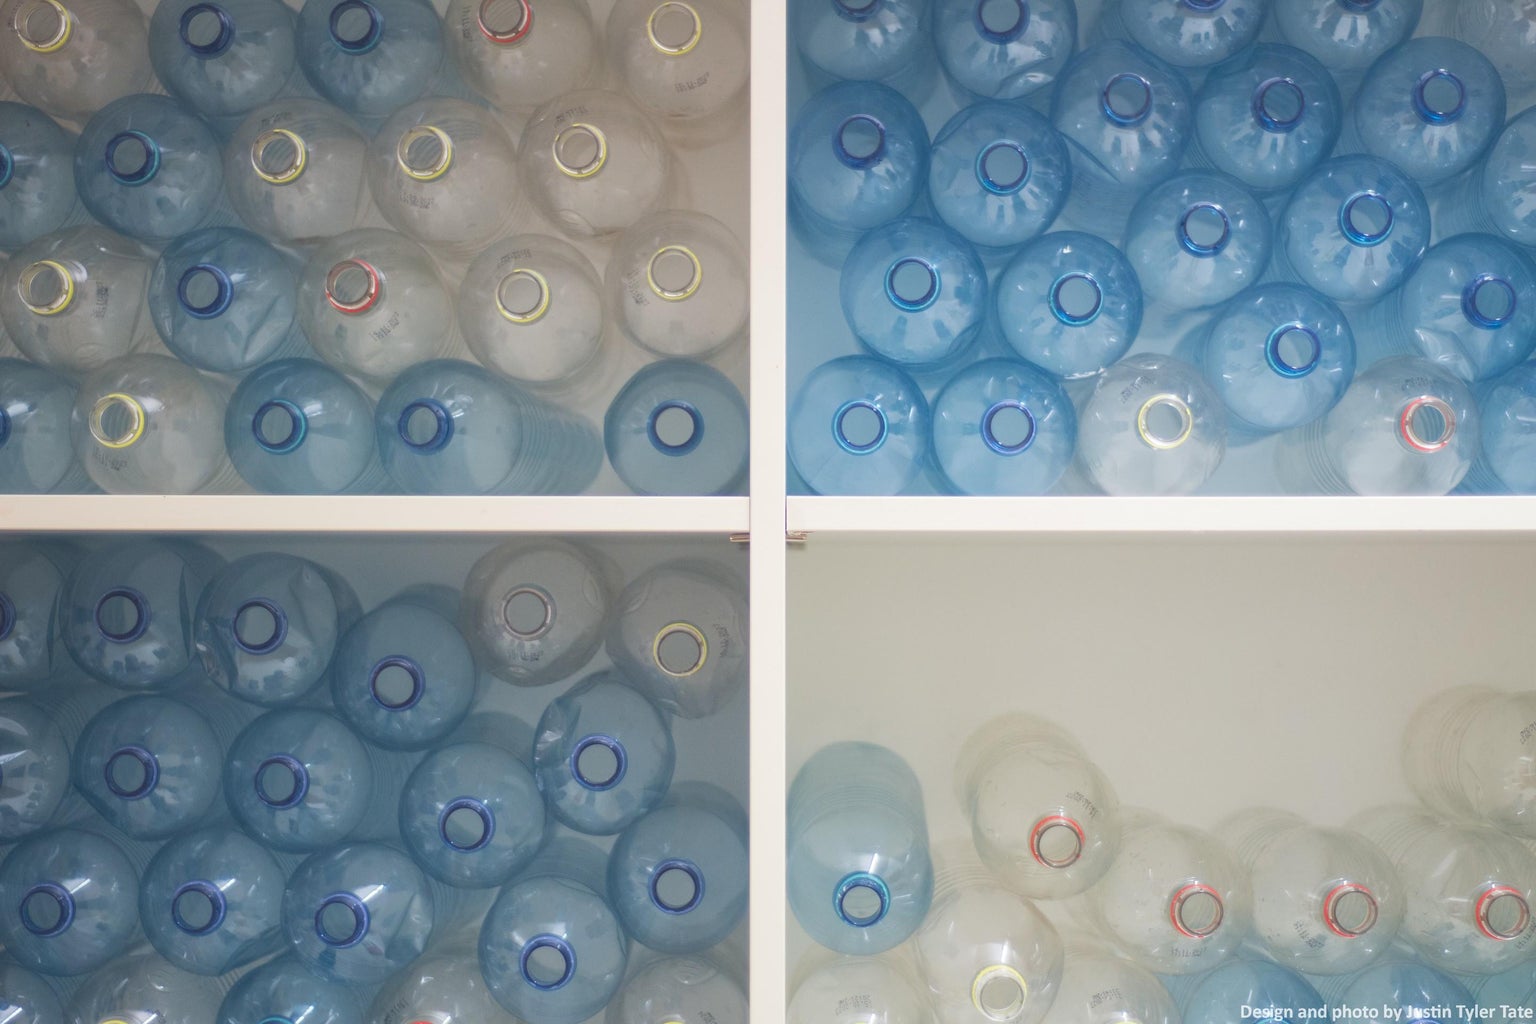
- Collect Bottles
- The first thing you’ll need to do is collect bottles. A lot of bottles. Each island (node/connector) of the Archipelago system requires about 50g of PET filament. While PET bottles vary in their size and thickness of the PET, on average each island will require approximately 4x1.5L bottles, with some material leftover.
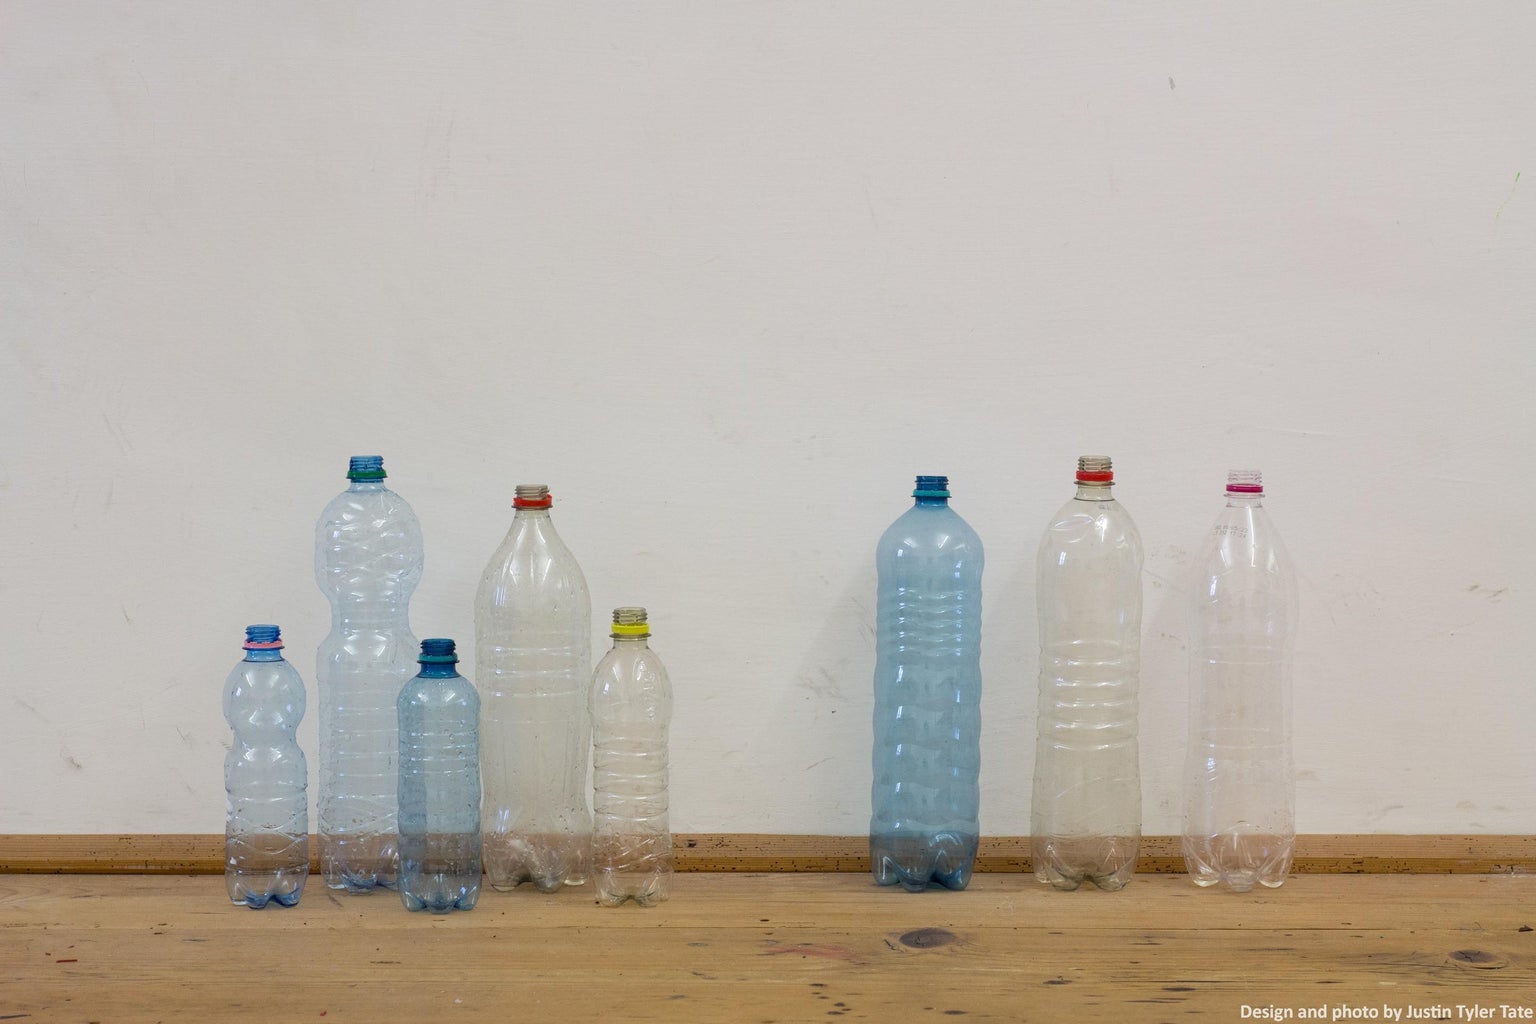
- Sort
- Some bottles are curvy while others are straight, meaning that not every bottle can be used for the structural supports of the Archipelago system. Since the curvy ones aren’t great for the supports, any overly curvy bottles can be cleaned, sliced, dried, formed into printing filament and then used. Bottles with straight sides can be set aside for use as structural supports.
- Clean
- You’ll want to clean all of the bottles that you collect so that nothing gets stuck inside of your filament and causes it to jam up your printer nozzle. Strip the label off as best you can, remove the top, rinse out and cut the bottom off of each. Dry them if you have time, or wait until after you’ve sliced them into strips.
- Slice
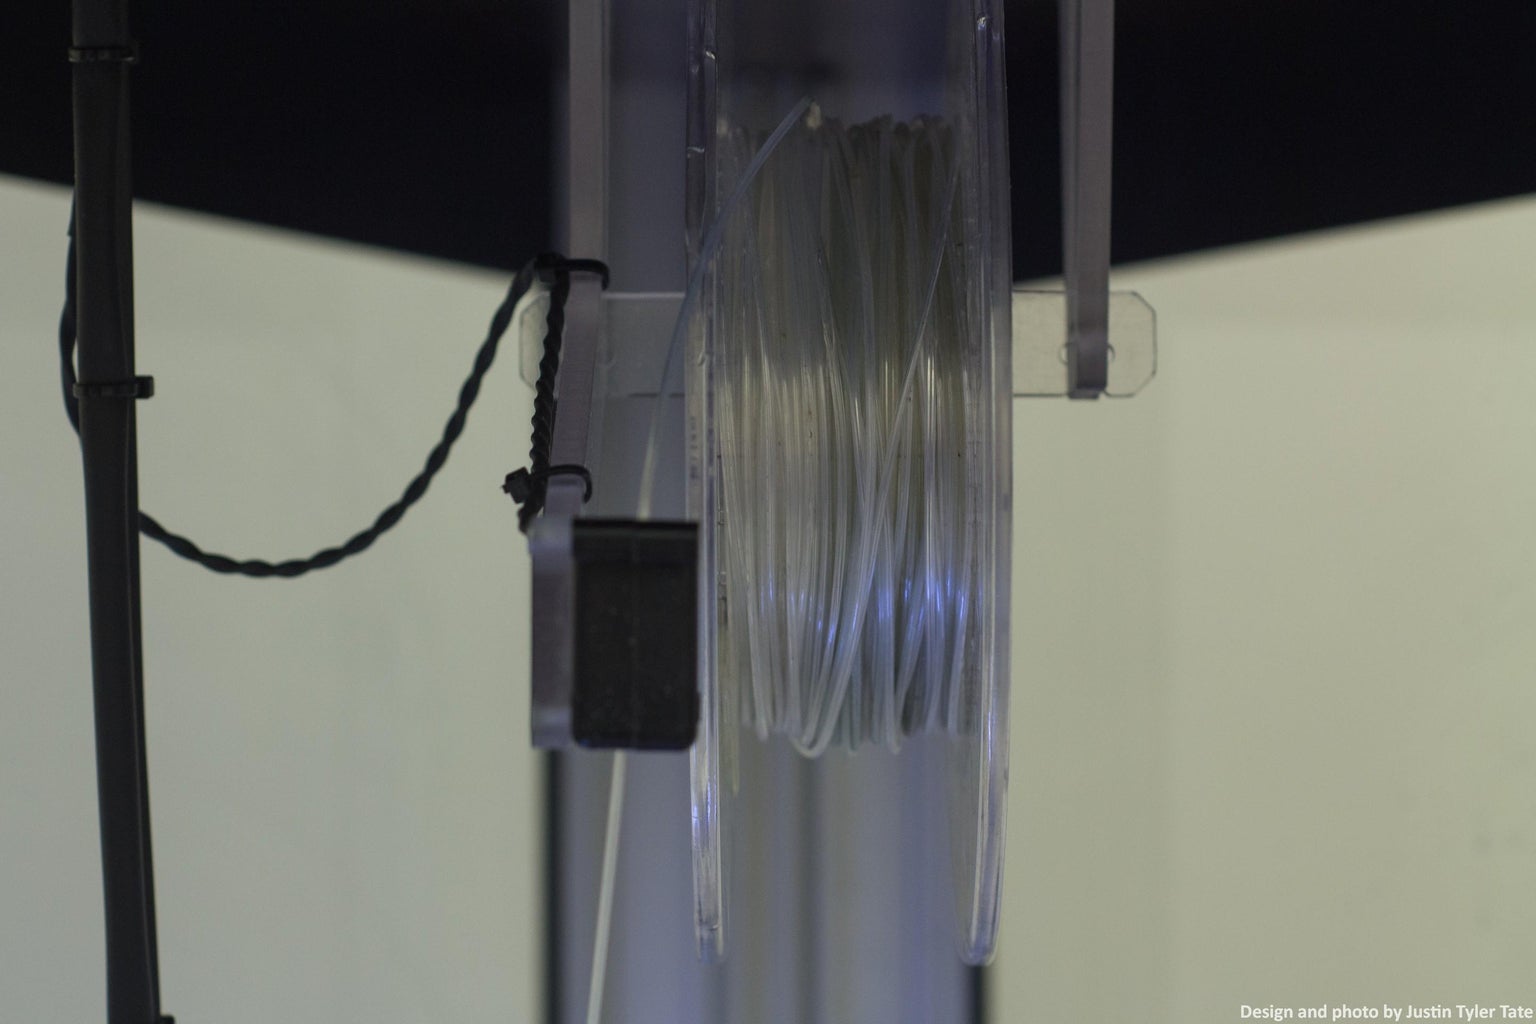
- This is arguably one of the most important steps in the whole process. You will need to use the bottle slicer to produce even strips of PET that you will then use to make filament.
- Sort bottles by the thickness of their PET so that you don’t have to change the blade level of the bottle slicer too frequently.
- Please refer to the following list:
THICKNESS OF THE PLASTIC / WIDTH OF THE STRIPS
.65mm / 1mm
.60mm / 2mm
.55mm / 3mm
.50mm / 4mm
.45mm / 5mm
.40mm / 6mm
.35mm / 7mm
.30mm / 8mm
.25mm / 9mm
.20mm / 10mm
- Dry
- For best results, you’ll want to dry the PET strips before extruding them—and after, if possible—in order to ensure that the filament is free of any liquids.
Step 7: Begin Production, Extrude Filament
Now that you have a mass of PET bottles sliced into strips and your filament extruder assembled and working, you can really start producing filament. With many sections of bottles cut, and them all turned into filament, you can now begin welding those sections together into one long roll - but be careful, any poorly welded joints can lead to printing disaster. As long as your roll of filament is even throughout, you’ll have no problems printing.
**Before you begin extruding your filament to be printed, you should know that PET—although one of the most commonly recycled plastics—is known to emit respiratory sensitisers, irritants and carcinogens when heated, which can irritate the eyes and respiratory system and may cause long term or irreversible effects. As such, be sure to only produce and print PET filament in a very well ventilated space, and/or if the machine has its own filtered fume extractor.
- EXTRUDE
- **On the Archipelago Filament Extruder, set the thermocontroller’s on setting to 220.3°c and it’s off setting to 220.7°c. Once it has heated up, the thermocontroller’s relay will turn on and off when it reaches those temperatures, leaving the temperature to fluctuate slightly outside of that temperature range—from about 215°c to 228°c—but nonetheless will produce consistent filament.
- Start by cutting the end of your PET strip at a sharp angle, so that it gradually tapers to the desired width. Then use a pair of pliers to pinch down the last few centimeters of that taper so that it becomes even thinner and compact.
- Next you should be able to thread it through the heat block and the nozzle, so that it pokes out the other end and you can draw it out further using your pliers.
- Once out, pull on it slowly until you can pass it through the two holes in the bobbin - you’ll have to do this smoothly though, because if the filament in the nozzle gets too hot then the filament will melt and separate, and you will have to start over. With the tip of the filament semi-locked into the bobbin, turn the PWM knob so that the motor starts turning to your desired speed, which will probably be the fastest it goes.
- Press the end of filament against the bobbin until it has gone through a full revolution and the pressure of the filament can press it down for you.
- Once the whole PET strip has been made into filament, trim off any sections which are less than 1.75mm.
- Remove the filament from the bobbin by either removing the arm and two hex nuts, so that you can remove the bobbin to unfurl it quickly, or unfurl it less quickly by hand.
- Make more filament.
Step 8: Weld Filament
- Weld Filament
- As each bottle will only produce only a short length of filament, they must be welded together so that your 3D printer can print a whole or multiple archipelago islands.
- Insert one of the ends of filament through a length of silicone tube with an inside diameter of 1.75mm-1.8mm, and position it close to the end of the filament. Hold the tips of both sections of filament about 1cm over a flame, until you see the tips of each become glossy and melt into a spherical shape.
- Once molten, quickly press the two together, pushing the silicone tube over the connection point while also turning the tube with your fingers for 10-15 seconds.
- Push the tube past the connection point to see how well the two sections of filament have been welded together. Scrape any superfluous material off with a fingernail or sharp blade (be very careful) and sand with 100-260 grit sandpaper if necessary.
- The transition between the two sections of filament has to be perfectly consistent in order for it to pass through the 3D printer’s filament feeder. Slightly too thick and it will jam the machine, while slightly too thin and the feeder will not be able to put enough tension on it to feed it into the hot end.
Step 9: Print
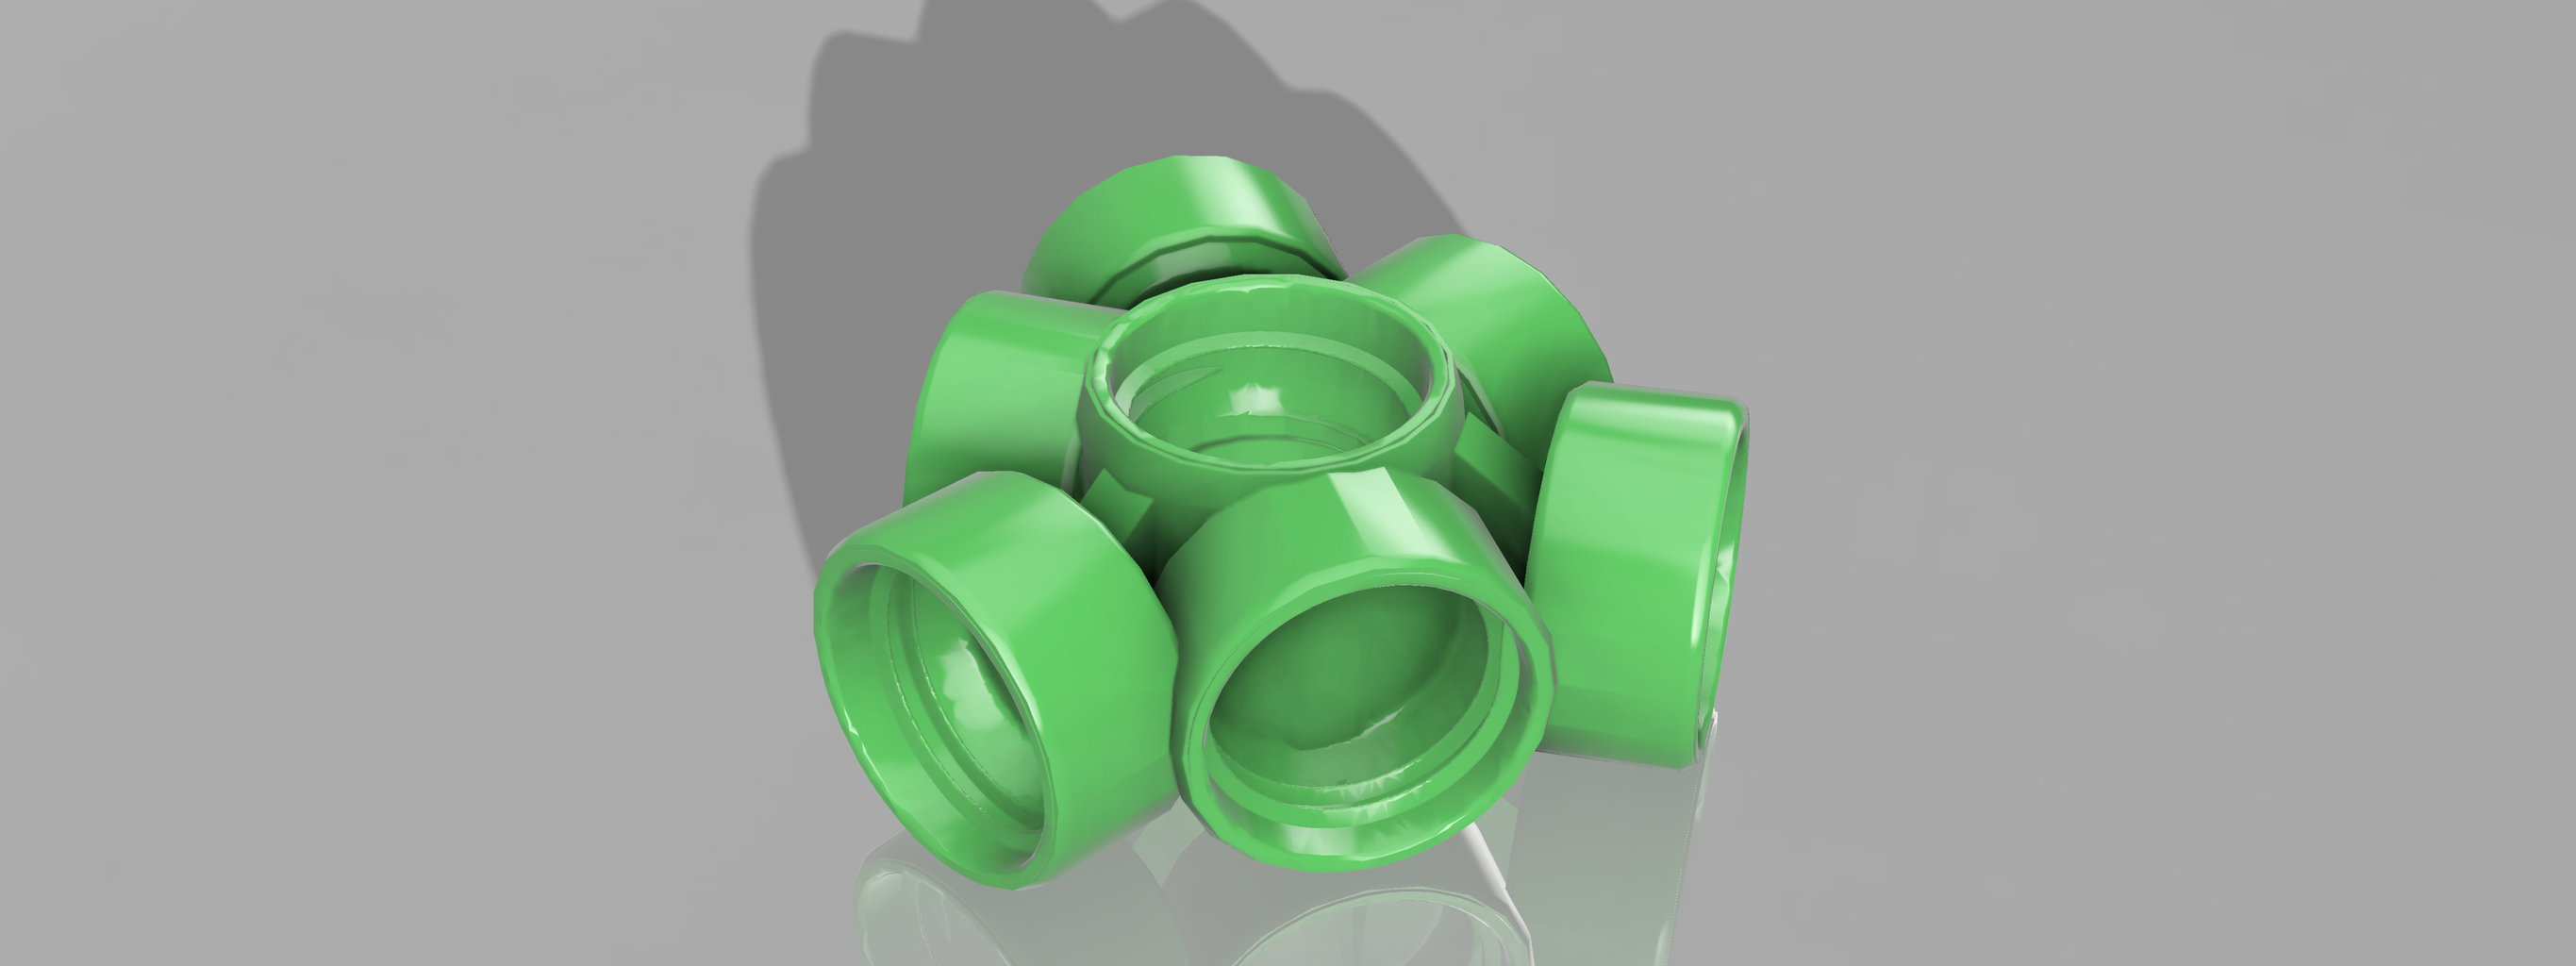
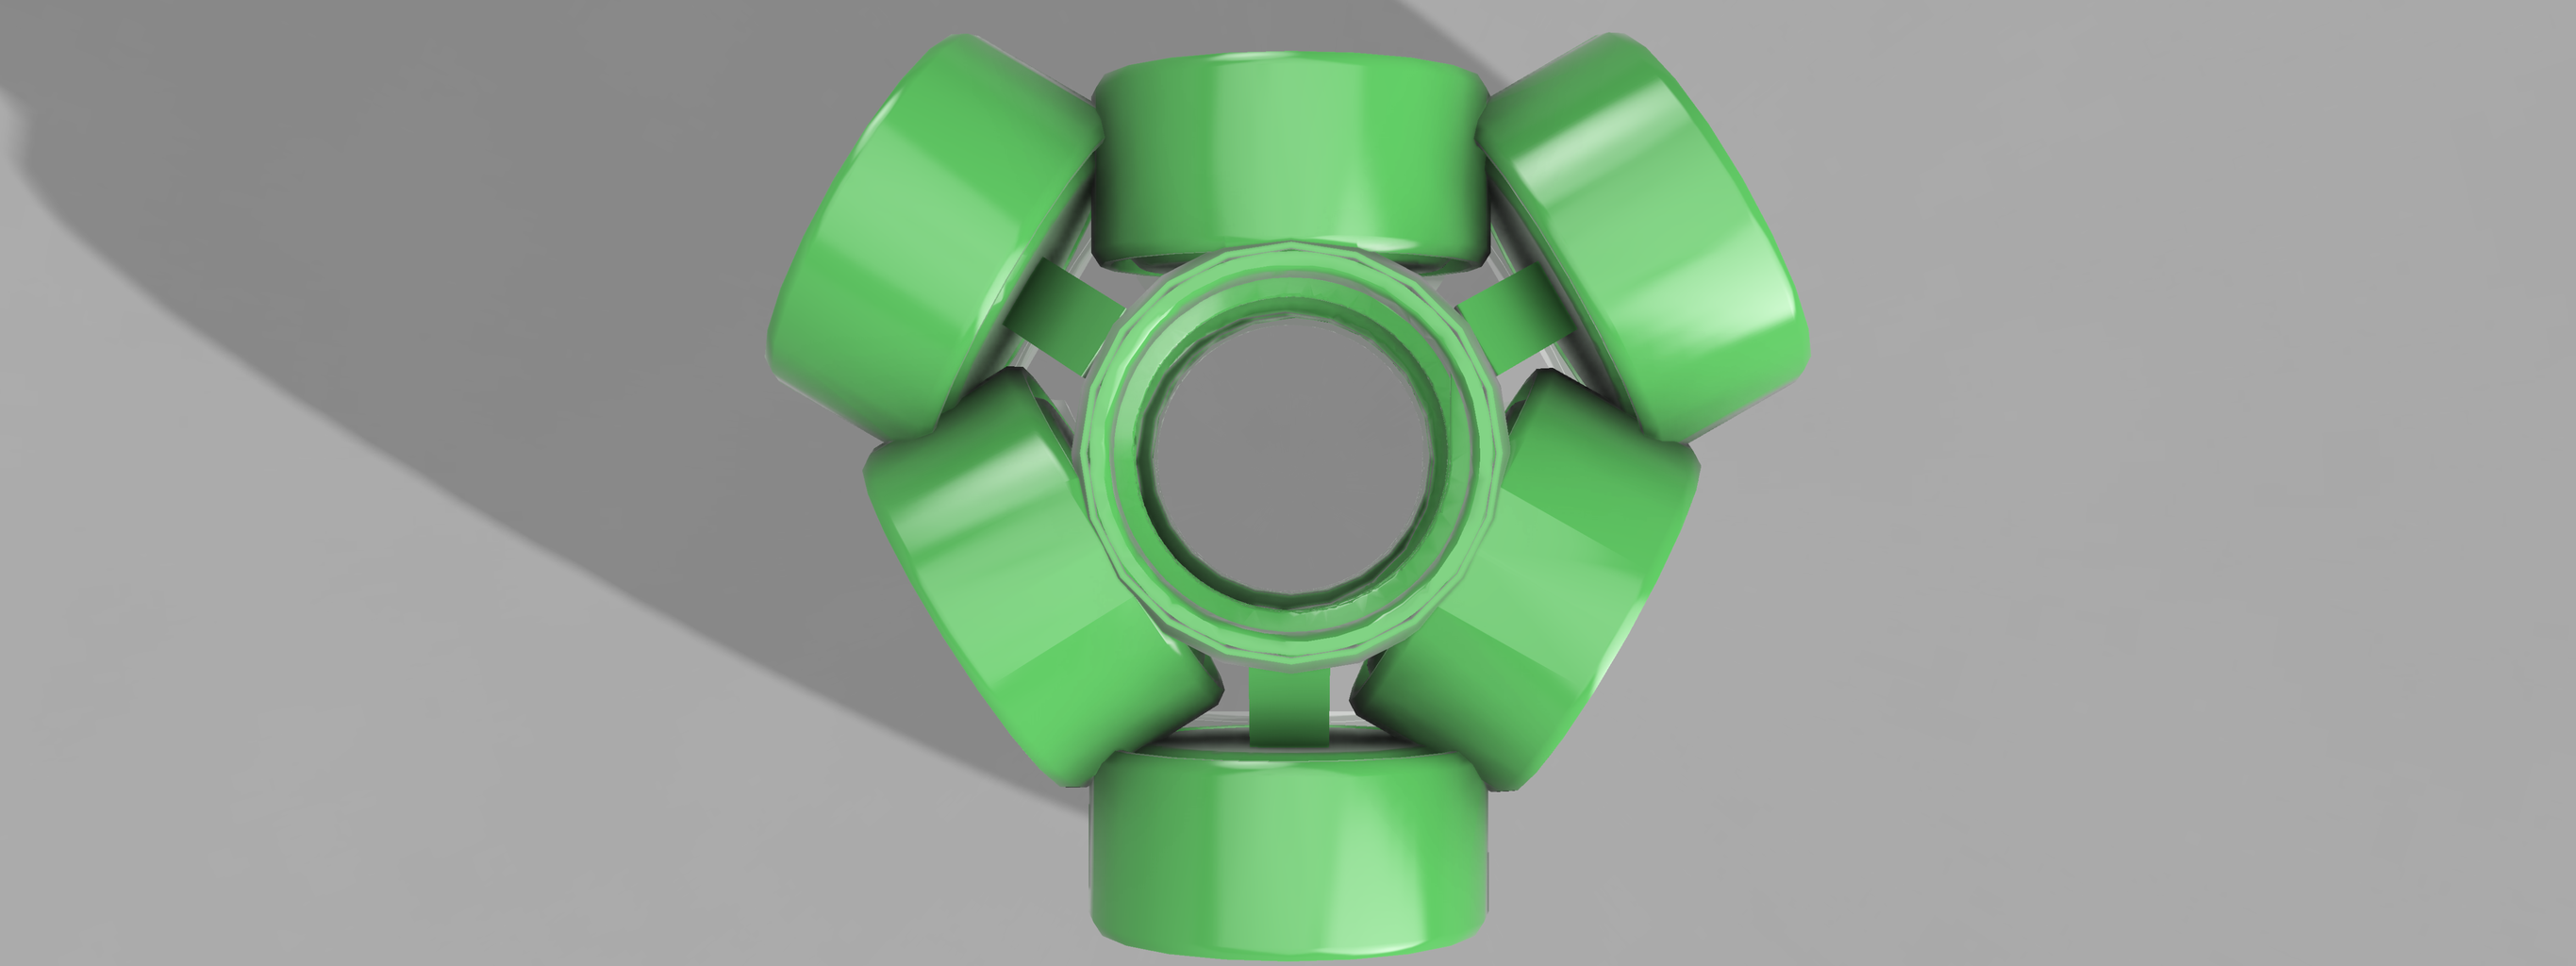
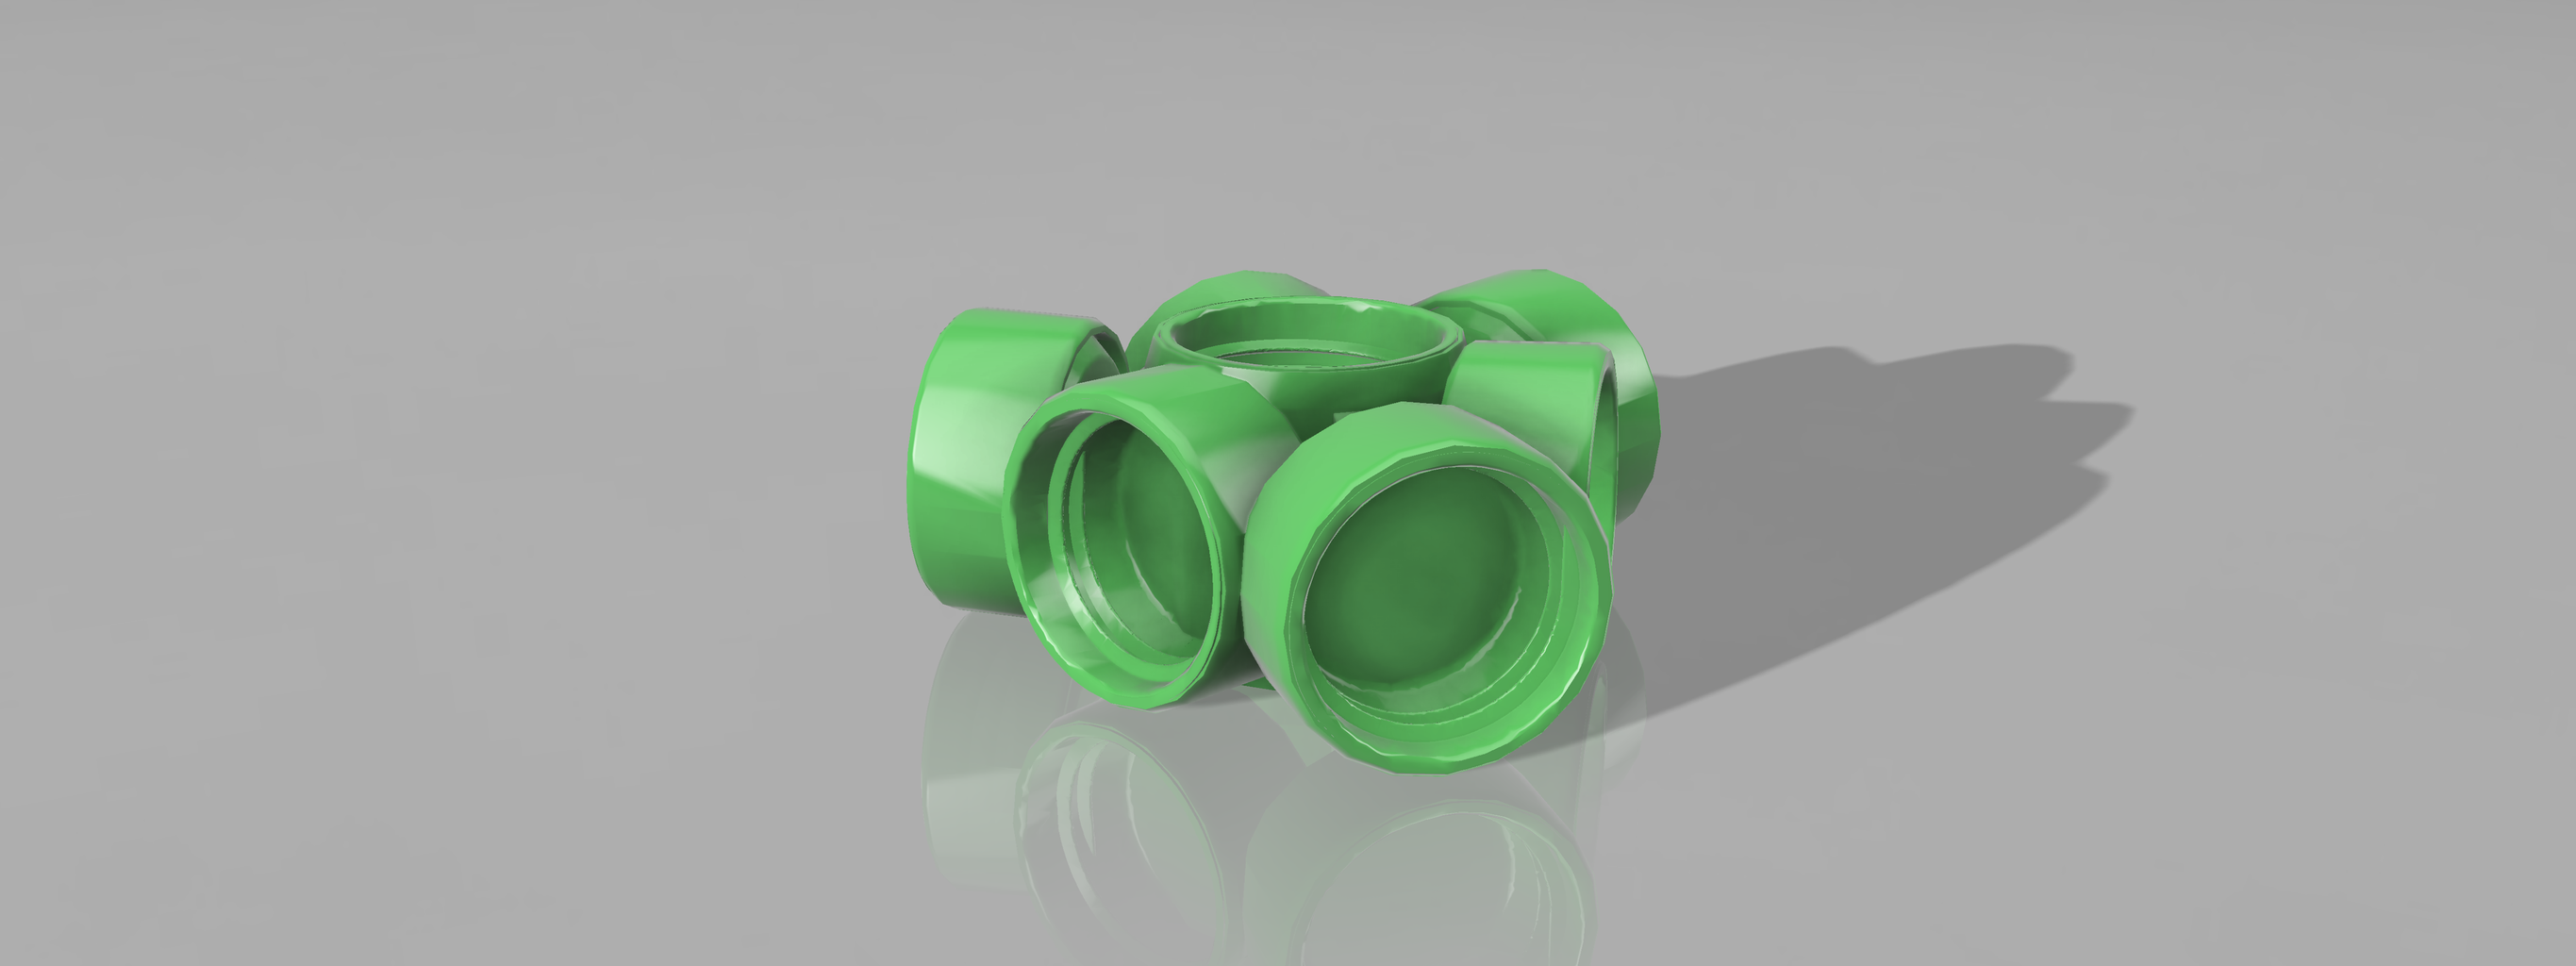
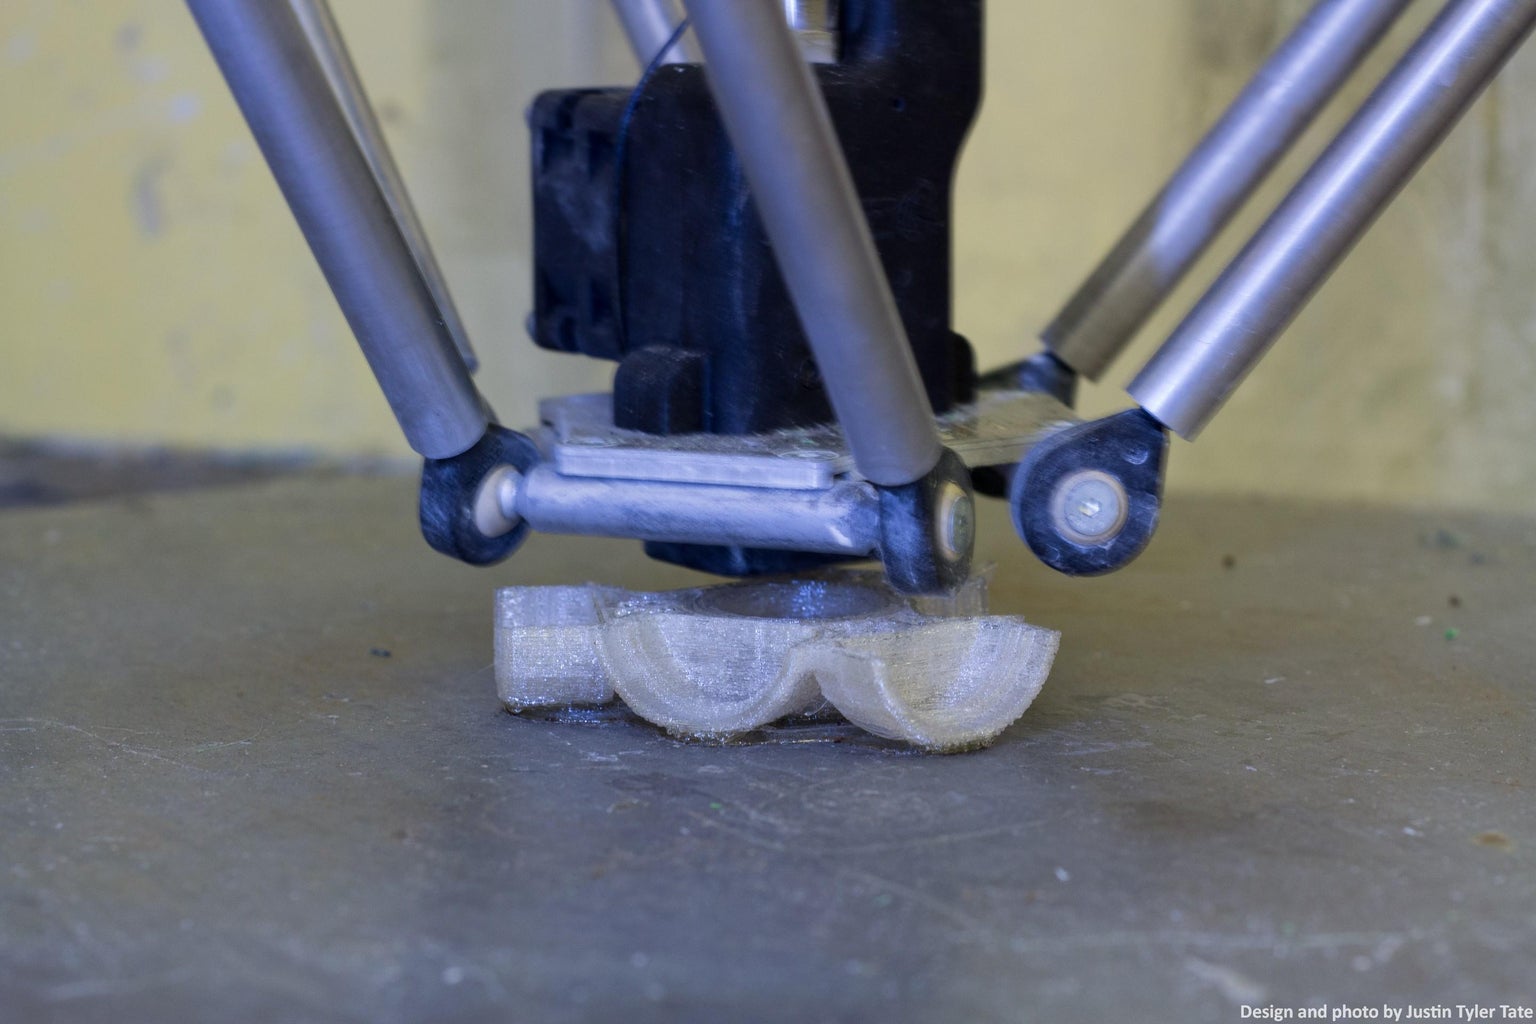
- Print as many islands as you will need to build a temporary and lightweight architectural structure which can be assembled, reformatted and reconstructed at will. The following print settings will allow for the PET filament to be printed into islands relatively quickly, depending on the capabilities of the 3D printer.
- Download the V.3 Archipelago Island .F3D or .STL file for printing:
PRINT SETTINGS:
Layer Height .3mm
Wall Thickness .8mm
Nozzle Temperature 265°c
Build Plate Temperature 75°c
Standby Temperature 150°c
Retraction Distance 4.5mm
Retraction Speed 40mm/s
Fan Speed 15%
Flow 130%
Initial Layer Flow 130%
Print Speed 60mm
Brim Width 10mm


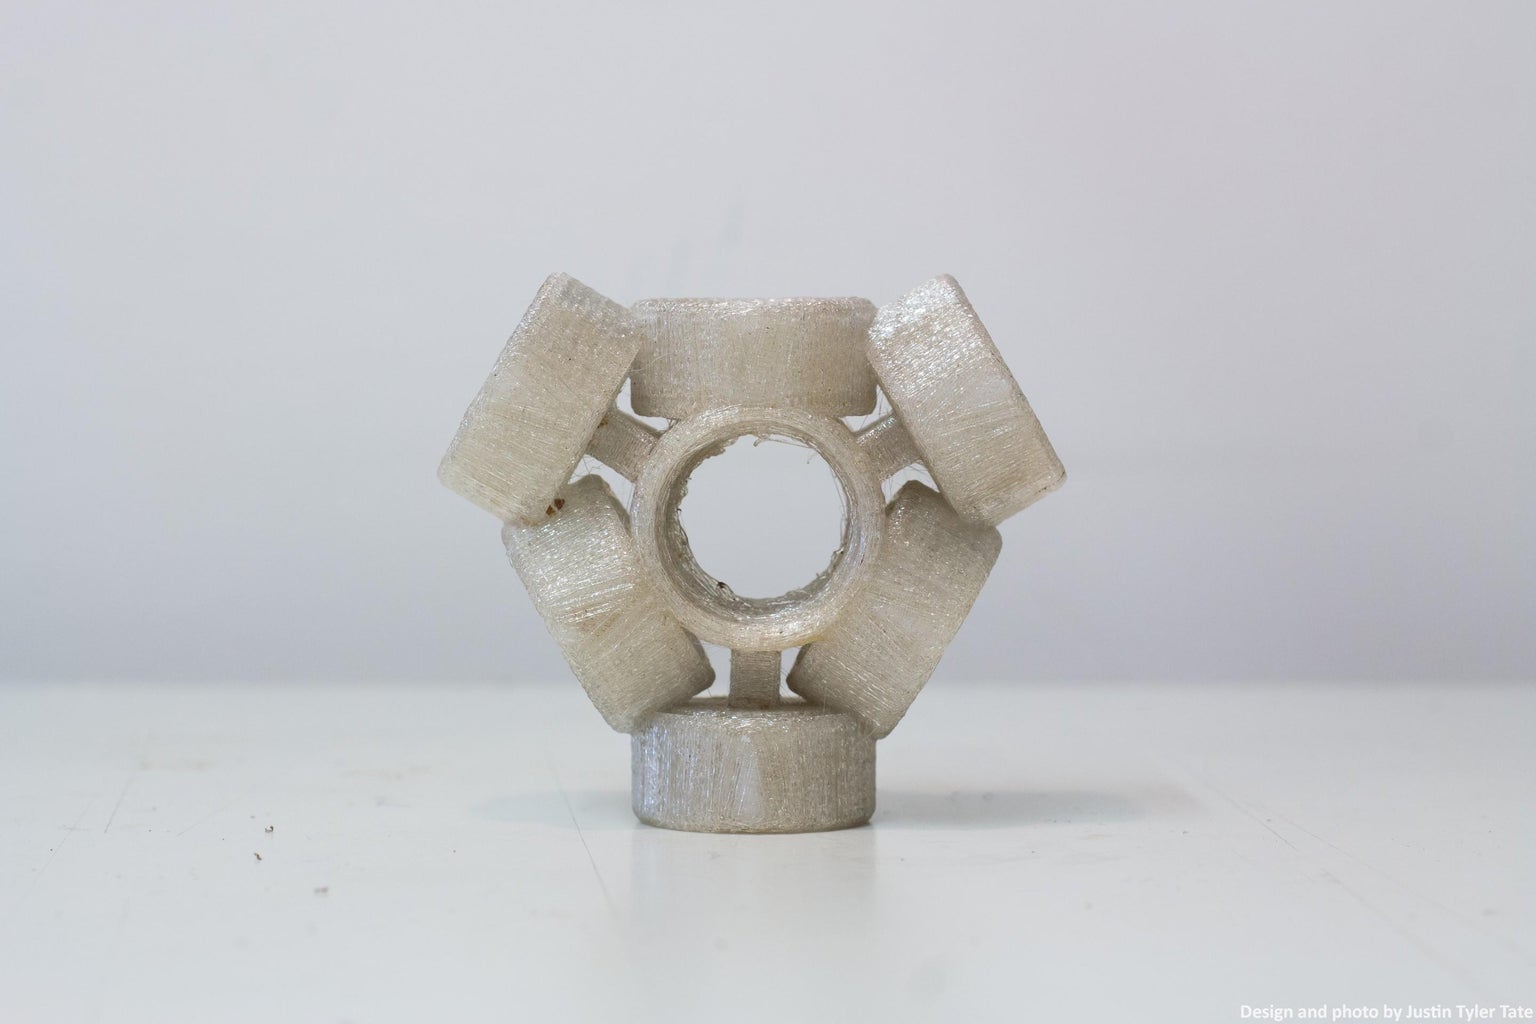
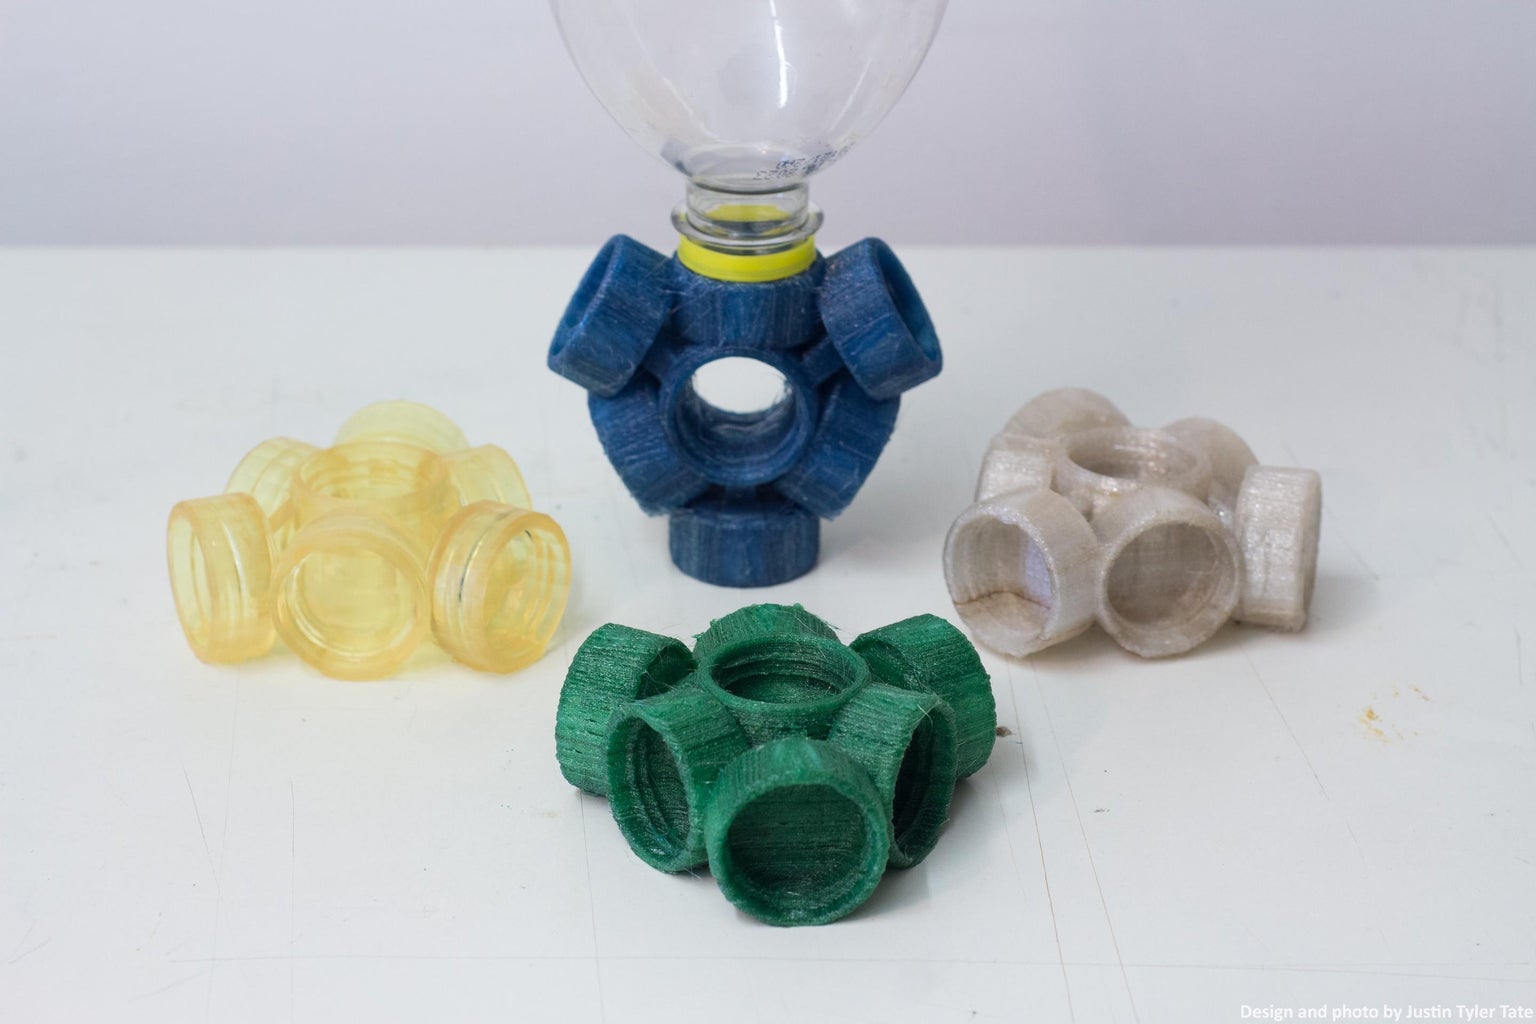
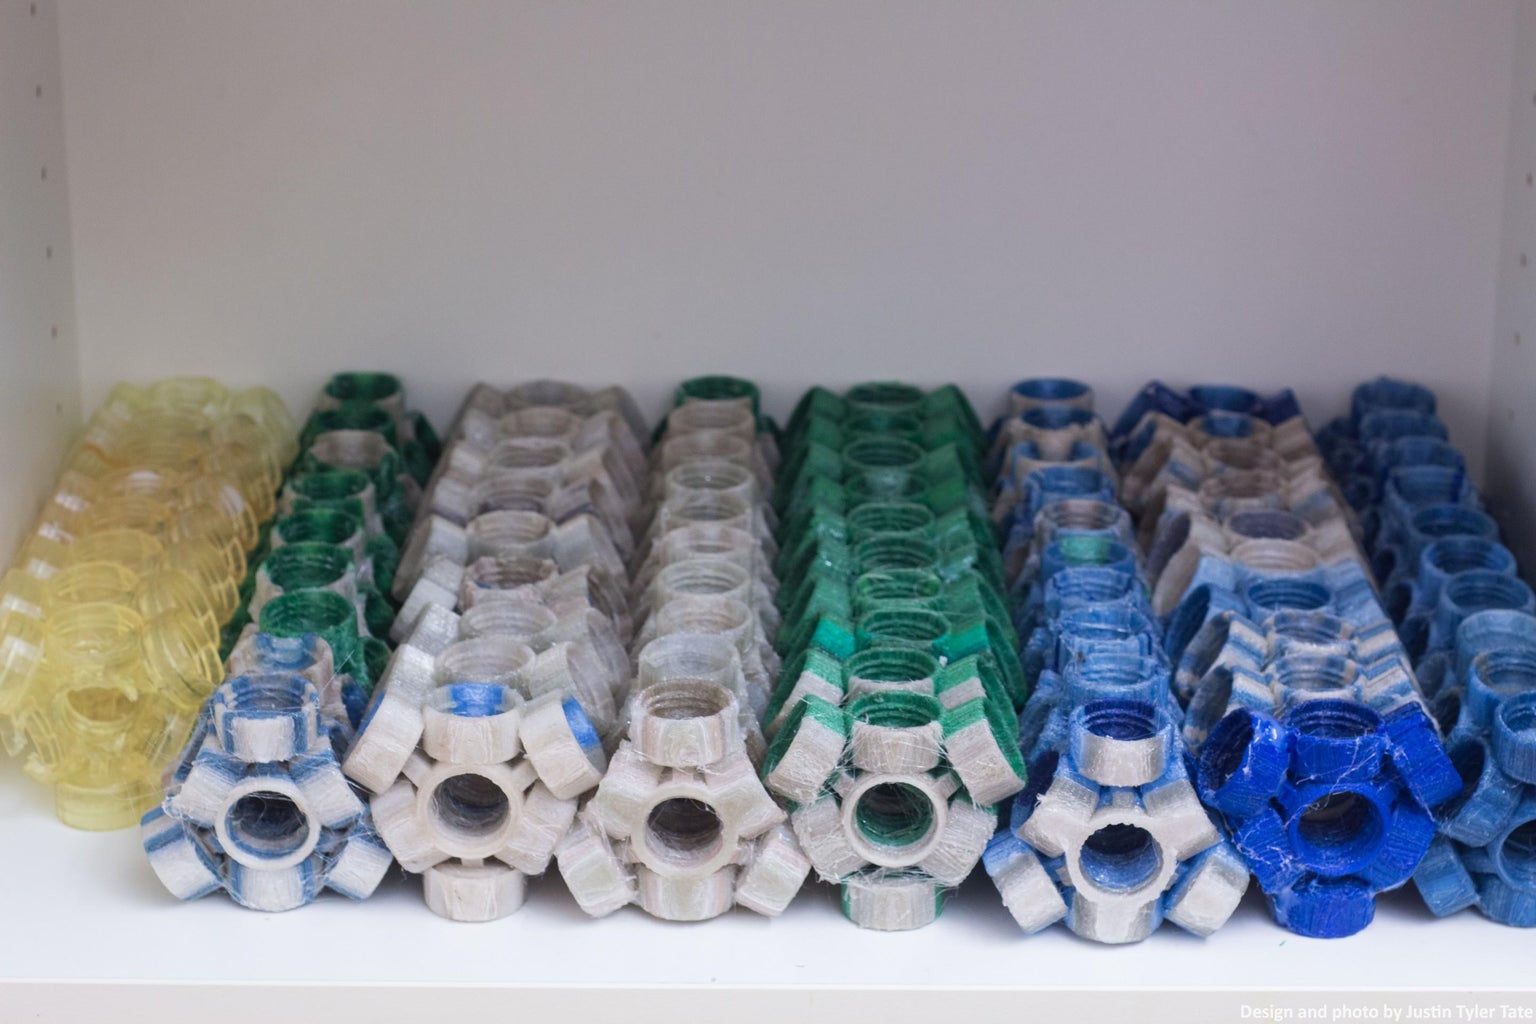
Step 10: Construct

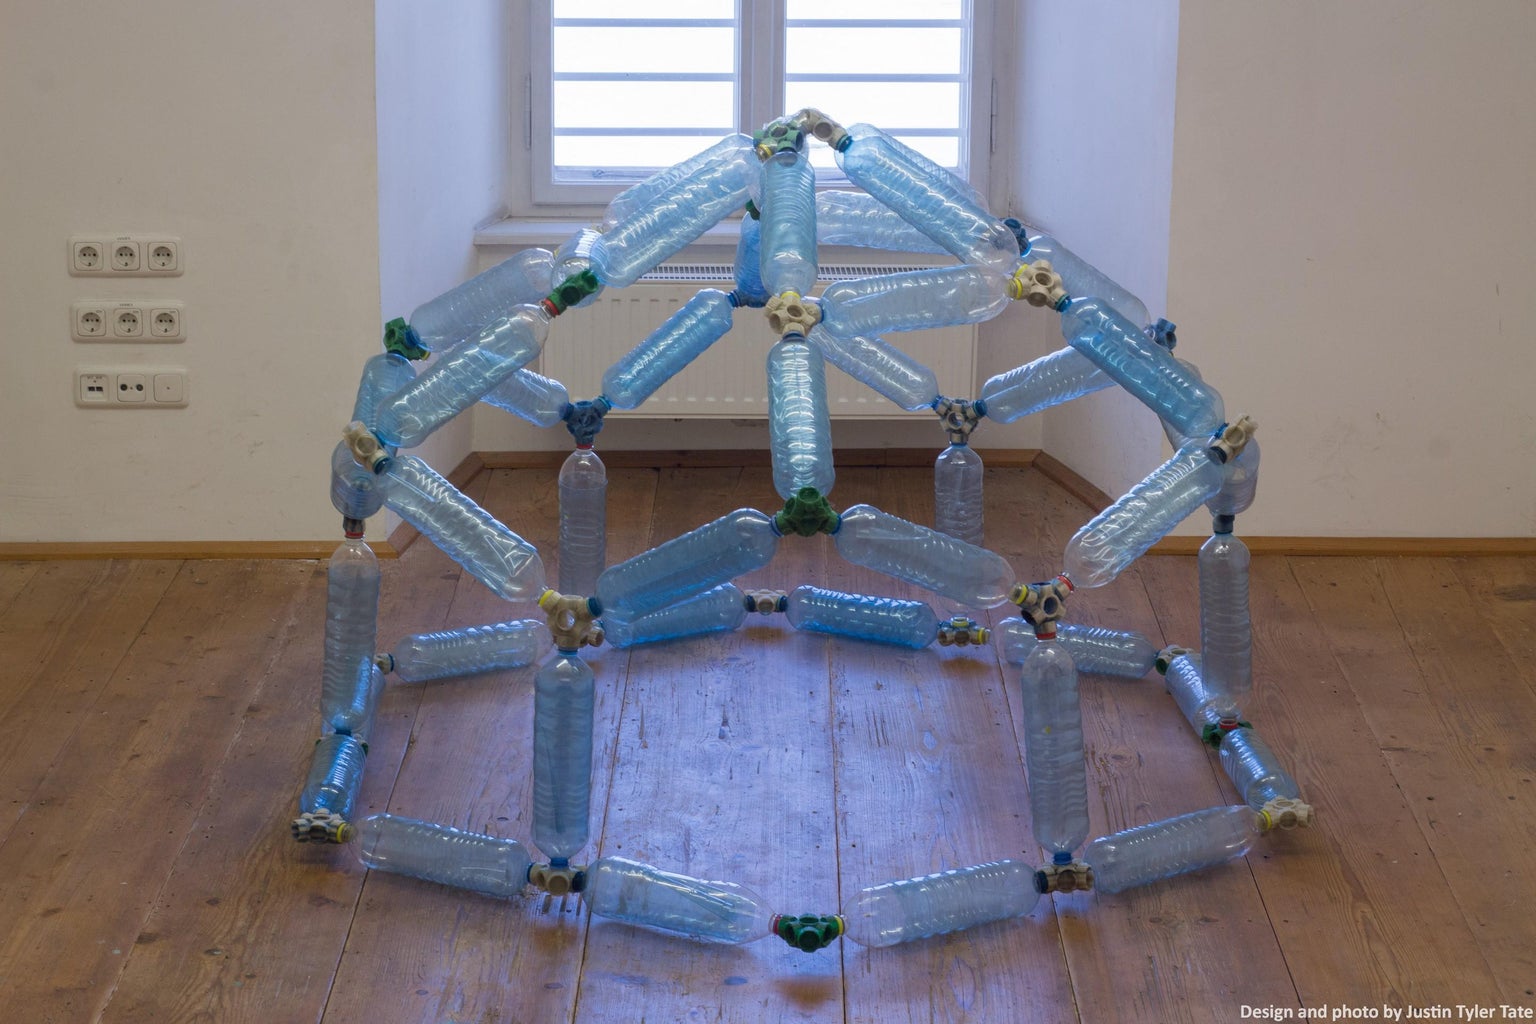
With all of the tedium of production behind you, you can now get onto the fun part of the process—the part where you let your inner child out to play and build. Put pairs of bottles together, screwing them into the islands, to build large structures such as columns, beams, arches and domes. Let your imagination roam free. The structure can be covered to make it waterproof, or left open to function more as a trellis or play space. The PET will break down over time with exposure to sun, so avoid this if you plan on leaving the structure up for a long time, otherwise build it up, deconstruct it, and then assemble something new at will.
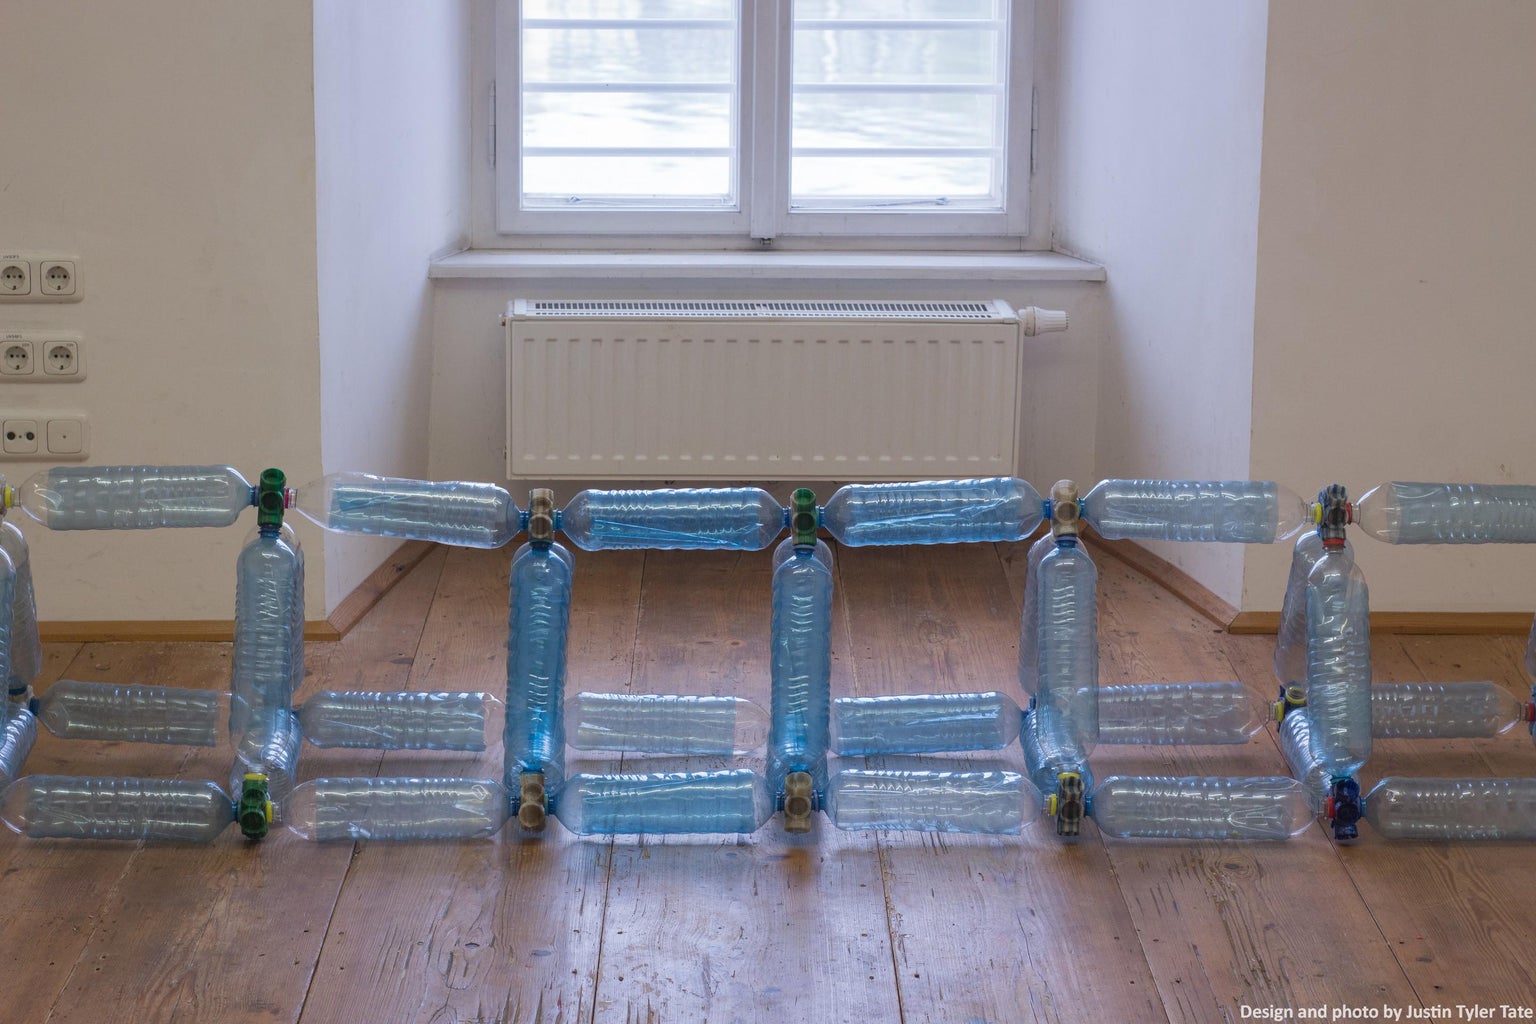
- Assemble Struts
- With a pair of straight sided bottles that have had their bottoms removed, fit one into the other until it won’t go any further.
- Screw these into the islands to construct large structures of varying shapes.
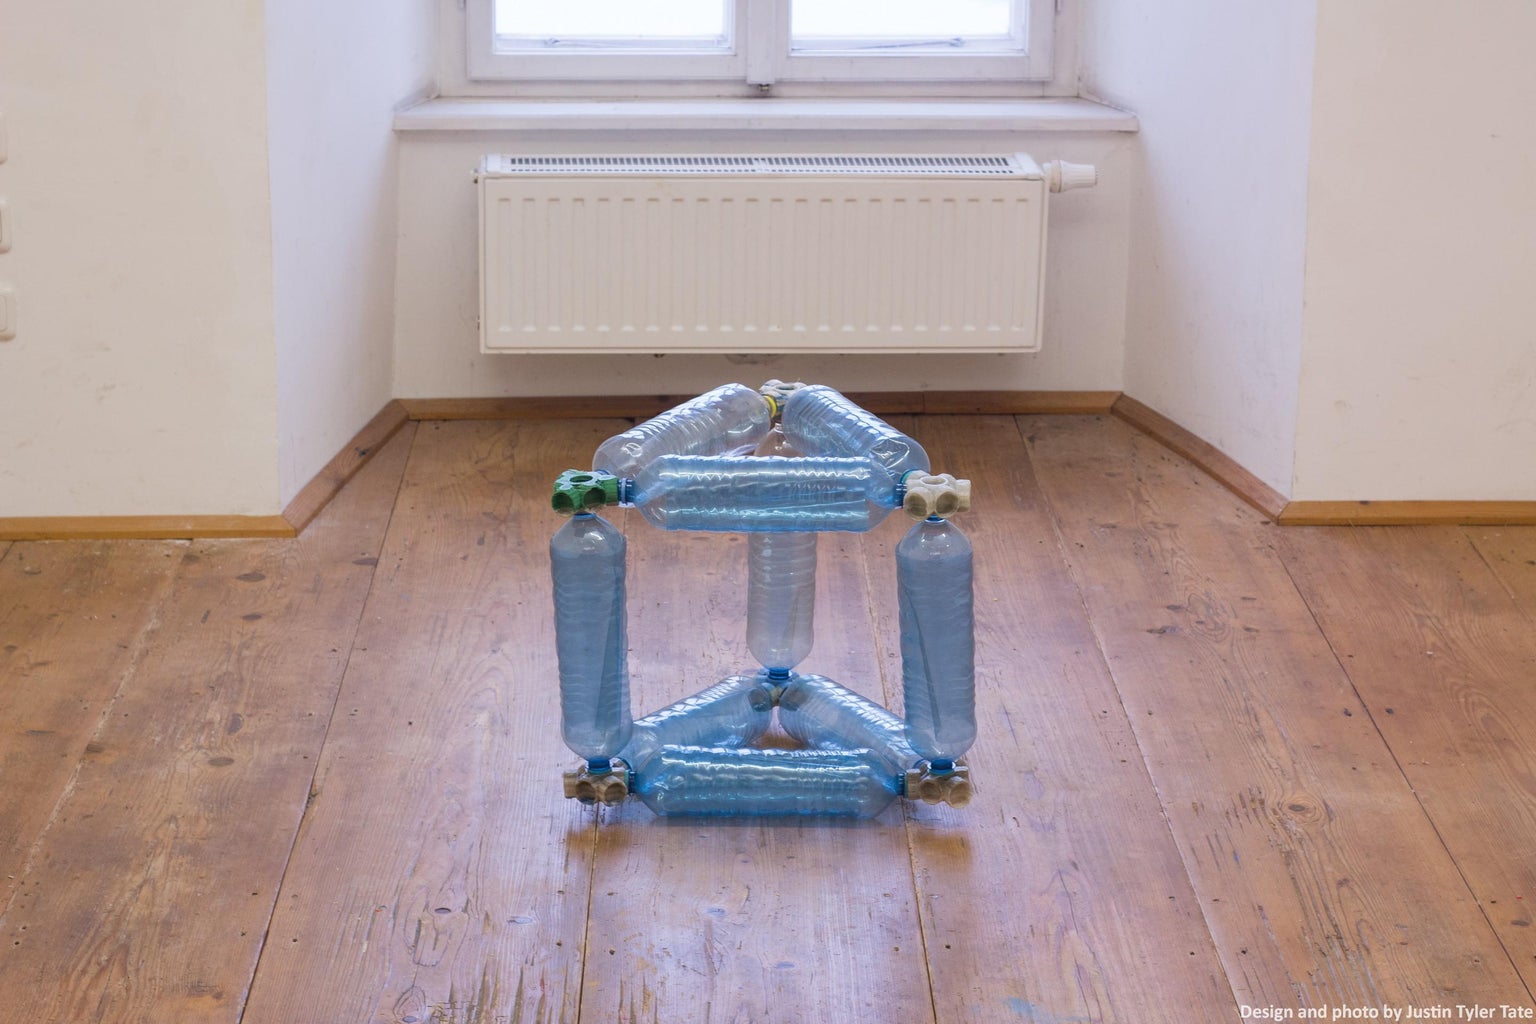
- Columns & Beams
- Three struts forming a triangle can be built upon endlessly to form columns and beams.
- Arches & Domes
- Using the full capacity of the Archipelago islands, struts can be fitted together in a myriad of ways to create arches and domes.
Step 11: Conclusion
The open source methodology developed for Archipelago is meant to be utilized by anyone, thereby creating islands of waste diversion as well as circular economies, existing outside of traditional modes of capitalism and environmental degradation. The work is not an object in itself, but a concept centered around sustainable design, social design and creative placemaking. The project means for its processes to be demystified and reproducible, existing both in physical and digital spaces.
You can see more and also offer feedback about the project at https://archipelagogo.weebly.com

This is an entry in the
Repair and Reuse Contest


2 Comments
Question 10 hours ago
Have you tried using heat to tack together the bottle strip ends, into one long strip, before feeding the filament extruder?
Answer 6 hours ago
Yes, I did. PET has this way of deforming/shrinking when it comes into contact with heat, and as such it never worked for me, and I tried many many times. I also tried cutting the strips in various ways so that they could physically be attached before going through the machine, but having those cuts in the PET would always cause them to tear as they passed through the heating block. Also, the machine doesn't melt the PET to extrude it, but just heats it up so that it can be formed into filament, so any welded joints seemed to pull apart as they passed through the heating block. Welding the pieces of filament was the easiest and fastest method I found, but if you find a better method, please share :)