
Introduction: Use Fusion 360 to Render Your Tinkercad Design


Tinkercad makes it easy to create a variety of 3D designs. While you can't yet render your designs using Tinkercad, it is easy to send your designs to Fusion 360 and render your designs there.
In this tutorial, we will guide you through the process of setting up and rendering your 3D models in Fusion 360 starting with transferring your Tinkercad design to Fusion 360, adding appearances and an environment, and finally rendering your model in high-quality images.
So, let's get started!
Supplies
All you'll need is Tinkercad and Fusion 360, which is free to students and educators.
Step 1: Video Tutorial
Check out the steps below or watch the video here.
Step 2: Send to Fusion


Start by sending your Tinkercad design to Fusion 360 using the easy Send to Fusion feature. For my example, I made StumpChunkman's Balloon Powered Car and added some extra details so I'd have more pieces to add appearances to.
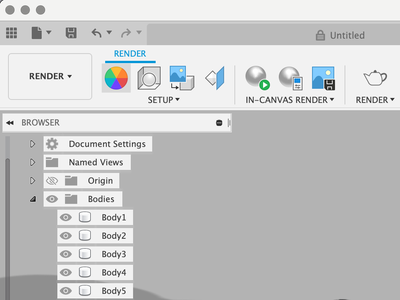
Step 3: Render Menu

Once you have your design in Fusion 360, change your workspace from Design to Render.
Step 4: Appearance Menu

Click on the color wheel next to the workspace selector to open the Appearance menu.
If you brought your design from Tinkercad, you'll see the appearances that are already assigned to your design to match the colors of your model. All of this is changeable.
There is the option to add appearances to Bodies/Components or Faces. If you brought your design in from Tinkercad, Bodies will probably be easiest to work with, but if you want more customization (or if everything was grouped together before you brought it into Fusion 360), you can try out Faces.
Step 5: Add Appearances


Click through the menu and drag any appearances you want to specific parts of your design. Click and don't let go until the part you want changed is highlighted.
You can just keep layering them on top of each other if you decide you don't like the way it looks.
There are lots of categories with many subcategories.
Some appearances need to be downloaded before you can use them.
There is also a handy search bar to make it easier to find what you need. You can even just type in a color if you're not sure what you want, but know what color you want. (Press Tab after typing in what you want to search, not Enter.)
If you change the view, you'll notice the Appearance menu is no longer usable. Just click Escape when you are done changing the view and the menu will become usable again.
Step 6: Change Appearance Color


Even though all the appearances already have colors, you can still personalize the color. Once an appearance is on the model, double click on it in the Appearance menu on the right.
This will bring up a new window where you can change the shade of the color or completely change it.
Step 7: Add Background


To add a background, click on the Scene Setting option next to the color wheel in the top bar.
This will bring up the scene options.
You can just do a solid color, or change the Background option to Environment.
Then you can click over to the Environment tab and pick a new background. Right click, and click Apply to Scene to set it. You can also simply click and drag the environment into the background to set it.
Try out new things until you have it just how you want it.
Step 8: Unassign and Delete Appearance

If you decide you no longer want an appearance on your model, you can just put a new one over it, or you can right click on it and choose Unassign and Delete. This will remove it from your model and leave you with a blank look.
Though, you can just put appearances over each other, so this isn't completely necessary.
If you delete all the appearances you used, you'll be left with a silver model, not the color model you brought over from Tinkercad.
Step 9: In-Canvas Render


You can just take a screenshot of your design to add to Tinkercad, or you can do an In-Canvas Render to get better results.
Click on the Sphere in the top menu to start the render.
It will start noisy, but it will get better the longer you wait and you can monitor the progress in the bottom right corner of your workspace.
Once it is at a stage you are happy with, click the save icon indicated with a picture icon and floppy disc.
Save it to your Computer and you're set!
Step 10: Add to Your Tinkercad Design


If you've never added a photo to your Tinkercad design's gallery view, it's really easy.
Click on the design you want to add an image to from your dashboard.
On the Design Detail Page that comes up, scroll down a bit and click on +Upload Image option.
Click on Choose File and select a image from your computer. Make sure it is under 5MB.
Now it's added to your design. To make it the main image of your design that shows up on your Dashboard and in the Gallery, click on the three dots in the top right corner and Set as cover image.
You can add more than one image to your Tinkercad design.
You're set! Don't forget to make your design public in the gallery by clicking on the gear in the top right corner of the design page to bring up the properties menu.


Comments